Friday, February 28, 2014

Mondo Coconut Shrimp


Yes, MONDO!  With four, count ‘em, FOUR different coconut products, you too can make your favorite appetizer from that restaurant you go to with your girlfriends!  Mondo Coconut Shrimp are really quite easy to make, and, a fun and tasty appetizer for a party.
You’ll want to use BIG shrimp for this recipe—the larger the better.  I found  some 13-15 count shrimp on sale, and they worked really well.  If you are using smaller shrimp, decrease your cooking time so you don’t make these guys all tough and rubbery.  I coated these in both sweetened AND unsweetened coconut.  Feel free to use one or the other if you don’t have both.  I was going to make this recipe just with the unsweetened kind, but I found a cup of sweetened coconut in my freezer and decided to use it up – and I’m glad I did!
To be  honest, these are fantastic with just some salt sprinkled on top when they come off the stove.  I took a photo of them with a lemon slice, and found out they didn’t even need that to be delicious!  So make these for friends, or as part of a funky dinner, and go MONDO!
MONDO Coconut Shrimp
Ingredients:
  • 1 pound large shrimp, shelled and deveined
  • 3 eggs
  • 1 cup coconut flour
  • 1 cup sweetened shredded coconut
  • 1 cup unsweetened shredded coconut
  • 1 teaspoon curry powder
  • coconut oil, for frying
  • salt for serving
Directions:
  1. Set up a breading station.  In the first bowl, beat the 3 eggs with a tablespoon of water.  In the second bowl, pour in the coconut flour.  In the third bowl, mix together the two coconut shreds and the curry powder.
  2. Start breading:  Dip a shrimp into the egg, then the coconut flour, then back into the egg, and then the coconut shreds.  Place on a plate while you complete the breading.
  3. In a large non-stick frying pan, heat one heaping teaspoon of coconut oil over medium heat.  When  hot, carefully add the breaded shrimp.  You’ll probably have to do this in at least two batches.  Let them cook for about six minutes, then flip and cook again for another five minutes.  Watch your heat here – you want it medium to medium-low, so that the shrimp cooks evenly and the breading doesn’t burn before the shrimp are done.
  4. Remove cooked shrimp to a plate and immediately sprinkle with kosher or sea salt.  Add another teaspoon of coconut oil  to the pan, if necessary, and cook the next batch.  Serve hot!
I texted my husband a photo of the shrimp and he said, “Oooh, looks yummy!” so I saved him some.  Unfortunately, they aren’t as nice the second time around.  They still taste great, but you can’t get them crispy on the outside a second time.  That means Carpe Diem – Gather ye rosebuds while ye may – and eat your shrimp while they’re hot.

Saturday, February 15, 2014

Cabbage and Pineapple Slaw


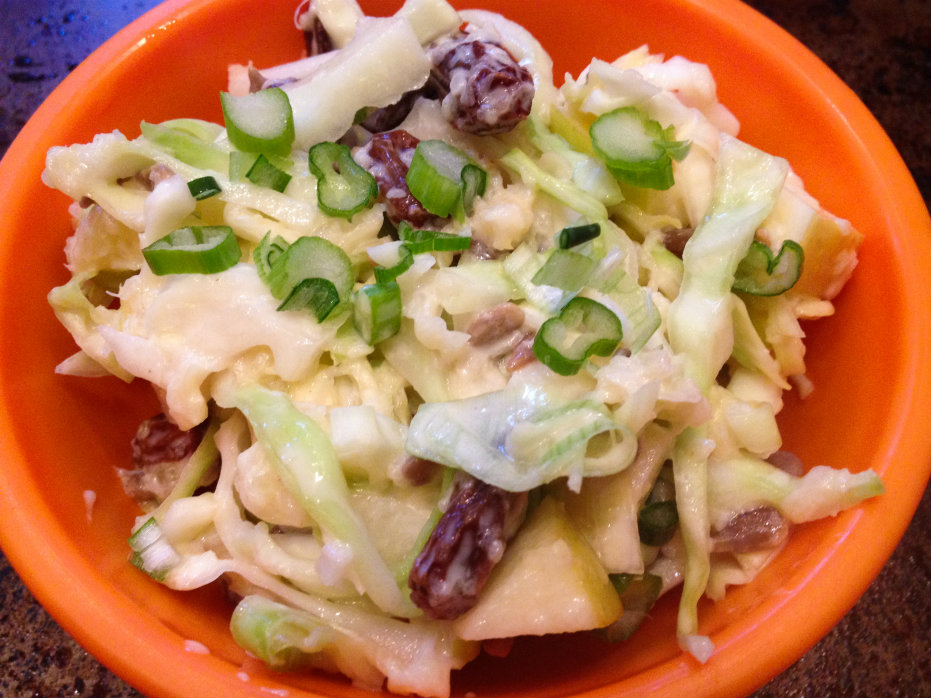
Cabbage and Pineapple Slaw Resize
Don’t let the monochromatic appearance fool you – this salad packs a tasty punch!  Winter veggies come together with fruit, nuts, and a light yogurt dressing in this recipe for Cabbage and Pineapple Slaw.
Cabbage is not a glamorous vegetable.  In fact you can probably buy a giant head of it today for less than a dollar.  Nutritionally it’s a powerhouse, though, and you probably could stand to eat more of what it’s offering!  Sliced very fine (or grated if you prefer), it’s a perfect foil for crunchy apples, chewy raisins, and whatever nuts you like.  I used sunflower seeds, but try almonds, hazelnuts, pecans or walnuts.  I think walnuts would make it taste even more like a healthier version of Waldorf Salad (a childhood favorite of mine.)  The star of the show, and what lifts this recipe above other coleslaws, is pineapple.  Fresh pineapple, minced, would be glorious, but I used a half a can of crushed pineapple and it was delicious.  Save the rest of the pineapple for smoothies, or to dress up cottage cheese.
Since we’re still knee-deep in winter, and Soup Month is going strong, try this salad paired with a spicy soup.  I think it would be great with Chinese Hot and Sour Soup, or any chili recipe, to quell the heat.  Let me know how you like it!

Cabbage and Pineapple Slaw

Ingredients:
  • 1/2 head green cabbage, sliced very fine or grated
  • 1 small apple, diced
  • 1 green onion, minced
  • about 1 cup crushed or minced pineapple
  • 1/2 cup raisins or other dried fruit (cranberries or cherries would be yummy!)
  • 1/2 cup nuts or sunflower seeds
  • 1 heaping tablespoon mayonnaise
  • 2 heaping tablespoons plain yogurt
  • juice of 1 lemon
  • juice of 1 clementine orange
  • 1/4 teaspoon salt, or to taste
Directions:
  1. In a very large mixing bowl (or a very large Tupperware container with a lid, my preferred method), mix together the cabbage, apple, onion, pineapple, raisins, and nuts.
  2. In a small container with a lid, shake together the mayo, yogurt, lemon and orange juices, and salt.  Taste to see if you want any more salt or lemon.
  3. Pour dressing over cabbage mixture and shake or toss to combine.  Refrigerate until ready to serve.

Chocolate-Covered Strawberries


Chocolate-Covered Strawberries Resize
Nothing says Valentine’s Day like Chocolate-Covered Strawberries!  Surprise your sweetie – or sweeties, because my kids went cuckoo for these!  If you can get your hands on some nice strawberries (and I know it’s still very much winter in some places, but go with me on this), you can make these for dessert and watch their eyes light up!
My trick here is to use a teaspoon of coconut oil in the chocolate.  It keeps the chocolate from becoming brittle and adds the lightest hint of tropical flavor.  Instead of shattering when you bite into it, this chocolate holds tight to the strawberry so you can eat every last bite.  No worries if you don’t have coconut oil.  You can go without and just use the chocolate, but you will definitely want to make sure your berries are blemish-free and thoroughly dried.
Ready to make your loved ones’ hearts go pitter-pat?  Bring out these healthy and gorgeous treats tonight!
Chocolate-Covered Strawberries
Ingredients:
  • 18 strawberries
  • 1 cup semisweet chocolate chips
  • 1 teaspoon coconut oil
Directions:
  1. Wash the strawberries and dry very carefully.  Pull up the stem leaves so they point up; otherwise you’ll get them covered in chocolate!  Make sure you don’t have any open, weepy spots on the berries, or the chocolate won’t stick.
  2. In a small but deep bowl, microwave the chocolate chips and coconut oil for 30 seconds at a time, and stir after each 30 seconds.  It took three 30-second bursts to get everything melted and smooth.
  3. Line a baking sheet or tray with parchment paper.  Holding onto the stem of the berry, dip in chocolate and place on the parchment paper.  When all berries are dipped, place the tray in the fridge (or freezer if you are short on time!)  Serve cold.
I had a little leftover chocolate in my bowl.  I dipped cashews and banana pieces in there to get every last drop.  My 2 year-old’s chocolate mustache was a sight to behold!

Sunday, February 9, 2014

Double Mushroom Pot Roast (Crock Pot)


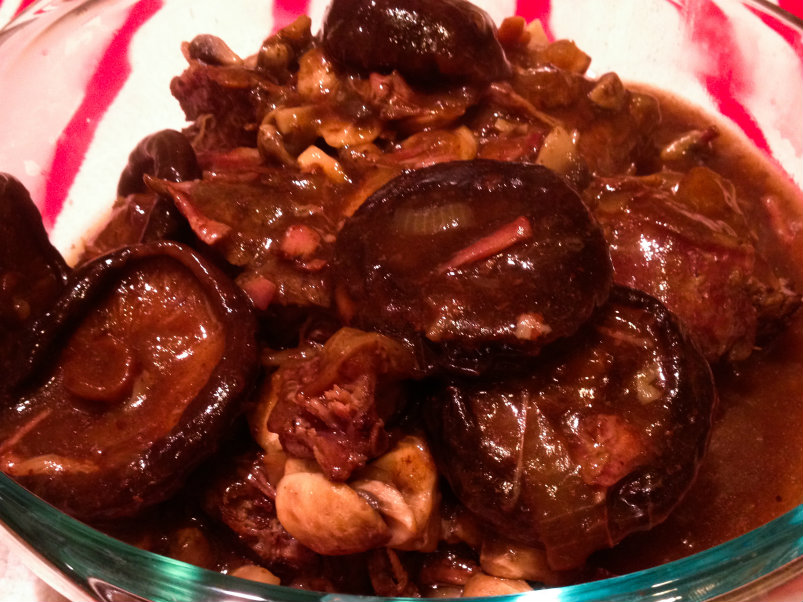
Double Mushroom Pot Roast resize
I feel like I should apologize for the photo. It’s very…brown.  There’s really no good way to photograph this recipe.  It’s not glamorous.  But it is the easiest and most delicious thing that has ever come out of my Crock Pot!  I present to you:  Double Mushroom Pot Roast!
The secret ingredient is dried mushrooms.  I use dried shiitake mushrooms, because they’re cheap and plentiful at my Korean market.  You can try this with whatever dried mushrooms you can find.  I use a big handful, about 6 or 7 big mushrooms.  For the second dose of mushrooms, regular button mushrooms or creminis will do the trick.  Use whatever large beef roast you like.  Chuck roast is always a favorite, and for this one, I used something called a “seven bone roast” that was also flavorful.
If you want your house to smell amazing when you walk in the door after work or errands, make this in the morning and revel at how easy and delicious it is that night.
Double Mushroom Pot Roast (Crock Pot)
Ingredients:
  • 1 large beef roast, preferably chuck, about 3 pounds
  • 1 onion, sliced
  • handful of dried mushrooms
  • 8 ounces fresh button or cremini mushrooms, sliced
  • 2 tablespoons cornstarch
  • salt and pepper
Directions:
  1. In a very large Crock Pot, drop in the sliced onions and dried mushrooms.  Set to LOW and the timer for 8-10 hours.
  2. In a large pan, brown the roast on each side.  When browned, place on top of mushrooms and onion, season with salt and pepper, and cover.
  3. After 8 hours, remove the roast from the Crock Pot to a large serving platter or bowl.  In  a large pan, cook the button (or cremini) mushrooms and spoon a bit of the juice from the Crock Pot over them to keep them from sticking.
  4. When the mushrooms are done, pour them over the roast.  In the same pan, pour in the contents of the Crock Pot – the juice, onions and mushrooms.  Cook for 5 minutes on medium to reduce a bit.
  5. Mix the cornstarch with 1/4 cup of water and mix to blend.  Pour this mixture into the pan and stir into the onion mixture.  Stir frequently to prevent the gravy from sticking to the pan.  When thickened, about 5 to 10 minutes, pour over the roast and serve.  Season heavily with salt and pepper.

Saturday, February 1, 2014

Broccoli Stalk Soup


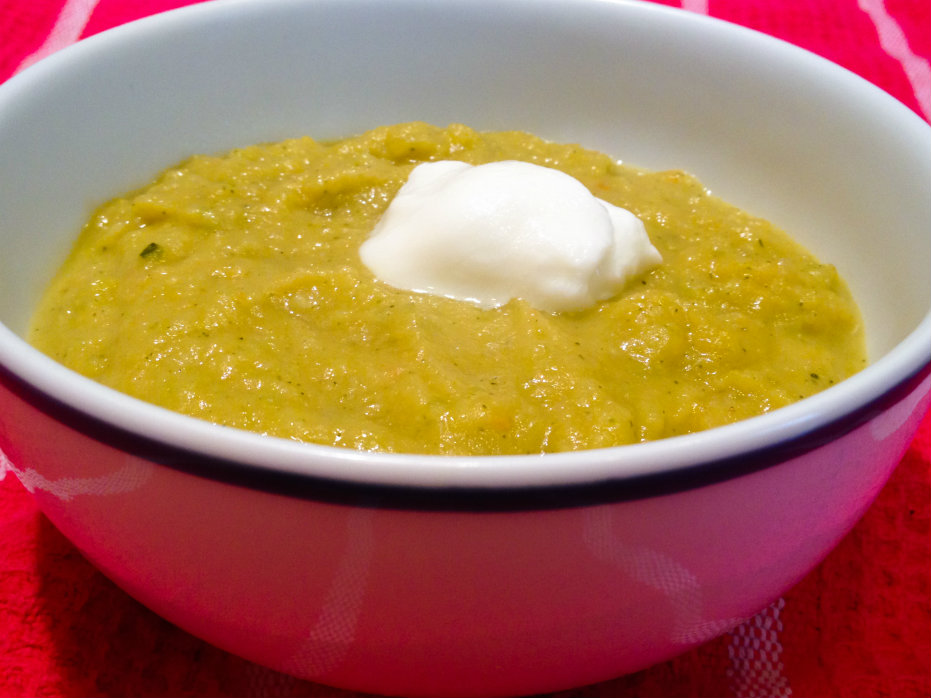
Broccoli Stalk Soup Resize
I’m coming in, just under the wire, with a soup recipe to round out January as National Soup Month!  It’s creamy, it’s Paleo, it’s as frugal as can be:  Broccoli Stalk Soup!
I seriously buy about ten pounds of broccoli a week, and I’m ashamed to admit how many stalks have gone to waste over the years.  My girls didn’t want to eat the tougher stalk and will only eat the florets, and to be honest, they do take a little more work to prepare if you want to serve the stalk together with the floret, since you have to peel off the tough outer layer.  But I couldn’t accept throwing all those healthy green vegetables into the compost bin, so I made a broccoli soup out of them.  Hooray – it is delicious and uses up nearly all the stalk.  So much less to compost!
If you don’t follow the Paleo diet, feel free to use one large or two small potatoes in place of the rutabaga.  But I really liked the rutabaga – I think it adds a sweetness, and contributes a creamy texture to the soup when you blend it.  And because you are blending it up, you don’t have to worry about mincing and dicing carefully – just chop up your veggies and cook them til tender.  You can serve this with some shredded cheese on top, or like I did, with a dollop of plain yogurt.  You can also add a little more chicken stock than I did if you want a thinner soup.  But I like it this way:  thick, warm, and truly satisfying!
Broccoli Stalk Soup
Ingredients:
  • 3 tablespoons olive oil or bacon fat
  • 1 large rutabaga, peeled and cubed
  • 3 cloves garlic, minced
  • 1 onion, sliced
  • 2 carrots, peeled and chopped
  • 6 broccoli stalks, plus one head of broccoli
  • 4 cups (or more) chicken or vegetable stock
Directions:
  1. In a very large pot, heat the oil and add the rutabaga, garlic, onion and carrots.  Cook on medium, stirring to keep the garlic from burning, for about ten minutes.
  2. While the other vegetables are cooking, prepare the broccoli.  With a paring knife or vegetable peeler, peel the broccoli stalks.  Cut off the bottom half inch of stalk, and then cut the stalks into smaller pieces.  Chop the head of broccoli and separate the florets.  Add the broccoli to the pot and cook another five minutes.
  3. Add the chicken stock and cover the pot with a lid.  Simmer over medium-low heat for about 20 minutes, or until the vegetables are tender.  Transfer soup to a blender – CAREFULLY! – in batches and blend until mostly smooth.  You can leave a few chunks if you like.  I used an immersion blender and it worked very well.  You can add a little more stock here if you want a thinner soup.
  4. Serve soup hot, garnished with grated cheese or yogurt.