When I was in high school, 25 years ago, I thought the funniest movies in the world were Monty Python movies. Yes, I was one of those nerds who could rattle off quotes from all the movies (in the intervening years, my skills have gotten rusty, but I still have a few). One of my favorite scenes in the movie “The Life of Brian” was when a group of people are listening to the Sermon on the Mount. Unfortunately, they are way, way at the back of the crowd and can’t hear well. When Jesus says, “Blessed are the peacemakers,” the crowd in back misinterpret it as “Blessed are the cheese makers.” So when I came across this recipe for Homemade Ricotta, I immediately started giggling. I want to be a blessed cheese maker, and you can be too!
You already have the ingredients you need. Use whole milk, or else the ricotta won’t set up. One lemon, a little salt, and a tablespoon of white vinegar – what could be easier? You’ll also need a thermometer. I have a candy thermometer that clips to the side of the pan, but you could use a meat thermometer, or one of those fancy infrared ones too! The only equipment you might need to buy is cheesecloth. I found it at my regular grocery store, and have used it before in making Homemade Coconut Milk.
Ricotta is one of those amazing ingredients that can be used in either sweet or savory recipes. In the following two weeks, I’ll have recipes that use fresh ricotta in a zucchini “lasagna” (with no noodles!), and in a dessert with fresh summer fruit. Until then, you can serve fresh ricotta as an appetizer, spread on thin slices of bread, with either cracked pepper and minced herbs, or with a light drizzle of honey and crushed walnuts. Ready? Let’s make some cheese!
Homemade Ricotta
(Makes one cup of ricotta)
Ingredients:
- 4 cups whole milk
- 1/2 teaspoon salt
- 1 tablespoon lemon juice
- 1 tablespoon white vinegar (you may need more, but I didn’t)
Directions:
- In a pot, heat milk and salt over medium-high heat. Stir occasionally to make sure it’s not burning on the bottom.
- Prepare your utensils: Line a mesh sieve with a double-layer of cheesecloth. If you want to save the whey, place the sieve over a large bowl. (I saved my whey – next week I’ll show you how I used it.)
- When the temperature of the milk reaches 185*F, turn off the heat and pour in the lemon juice and vinegar. Stir gently. You just made what Little Bo Peep was eating – curds and whey! Let it sit for about ten minutes, and stir again. If you see any milk in your pot that hasn’t curdled, you can add another teaspoon of vinegar, stir, and let sit another ten minutes. Mine didn’t need any extra and separated easily.
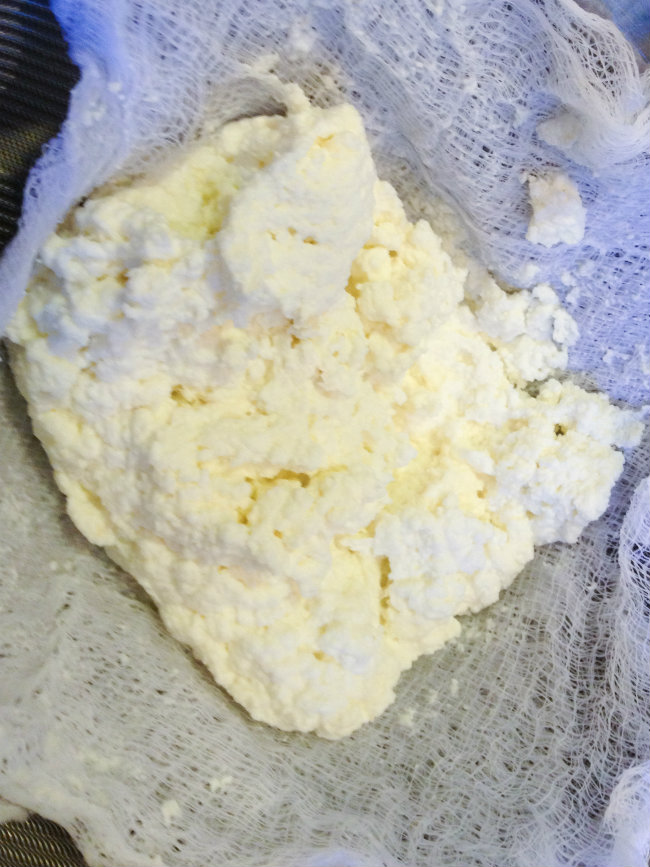
- Pour the curds and whey into the cheesecloth-lined sieve. The whey, the yellowish liquid, will end up in the bowl. Let cool and refrigerate for later use. Let the cheese curds, aka your lovely homemade ricotta, drain in the cheesecloth. If you want it soft and moist, let it drain for about ten minutes. This is good for spreading on bread, or in dessert applications. I let mine drain for much longer – about half an hour – because I was baking it in a “lasagna” and didn’t want extra water in the casserole.
- This keeps for about 5 days, refrigerated. I challenge you to make it last more than a few hours!