Showing posts with label Side Dishes. Show all posts

Sunday, August 31, 2014

Tarragon Green Bean Salad


Green beans – get ‘em while they’re hot!  Or cold.  They’re in season now, so green beans are cheap and plentiful.  My husband likes them best splashed with olive oil and roasted in the oven, but sometimes you don’t want to heat up the house.  For a yummy, summery green bean dish that’s delicious warm or cold, try this Tarragon Green Bean Salad!
Fresh herbs are a joy, and this recipe uses parsley, tarragon, and green onions.  Technically this may be a green goddess salad dressing, and it IS wonderful on a salad with fresh tomatoes.  You will have enough dressing left over to do just that!  Make the dressing while the beans are cooking and this recipe is ready in a snap.  Let’s go!
Tarragon Green Bean Salad
Ingredients:
  • 1 pound fresh green beans
  • 2 cloves garlic
  • 1-inch squeeze of anchovy paste or one small anchovy fillet (you can sub soy sauce if you must)
  • 1 fist full of parsley
  • 1 fist full of tarragon leaves
  • 2 green onions
  • 2 tablespoons mayonnaise
  • 2 tablespoons yogurt (or sub sour cream)
  • juice of 1 lemon (or sub tarragon vinegar, if you’re fancy!)
Directions:
  1. Prep the green beans:  cut off tops and tails and cut the beans into 1-inch pieces.  Put the beans in a covered dish with some water and cover.  Microwave for about six minutes.  You want the beans tender-crisp.
  2. While the beans are steaming, make the dressing:  Blend all the rest of the ingredients in a food processor.  It doesn’t have to be homogeneously smooth, but you don’t want to bite down on a big chunk of garlic!
  3. To serve:  Toss the beans in half of the dressing.  Serve warm, or refrigerate until ready to serve.  It’s great cold too, especially with grilled meats.  Serve the leftover dressing with salad and tomatoes, or use it as a dip for carrots and peppers.

Friday, June 20, 2014

Crunchy Chopped Salad


I think this was originally a recipe from a South Beach Diet cookbook.  But I started making it so long ago, and have added and deleted ingredients over the years…so that I am not sure it’s the same one in the book.  That’s okay – it’s not about exact ingredients.  You can add or subtract as you like.  It’s about CRUNCH!  And that’s what you get in this Crunchy Chopped Salad!
I know that chips aren’t great for me.  I usually don’t crave them, and I make sure I don’t keep them in the house (because as a stay-at-home mom, you DO eat whatever is in the pantry!)  But sometimes you just get that urge for something kind of salty and crunchy.  I make this salad instead.  Is it the same?  Of course not!  (Otherwise I’d call it Doritos Salad!)  But this satisfying, fun-to-eat dish  scratches that itch for me, and maybe it will for you too.
If you need a break from lettuce, try this.  If you have lots of singleton vegetables in your crisper drawer, try this.  If you want something fresh and different for your next cookout, try this!
Crunchy Chopped Salad
(Serves four as a side dish)
Ingredients:
  • 6 baby carrots
  • 1 bunch radishes, trimmed
  • 3 stalks celery, trimmed
  • 2 Persian cucumbers, or one large cucumber
  • 1/2 red bell pepper
  • 1/2 yellow bell pepper
  • 2 green onions
  • 2 cloves garlic
  • juice of 1 lemon or lime
  • 2 or 3 drops of honey
  • salt and pepper
  • 1/4 to 1/3 cup olive oil
  • 2 avocados
Directions:
  1. Wash and trim all your veggies.  Cut them all into medium-small pieces.  This is up to you, but for example, I cut the peppers into 1/2″ square pieces.  The radishes, cucumbers, carrots, and celery all get sliced vertically, then cut into 1/4″ slices.  If you dice everything too small, you won’t get the crunchiness.  If you cut everything too large, you’ll only get one or two veggies on your spoon at a time.  Experiment and see what size you like best.  If you are using a large cucumber, you may want to peel off the waxy skin and scoop out the seeds.  I like Persians because they are thin-skinned and have very little squishy gel around the seeds.  Pile all your chopped veggies into a big bowl and toss.  Beautiful, right?
  2. In a little food processor, blend up your garlic, lemon juice, honey, salt and pepper, and 1/4 cup olive oil.  Taste and dilute with more oil if you like.
  3. To serve, dish the salad into a bowl and drizzle liberally with dressing.  For each serving, dice half of an avocado and place it on top (otherwise it gets smushed.)  Eat this salad with a big soup spoon so you get a little of each vegetable in every bite!
If you have leftovers, you can mix in a can of tuna the next day.  It’s wonderful!

Saturday, April 26, 2014

Dijon Dill Green Beans


If I remember correctly, this is a recipe from the South Beach Diet book.   In any case, regardless of origin, these Dijon Dill Green Beans are delicious and healthy…and sure to please!
The Dijon dill dressing is very light and won’t hide the sweetness of the green beans.  I’ve used both dried dill and fresh, and they both taste great, so don’t fret or make a trip to the store if you only have dried.  Low-carb, low-cal, and tasty for sure, this veggie side will taste great with whatever main dish you’re making tonight!
Dijon Dill Green Beans
Ingredients:
  • 1 pound green beans, fresh or frozen
  • 2 tablespoons butter
  • 1 tablespoon Dijon mustard
  • 2 tablespoons chopped fresh dill (or one scant teaspoon dried dill)
  • salt and pepper to taste
  • squeeze of lemon, optional
Directions:
  1. Prepare the green beans:  (If using fresh, take off the ends and cut into 2-inch lengths.)  Steam or microwave the beans until they are still a little firm.
  2. While the beans are cooking, heat a large pan over medium and add the butter and dill.  Stir to keep the dill from burning and cook for a few minutes until the butter is bubbly and starting to brown.  Add the Dijon mustard and salt and pepper.
  3. Drain away any excess water from the beans, then add to the dill mixture.  Stir to coat the beans, then serve hot with a squeeze of lemon or another pinch of salt.
Leftovers?  I ate mine cold, with a can of tuna mixed in and (surprise!) a little more lemon juice squeezed over the top.  Yum!

Saturday, February 15, 2014

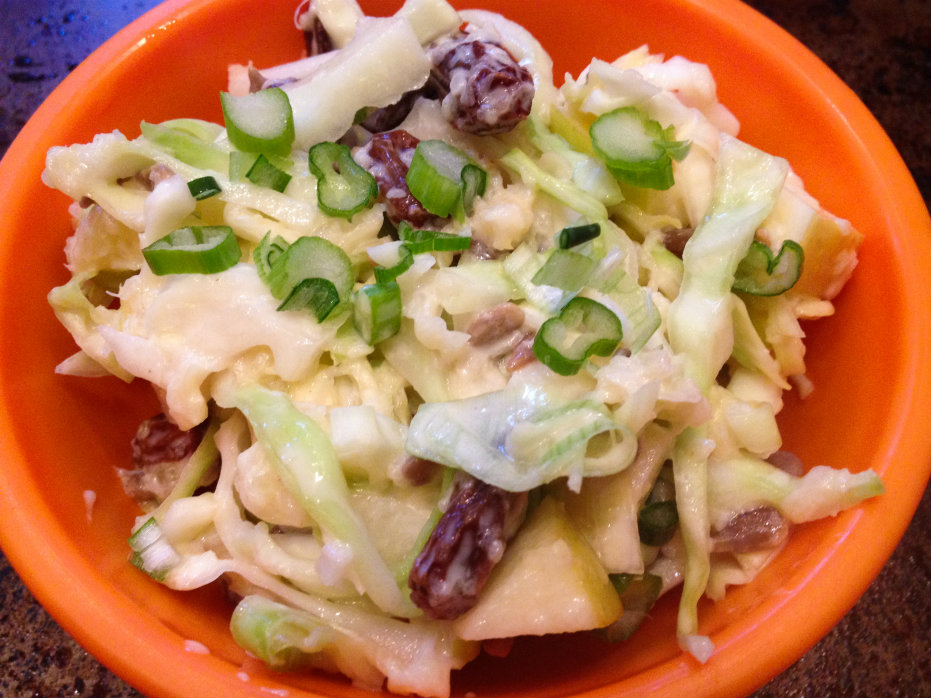
Cabbage and Pineapple Slaw


Cabbage and Pineapple Slaw Resize
Don’t let the monochromatic appearance fool you – this salad packs a tasty punch!  Winter veggies come together with fruit, nuts, and a light yogurt dressing in this recipe for Cabbage and Pineapple Slaw.
Cabbage is not a glamorous vegetable.  In fact you can probably buy a giant head of it today for less than a dollar.  Nutritionally it’s a powerhouse, though, and you probably could stand to eat more of what it’s offering!  Sliced very fine (or grated if you prefer), it’s a perfect foil for crunchy apples, chewy raisins, and whatever nuts you like.  I used sunflower seeds, but try almonds, hazelnuts, pecans or walnuts.  I think walnuts would make it taste even more like a healthier version of Waldorf Salad (a childhood favorite of mine.)  The star of the show, and what lifts this recipe above other coleslaws, is pineapple.  Fresh pineapple, minced, would be glorious, but I used a half a can of crushed pineapple and it was delicious.  Save the rest of the pineapple for smoothies, or to dress up cottage cheese.
Since we’re still knee-deep in winter, and Soup Month is going strong, try this salad paired with a spicy soup.  I think it would be great with Chinese Hot and Sour Soup, or any chili recipe, to quell the heat.  Let me know how you like it!

Cabbage and Pineapple Slaw

Ingredients:
  • 1/2 head green cabbage, sliced very fine or grated
  • 1 small apple, diced
  • 1 green onion, minced
  • about 1 cup crushed or minced pineapple
  • 1/2 cup raisins or other dried fruit (cranberries or cherries would be yummy!)
  • 1/2 cup nuts or sunflower seeds
  • 1 heaping tablespoon mayonnaise
  • 2 heaping tablespoons plain yogurt
  • juice of 1 lemon
  • juice of 1 clementine orange
  • 1/4 teaspoon salt, or to taste
Directions:
  1. In a very large mixing bowl (or a very large Tupperware container with a lid, my preferred method), mix together the cabbage, apple, onion, pineapple, raisins, and nuts.
  2. In a small container with a lid, shake together the mayo, yogurt, lemon and orange juices, and salt.  Taste to see if you want any more salt or lemon.
  3. Pour dressing over cabbage mixture and shake or toss to combine.  Refrigerate until ready to serve.

Saturday, January 11, 2014

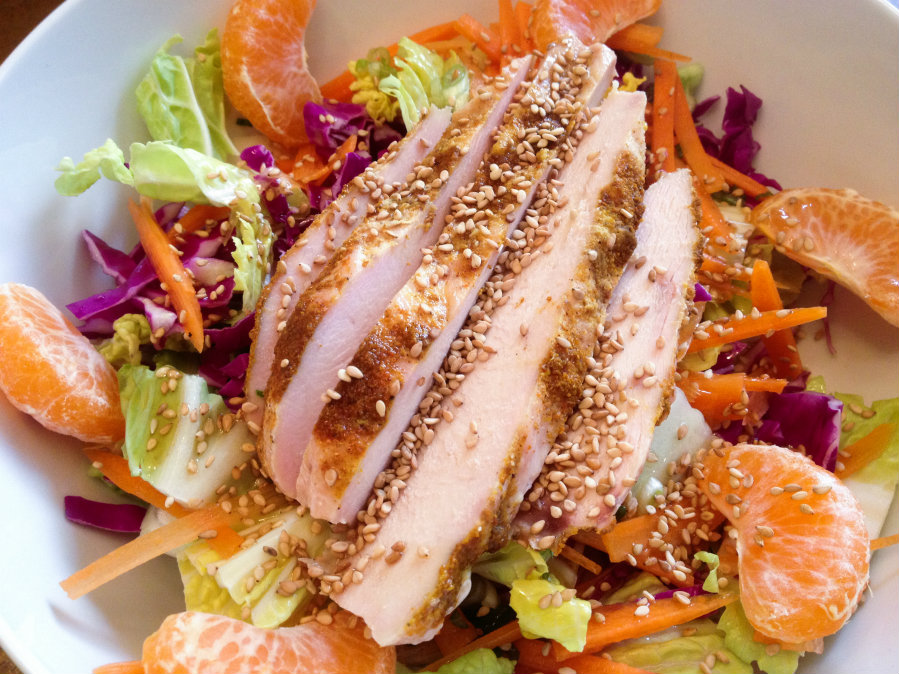
Chinese Chicken Salad


Chinese Chicken Salad Resize
Did you know that January is National Soup Month?  Sounds perfect to me - a big bowl of soup and a salad makes one of the best lunches imaginable.  One of my favorite salads is Chinese Chicken Salad!
This is perfect for winter, because all of the ingredients are in season now.  Instead of canned mandarin oranges, you can probably find fresh ones now – I’ve got Clementines and Satsumas left and right at my grocery store.  Red cabbage and carrots are always around, as are green onions.  For the base, I used Napa cabbage, but if you don’t have that, you can use any kind of lettuce you like, or really finely chopped green cabbage.  I cooked some extra chicken breasts last night so I could chop them up cold and throw them over the salad, but you can use whatever chicken you like – roasted, store-bought rotisserie, or even breaded chicken nuggets!
This recipe serves two as part of a lunch or dinner menu.  Try this salad with any soup you like, or paired up with a sandwich, wrap, or pasta dish.  Filling, nutritious and delicious – and it won’t break any of your New Year’s resolutions!
Chinese Chicken Salad
Ingredients:
  • 1 small head Napa cabbage, or romaine lettuce
  • 1/2 head small red cabbage
  • 2 carrots
  • 2 or 3 green onions
  • 2 mandarin oranges
  • 2 cooked chicken breasts, or 3 cups chopped cooked chicken
  • 2 tablespoons sesame oil
  • 2 tablespoons rice vinegar
  • 1 tablespoon sesame seeds
  • salt and pepper to taste
Directions:
  1. Chop the Napa cabbage into inch-wide strips.  Finely slice the red cabbage.  Place both in a salad spinner and rinse under cold water, then spin dry.
  2. Cut the carrots into matchsticks.  Finely slice the green onions.  Peel the oranges and remove as much of the white pith as possible.  Separate into segments.  Dice or thinly slice the chicken breasts.
  3. To assemble:  In two very large bowls, mix together the cabbages, carrots, and onions.  Arrange the oranges and chicken breasts on top.  Drizzle each salad with one tablespoon each of sesame oil and rice vinegar, and sprinkle the sesame seeds, salt, and pepper on top.

Saturday, October 12, 2013

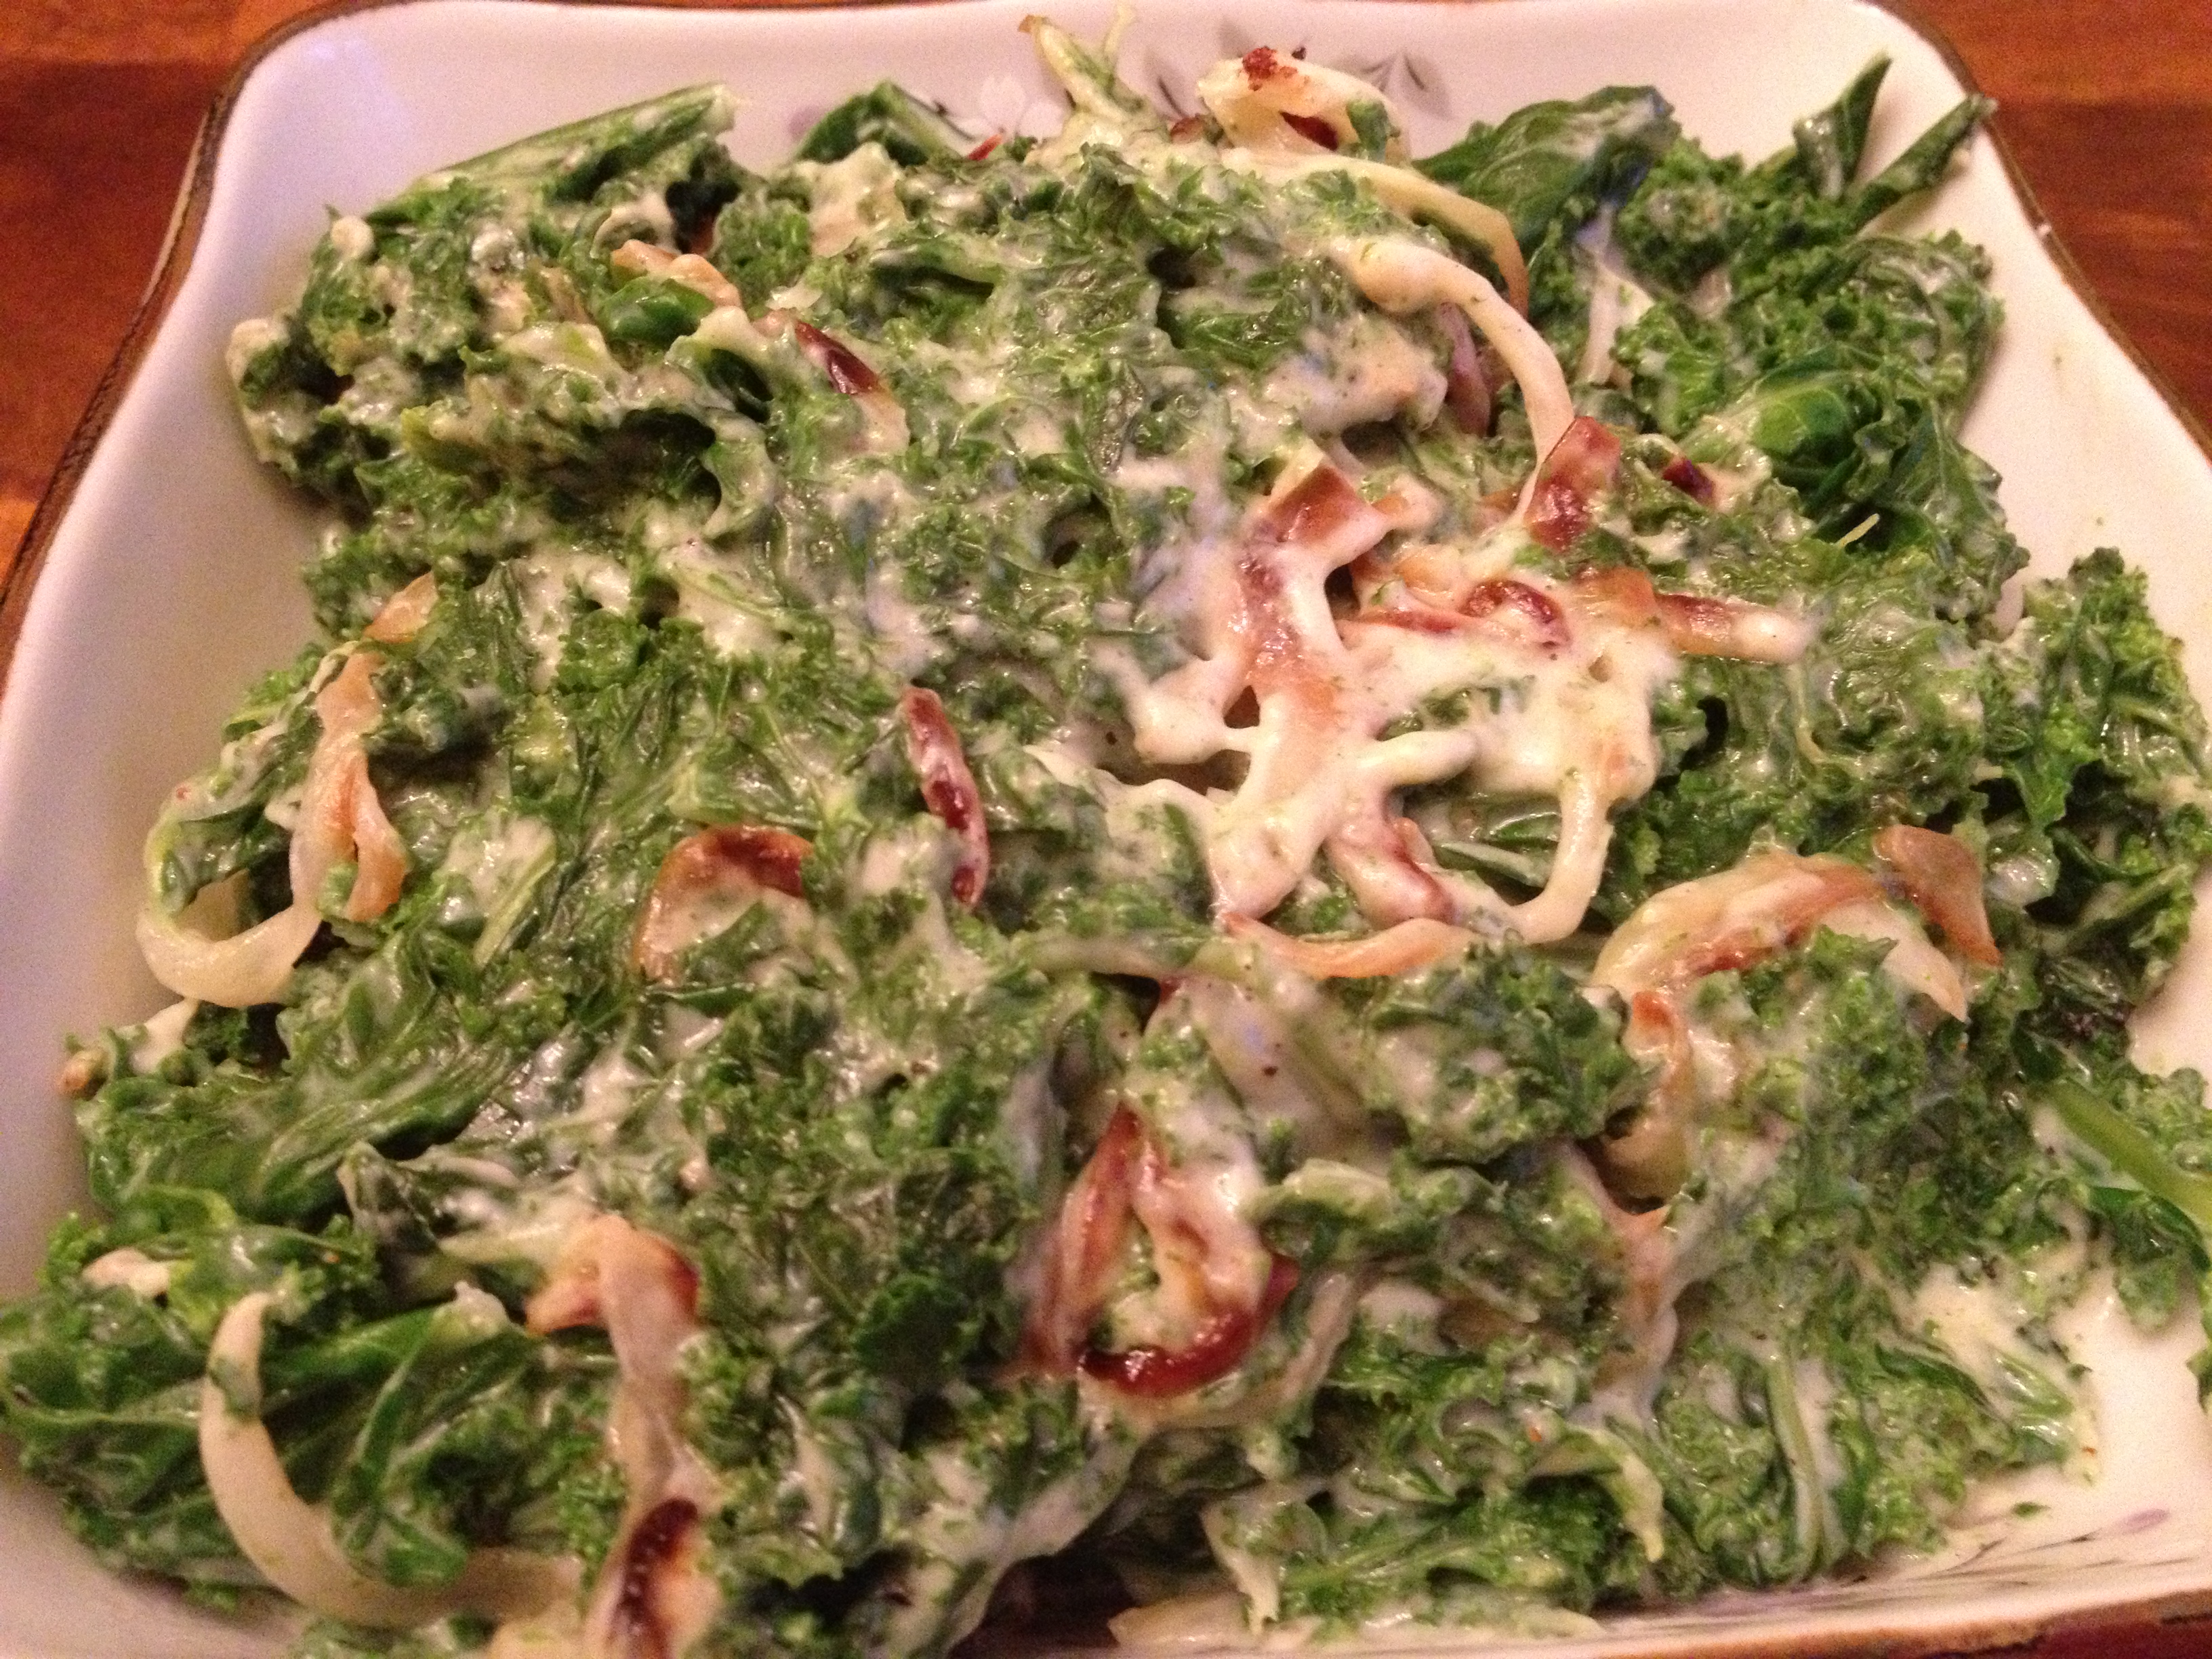
Creamed Kale


Creamed Kale
My favorite side dish in restaurants is creamed spinach.  There’s just something about it that I crave.  And lucky for me, it’s not hard to make at home.  But spinach is a little fussy – it goes mushy in the fridge really quickly, so I don’t have it on hand unless I’m cooking it that day.  But kale on the other hand … that hearty veggie will hang out in your fridge for a few days without appreciable loss of texture or taste.  So I had 2 bunches of curly kale hogging space in my fridge and decided to see if I could cream it.  In short, yes I did!  Creamed Kale for dinner!
Use whatever hearty green you have – kale, chard, or spinach.  If you are using spinach, just wash and blanch it quickly.  Kale and chard need more time in the pot to soften up, so plan accordingly.  I made this with one part whole milk and one part half-and-half, but I think next time I can just use whole milk.  If you like a richer flavor, use all half-and-half.  As for the onion, I used just a regular brown onion.  I think a sweet variety would be even better, so if you see Vidalias or Walla Wallas, pick one up!  Also, I left it out, but you can certainly add a little (or a lot, your choice) grated parmesan cheese to garnish.  Ready to check it out?  Let’s go!
Creamed Kale
(serves 2 as a side dish)
Ingredients:
  • 2 bunches kale, any kind, or chard, or spinach (see note above if using spinach)
  • 1 onion
  • 3 tablespoons butter, divided
  • 1/2 cup whole milk
  • 1/2 cup half-and-half
  • 1 teaspoon corn starch
  • salt and pepper
  • 1/8 teaspoon grated nutmeg
Directions:
  1. Set a large pot of water to boil.  Prepare the kale:  tear out the tough center stem, and tear the leaves into bite-sized pieces.  Wash well.
  2. Slice the onion as fine as possible – you want thin strings.  In a large pan, cook the onions in 2 tablespoons of butter, stirring to make sure they don’t burn.
  3. Boil the kale for about 3 or 4 minutes.  You don’t want it too soft – a little chew is nice.  Remove to an ice bath.  When cool enough to handle, squeeze out as much water as possible from the kale.
  4. When the onions are soft and browning, add the kale to the pan.  In a bowl, whisk together the milk, half-and-half, and cornstarch.  Pour over kale and onions and stir to incorporate.  Turn the heat down to medium low and simmer for 3 minutes until thick and creamy.  Season with salt, pepper, and nutmeg.  Stir in last tablespoon of butter, then serve hot.

Saturday, June 8, 2013

Sweet Potato Pizzas


Everyone has their weaknesses, their diet-busters, their evil temptresses.  One of mine, as you may have guessed, is popcorn.  Unfortunately, since I am striving to lead a Paleo lifestyle, popcorn is a no-go.  (Still searching for a good nut-free Paleo cracker recipe.  If you find one, please pass it on!)  The big temptation for my husband is pizza.  He is a pizza fanatic.  So when he pointed this recipe out to me online, he asked me to make it for him, hoping to scratch the pizza itch in a healthier way.

To be honest, I thought it sounded gross.  The ingredients didn't sound like they'd combine into something I wanted to eat.  Thankfully, I was a good wife and made him what he wanted.  I tried a bite ... and LOVED it!  So happy I trusted him!  These Sweet Potato Pizzas are not the same as a crispy-crusted calorie bomb from your favorite pie shop, but they are a tasty dish nonetheless.  And if you are craving pizza but don't want the gluten-and-grain crust, here is a good place to go to feed your need.  Find my recipe at GCH.

Friday, May 3, 2013

Broccoli Bacon Salad


Bacon!  Do I have your attention?  Make sure everyone eats their greens by combining them with bacon!  My Mom made this for nearly every summer barbecue, and I'm sure it will quickly become a favorite for your family too.  Make it your own and change out the raisins for dried cherries or cranberries, or sub almonds or cashews for the sunflower seeds.  Many happy returns, at GCH!

Saturday, March 16, 2013

Roasted Cabbage Wedges


Okay, don't recoil.  Stick with me here.  This isn't stinky, or sulfuric, or boiled to death.  Roasted cabbage might be a revelation for you.  If you are making Corned Beef and Cabbage or Colcannon this weekend for St. Patrick's Day, you might have some extra cabbage that you don't know what to do with.  Try this.  I bet you might like it!

You don't have to use the fennel or anise seeds, but I like the little crunch and burst of flavor it adds.  Also, the lemon squeeze at the end is optional, but if you've read this blog for a while, you know I try to put lemon on everything.  And you know what?  I never regret it!

So go ahead, take a chance, and try the Roasted Cabbage Wedges.  I eat several at a time, for lunch, when I can.  See the recipe at GCH ... scroll past the Colcannon, it's at the bottom.

Friday, March 8, 2013

Vegetable Pancakes


Most people know these as latkes, but Koreans make something similar, called "jeon".  Whatever you call them - haystacks, vegetable hash browns, tasty crispy circles of love - these are easy and delicious.  Check out my recipe as I guest-blog over at GCH!

Tuesday, January 29, 2013

Sesame Kale Salad


If you follow me on Facebook, you know by now that I am in love with kale.  I talk about it all the time! I finally got up the nerve to try raw kale again (after my first experience with raw kale salad, which was, shall we say, uninspiring).  And boy am I glad I did!  I bought a package of pre-washed kale with shredded red cabbage and carrots, and made the simple vinaigrette recipe listed on the back.  Fantastic!  But I love to tinker, and I made what I think is a perfect intro to raw kale salad for those who've never had it.

If you can find it, pre-washed and prepared, packaged kale is a great way to go.  Trader Joe's always has it, as does Whole Foods, and probably other health food grocery stores.  If not, buy one large bunch of kale, or two if they are small.  To prepare it, fold each leaf in half and tear the leaf off the tough stem.  (You can eat the stems, but they are very fibrous and will give your jaw a workout!)  Wash well, once or twice, especially if it's curly kale - dirty kale is yucky!  You can use a veggie peeler on the carrots to get thin slivers and a knife to chop the cabbage finely, or just use a food processor, if you have one.  You don't want to shred them like in coleslaw, though - this is a chewy, satisfying salad.


The secret to the dressing is tahini.  Tahini is a paste made of sesame seeds, and is key in making your own hummus.  It's a nice thing to have around, and keeps in the fridge for a long time.  Otherwise, you probably have everything else you need.  Ready for raw kale salad?  This recipe will make you a believer!

Sesame Kale Salad

Ingredients:

  • 1 bag prepared kale, or 2 small bunches kale, washed and torn into small pieces
  • 2 large carrots, or ten baby carrots, peeled and shredded or sliced very thinly
  • 1/2 small head red cabbage, sliced very thinly
  • 1/4 cup sesame seeds
  • 1 heaping tablespoon tahini
  • 1 tablespoon rice vinegar
  • 1 teaspoon lemon juice
  • salt and pepper
  • 1/2 teaspoon sugar, honey, or other sweetener
  • 2 tablespoons sesame oil
  • 2 tablespoons olive oil
Directions:
  1. In a very large bowl, or preferably a very very large Tupperware container with a lid, mix together the kale, carrots, cabbage and sesame seeds.
  2. In a small Tupperware container with a lid, mix together the remaining ingredients.  Shake it up!  Then pour over the salad.  If you are using a container with a lid, shake to combine.  Really move it around!  If you don't have a lid, toss well for a few minutes, or use your hands to massage the dressing into the kale.  The dressing will help soften up the kale.  Let the salad sit at room temperature or in the fridge for half an hour before serving.
This salad is so sturdy, it's good the next day - even TWO days later!  Try putting a dressed lettuce salad in the fridge and eating it a day later.  You won't like it.  This one is better the next day because the dressing penetrates the veggies and makes them chewy and delicious.

Also, try adding in some raisins or a chopped apple.  My husband likes chopped green onion mixed in too.

Thursday, December 6, 2012

Spinach Banchan and Cucumber Salad Banchan -- Korean Basics


Last week I posted my recipe for Dubu Buchim at GCH.  Then I had requests:  "Can we have some recipes for things to eat with it?"  Of course!  Banchans for everyone!

This week's post at GCH is for two of my favorite banchans:  spinach banchan, and a cucumber salad.  The spinach banchan is a recipe you'll want to learn and memorize, since it is a component in many other Korean recipes, like Japchae, Kimbap, and Bibimbap.  The cucumber banchan is spicy-sweet and very refreshing when paired with hot rice and kimchee.  Ready for the link?  Here it is!  Girlfriend's Coffee Hour:  What's on Your Plate?  -- Korean Banchans!


Tuesday, October 23, 2012

Braised Red Cabbage


Say what you will about Martha Stewart, she puts out some great magazines!  We get Martha Stewart Living, and just received the November issue, which means it's time for thinking about Thanksgiving!  Browsing the pages filled with beautiful side dishes, pies, and gravies, I was ready to put on an apron and make the whole thing!

I settled on one recipe to test out for my own family's Thanksgiving:  Braised Red Cabbage.  I even had all the ingredients, no need for a trip to the store for me! This recipe is very easy, like beginner-level, but has a complex depth of flavor.  I served it with sausages, since to me it has a slightly Germanic-feel to it, along with a green salad and some extra sliced apples.  Try it and see - will this make the cut for your Thanksgiving feast?

Braised Red Cabbage
(Recipe courtesy of Martha Stewart Living magazine)

Ingredients:

  • 4 ounces bacon (about 4 slices), cut crosswise into 1/2-inch pieces
  • 1 medium onion, thinly sliced
  • 1 head red cabbage (2 1/4 pounds), halved, cored and cut lengthwise into 1/2-inch slices
  • 1/2 cup cider vinegar
  • 1/2 cup dry red wine
  • 3/4 cup water
  • 2 tablespoons dark-brown sugar
  • salt and pepper
  • 1 Golden Delicious apple, peeled, cored, and cut into 1/2-inch pieces (I used a Fuji apple and didn't peel it, and it was fine!)
Directions:
  1. Cook bacon in a large pot over medium heat, stirring occasionally, until fat renders and bacon is crisp, about 8 minutes.  Add onion, and cook, stirring occasionally, until translucent, about 3 minutes.  Add cabbage, vinegar, wine, water, sugar, and 1 1/2 teaspoons salt; stir to combine.  Raise heat to medium-high, cover, and cook 5 minutes.
  2. Reduce heat to medium-low, and continue to cook, covered stirring occasionally, 30 minutes.  Stir apple into cabbage, and cook, covered, until cabbage and apples are tender, 25 to 30 minutes.  Season with pepper.
When you first stir in the wine, cider, and sugar, the smell is very pungent.  Don't despair!  After the cooking time, it mellows considerably, and got very favorable reviews from the family.

Thursday, October 18, 2012

Homemade Egg Noodles

To reheat cooked noodles?  Pan fry with butter, salt and pepper.  Don't drool in the pan!

Didja notice those fat, delectable noodles supporting my Beef Stroganoff?  They're homemade egg noodles, and you can make them too!

I got the recipe from my Facebook friend Christi Wilson.  Five ingredients and four steps?  I'm in!

Egg Noodles
(recipe courtesy of Christi Wilson)

Ingredients:

  • 2 1/2 cups all purpose flour
  • 1 pinch table salt
  • 1/2 cup milk
  • 1 tablespoon butter
  • 2 eggs, beaten
Directions:

 1.  In a large bowl, stir together the flour and salt.  Stir in milk, butter, and eggs.
Yup, it's dough.

2.  Knead dough until smooth.  (I had to add a little extra flour - maybe my eggs were big, or maybe it was the rainy weather.  Anyway, keep your flour handy, just in case.  You'll also need about 1/4 cup for when you roll out the dough.)  Let the dough rest for about ten minutes.

Roll, roll, roll your dough, gently on the board...

3.  Flour your counter or a large cutting board, and roll out the dough to about 1/8-inch thickness.  Cut into desired shape.  I made mine about 1/2-inch wide, and long, but I ended up cutting them shorter after they were cooked, so the kids could handle them easier.  Let them air-dry for a few hours until you are ready to cook them.

I used the little metal basket I keep my spatulas and wooden spoons in.  Ideas are everywhere!

4.  To cook, boil until al dente.  Mine went for about 7 minutes.  Just until they are chewy but don't taste like flour anymore.

These were awesome with the Beef Stroganoff!  Big and chewy and fantastic when covered in stroganoff sauce.

Monday, October 1, 2012

Japchae -- Korean Basics


This year the Korean holiday "Chuseok" falls on September 30.  Chuseok is a day when Koreans celebrate the fall harvest, and perform ancestor worship rituals - sort of Thanksgiving meets Dia de los Muertos.  One of the traditional foods for Chuseok is japchae, which I love.  In fact, I don't need too much of an excuse to make it!

This recipe is simple and pretty cheap to make, but it does take a little time to prepare  all the ingredients.  There are two "specialty" ingredients you'll need from the Korean store:  the noodles and the mushrooms.


The noodles are made of sweet potato starch and are clear.  They don't have much of a flavor, but their texture is kind of snappy and fun.  I've never made this with a different kind of noodle, but I'm sure it can be done!

I buy packaged "dried mushrooms" at the Korean store.  I'm pretty sure they're dried shiitakes, but the only ingredient listed in English is "mushrooms", with everything else in Chinese, Korean, and Japanese.  If you can't find "dried mushrooms" at your Korean grocery store, use fresh shiitakes.

And as far as the meat goes, it's pretty much whatever beef you can slice really thinly.  You don't need much, and it would be very frugal of you to just slice up any steak or bulgogi you have leftover from dinner.

I wouldn't call this a ban chan, exactly, because I like to eat a LOT of it!  To make it a meal, serve with a hearty jiggae and maybe some samgyeopsal or bulgogi.  

Japchae

Ingredients:

  • 4 ounces beef, sliced as thin as possible into bite-sized strips
  • 6 cloves garlic, minced
  • 10 dried mushrooms (or fresh shiitake mushrooms)
  • 2 bunches spinach, tough stems trimmed and washed well
  • 2 large carrots, peeled 
  • 1 small onion, sliced very thin
  • 1/2 package sweet potato starch noodles, about 6 oz. 
  • 2 tablespoons sesame oil, maybe a little more
  • 2 tablespoons soy sauce
  • 1 tablespoon sugar
  • 1 tablespoon sesame seeds
Directions:
  1. Prepare meat:  Heat sauté pan and add a tablespoon of sesame oil.  Add meat and 3 cloves minced garlic and cook until done.  If you are using leftover, already-cooked meat, heat until hot and the garlic is cooked.  Remove from heat to a very large mixing bowl, and add 1 tablespoon soy sauce.  Set aside.
  2. Prepare mushrooms:  Place mushrooms in a bowl and cover with boiling water.  Place a plate on top to keep the heat in.  Let the mushrooms steep and rehydrate for about a half an hour.   When they are rehydrated and soft, slice thinly.  Of course, if you are using fresh shiitakes, just slice thinly.
  3. Prepare spinach:  Boil a large pot of water, and get an ice bath ready.  Blanch the spinach for about 20 seconds.  (Keep the water boiling for the noodles.)  Remove from boiling water and into the ice bath.  When cool, squeeze out  most of the water, but don't crush the spinach.  Add to the bowl with the meat and stir to combine.
  4. Prepare noodles:  Put the noodles into the boiling spinach water, then turn off the heat.  Leave the noodles in the pot for ten minutes, then drain, and add to the meat and spinach.  Toss to combine.
  5. Prepare carrots and onions:  Peel the carrots and cut into 2-inch lengths, then slice as thinly as possible.  Heat sauté pan, add 1 tablespoon sesame oil, and cook sliced carrots, onions, mushrooms, and remaining minced garlic until the onions are soft.  Remove from heat and dump it all into the meat bowl.  
  6. Sprinkle with sugar and remaining soy sauce and toss again to combine.  Shake on some sesame seeds and taste.  You may need more soy sauce, or a little more sesame oil.  What you are looking for:  balanced umami perfection!
I like to eat this very warm.  You can eat it cold out of the fridge the next day, but I would recommend microwaving it for about 30 seconds.  

Wednesday, September 12, 2012

Mushroom Ban Chan - Korean Basics


Unlike a typical American meal - protein, vegetable, and starch - a Korean meal has several components.  Rice is always present, as is a protein and some kind of kimchee.  Soup is almost always included, and my favorite part - the ban chans.  Those are those myriad little dishes that come with your dinner at the Korean restaurant, and are usually small bowls or plates of different kinds of vegetables - salads, sautés, pickles, and other presentations.  If you are cooking Korean food at home, the rice is easy to do, and you are probably putting some meat on the grill, but don't forget about the best part - the ban chans!

Here is an easy one to start with.  These are sautéed mushrooms, Korean-style.  Put the rice in the cooker (bap soot) and make these tonight!

Mushroom Ban Chan

Ingredients:

  • 1 package King Trumpet mushrooms (also called King Oyster mushrooms.  Can't find them?  You can use button or creminis, but next time, go to the Korean grocery store and look for these!  They're usually $2 a package - pretty good deal!)
Serving suggestion.  Mushroom dancing lessons not included.

  • 2 cloves garlic
  • sesame oil
  • salt
  • 2 green onions
  • 1 tablespoon sesame seeds
  • 1/4 cup very thinly sliced carrots, optional (I had these left over from making kim bap, and I think they added a nice sweetness and color contrast to the dish, but they are in no way necessary to a good presentation)
Directions:
  1. Slice the mushrooms into bite-sized pieces.  Finely chop the garlic, and thinly slice the green onion.
  2. Add a little sesame oil to your pan, about 2 tablespoons, over medium heat.  Add the carrots, if using, and sauté for 2 minutes.  Add the garlic and mushrooms and stir to coat.  Sprinkle with salt.  The mushrooms will soak up the oil pretty quickly and you may need to add more, but don't worry, they release it back out, along with a lot of water.
  3. Saute for 5 or 10 minutes, until the mushrooms sweat out all their water and they are soft and chewy.  Turn off the heat and toss with the sliced green onions and sesame seeds.  Eat hot or cool.
If you have leftovers, try them with scrambled eggs the next day for breakfast.

Wednesday, August 15, 2012

Black Bean and Corn Salad


Corn is only around during the summer, which means the clock is ticking if you want to make recipes that benefit from fresh corn, as opposed to canned or frozen.  This is one salad that really needs the bought it, chopped it, ate it kind of corn!

I love how colorful this salad is - the festive colors even LOOK like summer!  And this is a great dish for a potluck or barbecue, because it can be out of the fridge and still taste great (and, uh, not make anyone sick.)  This comes together in a flash - try it this weekend with whatever you decide to grill!

Black Bean and Corn Salad

Ingredients:

  • 1 can black beans
  • 2 ears corn
  • 2 bell peppers (I used one red and one yellow), diced
  • 1/3 cup chopped cilantro
  • 2 green onions, diced
  • 1/2 lemon
  • 1 teaspoon cumin seeds, toasted and ground
  • 2 tablespoons olive oil 
  • salt to taste
Directions:
  1. Rinse the beans and place in a large bowl.
  2. Prepare the dressing:  mix the ground cumin with the juice of half a lemon.  Add the oil and shake, then pour over the beans.
  3. Slice the corn off the cob, and add it to the beans.
  4. Add the peppers, cilantro, and onion and stir thoroughly to combine.  You may want to add a little salt.
Put it in the refrigerator until you're ready to eat.  You can also add chopped avocado to this.  It's delicious and adds a creamy counterbalance to the crunchy peppers.  Just keep in mind that, while this salad is terrific the next day, avocados are not, so eat them all before you put the leftovers away.

Wednesday, August 1, 2012

Superfoods Salad! Warm Kale and Oven-Dried Tomato Salad


The term "superfood" is in the news a lot lately, and for good reason.  Science is proving that some foods are just better for you than others.  These superfoods are high in nutritional value and have been shown to prevent a host of diseases, from diabetes to cancer to heart disease.  Why wouldn't you eat these dietary power-houses every day?


Well, aside from berries and nuts, some of these super-foods aren't very "fun".  Broccoli?  Mustard greens?  Lentils?  We know they are good for us, but sometimes it sounds more appetizing to eat french fries than flax seeds.  The trick, as with most things, is preparation and presentation.


Tiny spokesmodel, or giant bag?
I found a 10-ounce bag of pre-sliced kale at Trader Joe's for $2.00.  That's a great deal!  Now to dress it up visually, jazz it up taste-wise, and add even more superfoods to the mix.  Voila!  Superfood Salad!  Serve this warm with any lean protein and get a big dose of vitamins, fiber, and cancer-fighting antioxidants.  Healthy and delicious = super!


Warm Kale and Oven-Dried Tomato Salad


Ingredients:

  • 1 10-ounce bag of kale, or three large bunches of kale, tough stems removed
  • 3/4 cup broth or water
  • 1 teaspoon olive oil
  • 1/3 cup Oven-Dried Tomatoes packed in oil, with 2 tablespoons of the oil, or prepared sun-dried tomatoes packed in oil
  • 1/2 cup almonds, lightly cracked
  • 3 tablespoons grated parmesan cheese
  • squeeze of lemon or lime
  • salt and pepper to taste
Directions:
  1. Wash kale and remove tough stems.  If using bunches of whole kale instead of a bag of prepared kale, tear into bite-sized pieces.  
  2. Heat sauté pan on medium heat and add olive oil.  When hot, add kale and broth and cover, stirring occasionally, for 5 minutes.
  3. Remove lid and add oven-dried tomatoes and tomato oil.  Stir to combine and lower heat, cooking until the broth has evaporated.
  4. To serve:  pile kale on plate, add cracked almonds and cheese.  Squeeze a lemon over it and season with salt and pepper.
Serves two.  I ate this for lunch yesterday.  And then again for snack.  It's that good.

Wednesday, June 20, 2012

Green Beans with Bacon


I'm a terrible menu planner.  I do it all backwards.  I go to the store and buy things that look good, and then come home and don't know what to make with them.  Case in point:  a big bag of really beautiful frozen green beans.  Trader Joe's has them right now:  vibrantly colored haricots verts, the young, skinny French green beans, at a terrific price.  I couldn't resist.  But then I put them in the freezer and couldn't decide what to do with them.  When in doubt, turn to bacon!

The finished dish reminds me of pasta carbonara.  It tastes salty and rich, but it doesn't pack the caloric punch of spaghetti.  And to make things even easier, I used canned Parmesan cheese.  I know, gross, right?  For some presentations, only freshly shaved cheese will do, but in this recipe, it fits the bill.  By all means, use fresh green beans and high-quality cheese, but I guarantee, even with these short cuts, this is a side dish your pickiest, veggie-hating friends will love!  

Green Beans with Bacon

Ingredients:

  • 2  or 3 slices of bacon
  • 1 pound frozen haricots verts
  • 2 tablespoons grated Parmesan cheese (or more to taste)
  • 1 teaspoon fresh lemon juice
Directions:
  1. Dice the bacon and fry in a very large pan or Dutch oven.  When done to your liking, remove the bacon to a bowl, turn off the heat, and leave the bacon grease in the pan.
  2. While the bacon is cooking, put the beans in a covered microwave-safe dish and add 2 or 3 teaspoons of water.  Read the cooking directions on the back, and subtract 2 minutes.  Mine said to cook them for six to eight minutes, and I cooked them for four minutes, stirring halfway through.
  3. When the beans are done - you want them undercooked - add them to the pan with the bacon grease and sauté over medium heat for 3 minutes.  You want them to still be firm, so don't overcook them now!  When done, remove from heat, and add back the bacon, plus the cheese and lemon juice.  Toss with tongs and serve.
These are so satisfying and delicious, I ate the whole batch for lunch.  These don't even need any salt at the end!  Four ingredients plus ten minutes gets you a healthy side dish (or meal, in my case)!

Wednesday, May 30, 2012

Cauliflower "Grits"


Cauliflower grits supporting a heap of vegetable curry
In an effort to lose weight, eat better, and get my children to eat more veggies and fewer processed grains, I am always on the lookout for tasty recipes that fit the bill.  I'd had cauliflower "fauxtatoes" before, where you mash the cauliflower and try to pass it off as mashed potatoes, and it didn't really work for me.  This recipe for "grits", however, is a horse of a different color.


Cauliflower grits, au natural
The hardest part of this recipe is cleaning the food processor when you're done.  It really couldn't be easier, and the end result is a tasty, firm blend of cauliflower and almonds, cooked in broth until done.  I use chicken broth, but vegetable broth would work well too.  For the almonds, I like the toasted, skin-on kind, but you can use whatever you have - raw, slivered, Marcona ... I'm tempted to try this recipe with Trader Joe's Wasabi Almonds! I serve this in place of rice in all of my Indian dishes, and it supports a saucy chicken dish better than noodles, since it soaks up all the best juices that run to the bottom of your plate.  It reheats well, is packed with protein and healthy fats, and tastes great.  What are you waiting for?


Cauliflower "Grits"
(Recipe Adapted from Paleo Comfort Foods by Julie and Charles Mayfield)

Ingredients:
  • 1 large head of cauliflower, shredded (use your food processor.  If you don't have one, use a box grater, or just chop the heck out of it.)
  • 1 cup almonds 
  • 3 cups chicken stock or vegetable broth
  • 1 or 2 tablespoons of butter
  • salt and pepper to taste
Directions:
  1. Shred the cauliflower.  Doesn't matter if you have chunks left over, they get cooked down.  Just make sure, however you cut or shred it, it gets cut down very small - this ensures a quicker and more even cook time.  Add the cauliflower to a large pot with a lid.  Add the chicken broth and stir to combine.
  2. Crush the almonds.  I like it chunkier than almond meal, so it still gives you a little crunch and helps the cauliflower not just be squish.  Grind them in the food processor until the pieces are the size of bread crumbs, but not all the way powdered.  Add the almonds to the pot with the cauliflower and broth.
  3. Simmer, covered, on medium-low for about 20-30 minutes until tender.  Add the butter and taste for salt and pepper.  Serve under curry, gumbo, or by itself as a side dish.