Showing posts with label Mexican. Show all posts

Friday, March 6, 2015

Easy Chicken Mole

Easy Chicken Mole
The first time I had mole (say moe-lay) it was at a small but very well-regarded Mexican restaurant in Los Angeles, La Loteria.  I had heard of mole poblano before and decided to take a chance.  Que rico!  What a glorious taste!  It was rich, a tiny bit spicy, a little bitter, and a little fruity.  It was really a savory fiesta in my mouth.  However, when I went home with the intent to find out more about this magical dish and how to make it, all the recipes I saw were 40 ingredients long and took days to make.  No me gusta – I just didn’t have time to mess with that.  So after some more research, I came up with this recipe – my Easy Chicken Mole!
The two ingredients that most moles share to give them such depth of flavor are dried chiles and chocolate.  Really!  Buy the darkest chocolate you can find.  You can use baker’s unsweetened chocolate, but that will make it bitter, and you’ll probably want to bring it back around with some added honey or brown sugar.  I used bittersweet chocolate, 63% cacao.  I think it worked well, and next time I might even add a little more.
As far as the chiles go, it gets a little confusing.  Oftentimes a chile will have one name when it’s fresh and a different name when it’s dried (I guess kind of like grapes vs. raisins.)  To be honest, I think I bought ancho chiles, but I’m not sure – there were two kinds and neither were labeled!  You want chiles that are a very dark reddish-brown—like the color of dried blood—and about fist-sized.  I used two but I may use three or even four next time.  I removed the seeds, and that’s where the heat resides, so you only get the smoky, fruity flavor of the chiles and not the spiciness.
Try this recipe.  If you’ve never had mole, this is a great place to start.  If you are a mole aficionado, go ahead and tweak my recipe to get the taste you like.  Either way, I bet you’ll say, Que sabor!  (Or if you don’t habla espanol, ‘So tasty!’)
Easy Chicken Mole
Ingredients:
  • 2-4 dried chiles (use ancho, pasilla, or guajillo)
  • 2 onions, chopped
  • 4 tablespoons butter
  • 4 cloves garlic, minced
  • 1/4 cup sesame seeds (or use pepitas, peanuts, or almond butter)
  • 1/4 cup dark chocolate chips
  • 1/4 cup raisins
  • 1/2 teaspoon ground cinnamon
  • 1/2 teaspoon salt
  • 1/2 teaspoon dried oregano
  • 2 cups chicken stock
  • 1/2 cup brewed coffee
  • 2 slices bread
  • 2 pounds boneless, skinless chicken thighs (or use breasts, up to you!)
  • diced avocado, cilantro, sesame seeds to serve
  • rice or tortillas to serve, optional
Directions:
  1. Put the dried chiles in a bowl and cover with boiling water.  Put a plate over the bowl and let the chiles soak for about 15 minutes.  When they have softened, remove the stem and seeds and roughly chop.  Discard the stem, keep some seeds if you want some heat.
  2. While the chiles are soaking, cook the onion in the butter in a very large pot or Dutch oven.  Stir to make sure they don’t burn.
  3. Add the chopped chiles, minced garlic, and sesame seeds.  Stir and cook for 3 minutes.
  4. Add the chocolate, raisins, cinnamon, salt, and oregano.  Stir to combine and cook for another 2 minutes.
  5. Add the chicken stock and coffee.  Crumble in the bread.  Cover the pot with a lid and simmer for 10 minutes.
  6. CAREFULLY transfer sauce to a blender and blend until pretty smooth.  You could use an immersion blender, too.
  7. Return the sauce to the pot and add the chicken thighs.  Tuck them into the sauce and stir.  Make sure the chicken is covered in sauce, then cover with the lid.  Let simmer for about 25 minutes.
  8. The chicken is done when you can shred it with forks.  To serve, ladle the chicken and lots of mole into a bowl.  Garnish with lots of avocado, cilantro and sesame seeds.  You can also eat this in tortillas – just serve with less sauce if you are making tacos.  You can also serve it over rice to soak up the sauce.

Friday, June 20, 2014

Crockpot Pork Tacos


If your idea of Mexican food is based on the dollar menu at Taco Bell, you are in for a treat!  Authentic Mexican food is easy to make at home and is quite healthy for you.  This Monday was Cinco de Mayo, so I made these Crockpot Pork Tacos, and they were muy delicioso!
In Mexico, and in authentic Mexican restaurants here in California, there is no shredded lettuce or cheddar cheese.  Tacos are simple and small and are often eaten on-the-go, so they’re not all covered in sauces or messy vegetables.  Chopped onions and cilantro are usually the only thing you’ll see, with a squeeze of lime.  I added avocado to mine because it pairs great with the pork.  It’s a traditional accompaniment to tacos and adds a creamy note to balance out the sharpness of the raw onions.
As far as the pork goes, I usually use a big shoulder roast, but you can use whatever pork roast you like.  The seasoning is simple here, but you can spice it up as much as you want.  Try adding a can of chipotles in adobo sauce for a smoky flavor, or a jar of salsa verde to the crockpot.
Finally, tacos are kind of like sandwiches.  You can make a thousand different kinds of sandwiches and all are tasty.  But if you only ever eat a turkey sandwich, you may never know how much you’d love a Reuben.  So:  if taco night at your house always means ground beef and diced tomatoes, you owe it to yourself to try something new.  Ready?  Vamanos!
Crockpot Pork Tacos
Ingredients:
  • 1 large pork roast, 2 or 3 pounds
  • 2 tablespoons salt
  • 1 teaspoon garlic powder
  • 1 teaspoon ground cumin
  • 1/2 cup fresh cilantro, roughly chopped
  • 1/2 red onion, diced
  • 1 or 2 avocados, sliced or diced
  • corn tortillas
  • lime or lemon wedges, to serve
Directions:
  1. Combine the salt, garlic powder, and cumin, and rub all over the outside of the pork roast.  Place in your crockpot and cook for 8 hours on low.  When done, the pork should pull apart easily.
  2. Warm up your tortillas:  I wrap a few tortillas in a clean, damp dish towel and microwave for 20 seconds.  If you try to use them cold, they’ll crack!
  3. Shred your pork with two forks, or chop roughly.  To serve, put about 1/3 cup of shredded pork in the center of a tortilla.  Sprinkle with cilantro, onion, and avocado.  Squeeze lime over taco.  Eat several.  Don’t wipe your hands on your pants!
If you have leftovers, and I always do, I usually skip the tortilla and just eat the pork, reheated in the microwave, covered in cilantro, onions, and avocado.  Skip the carbs, and squeeze lots of lime!

Shrimp with Cilantro Pesto


One thing that will bum me out, without fail, is seeing a wilted, mushy bunch of herbs that I didn’t get to in time.  Just makes me feel terrible.  So I had this nearly full bunch of cilantro in my produce drawer and no clue what to make with it.  Aha!  How about try it in pesto?  This recipe forShrimp with Cilantro Pesto was a big hit at dinner last night!
You can cook the shrimp however you like.  Here, we just pan-fried them quickly with salt and pepper, and let the pesto do the heavy lifting in the flavor category.  This comes together so quick it’s laughable.  Make the pesto whenever you like – even the day before – and keep in the fridge until you are ready to eat.  We ate this with roasted baby potatoes and roasted broccoli.  The pesto was especially delicious on the potatoes.  Try it and see!
Shrimp with Cilantro Pesto
Ingredients:
  • 1 large bunch cilantro
  • 1/3 cup toasted pepitas
  • 1 teaspoon minced garlic
  • juice of 1 lemon or lime
  • 1/3 cup olive oil
  • salt and pepper
  • 1 pound shrimp, peeled
  • 1 tablespoon olive oil
Directions:
  1. Wash and shake the cilantro and trim about half an inch off the bottom of the stems.  Place them in the bowl of a food processor.  Blend with the pepitas, garlic, lemon juice, and olive oil.  Taste and add salt and pepper to your liking.  Pour into a bowl and store in the fridge until ready to use.
  2. Prepare the shrimp: peel the shell off, remove the tail, and de-vein.  Season with salt and pepper and drizzle with olive oil.  Heat a pan on medium-high, and quickly sauté the shrimp.  They will only take about 2 minutes per side – don’t let them get tough and overdone!  Remove shrimp from pan to a plate and serve with the cilantro pesto (and a squeeze of lemon if you like.)

Friday, September 13, 2013

Roasted Chipotle Salsa


Roasted Chipotle Salsa
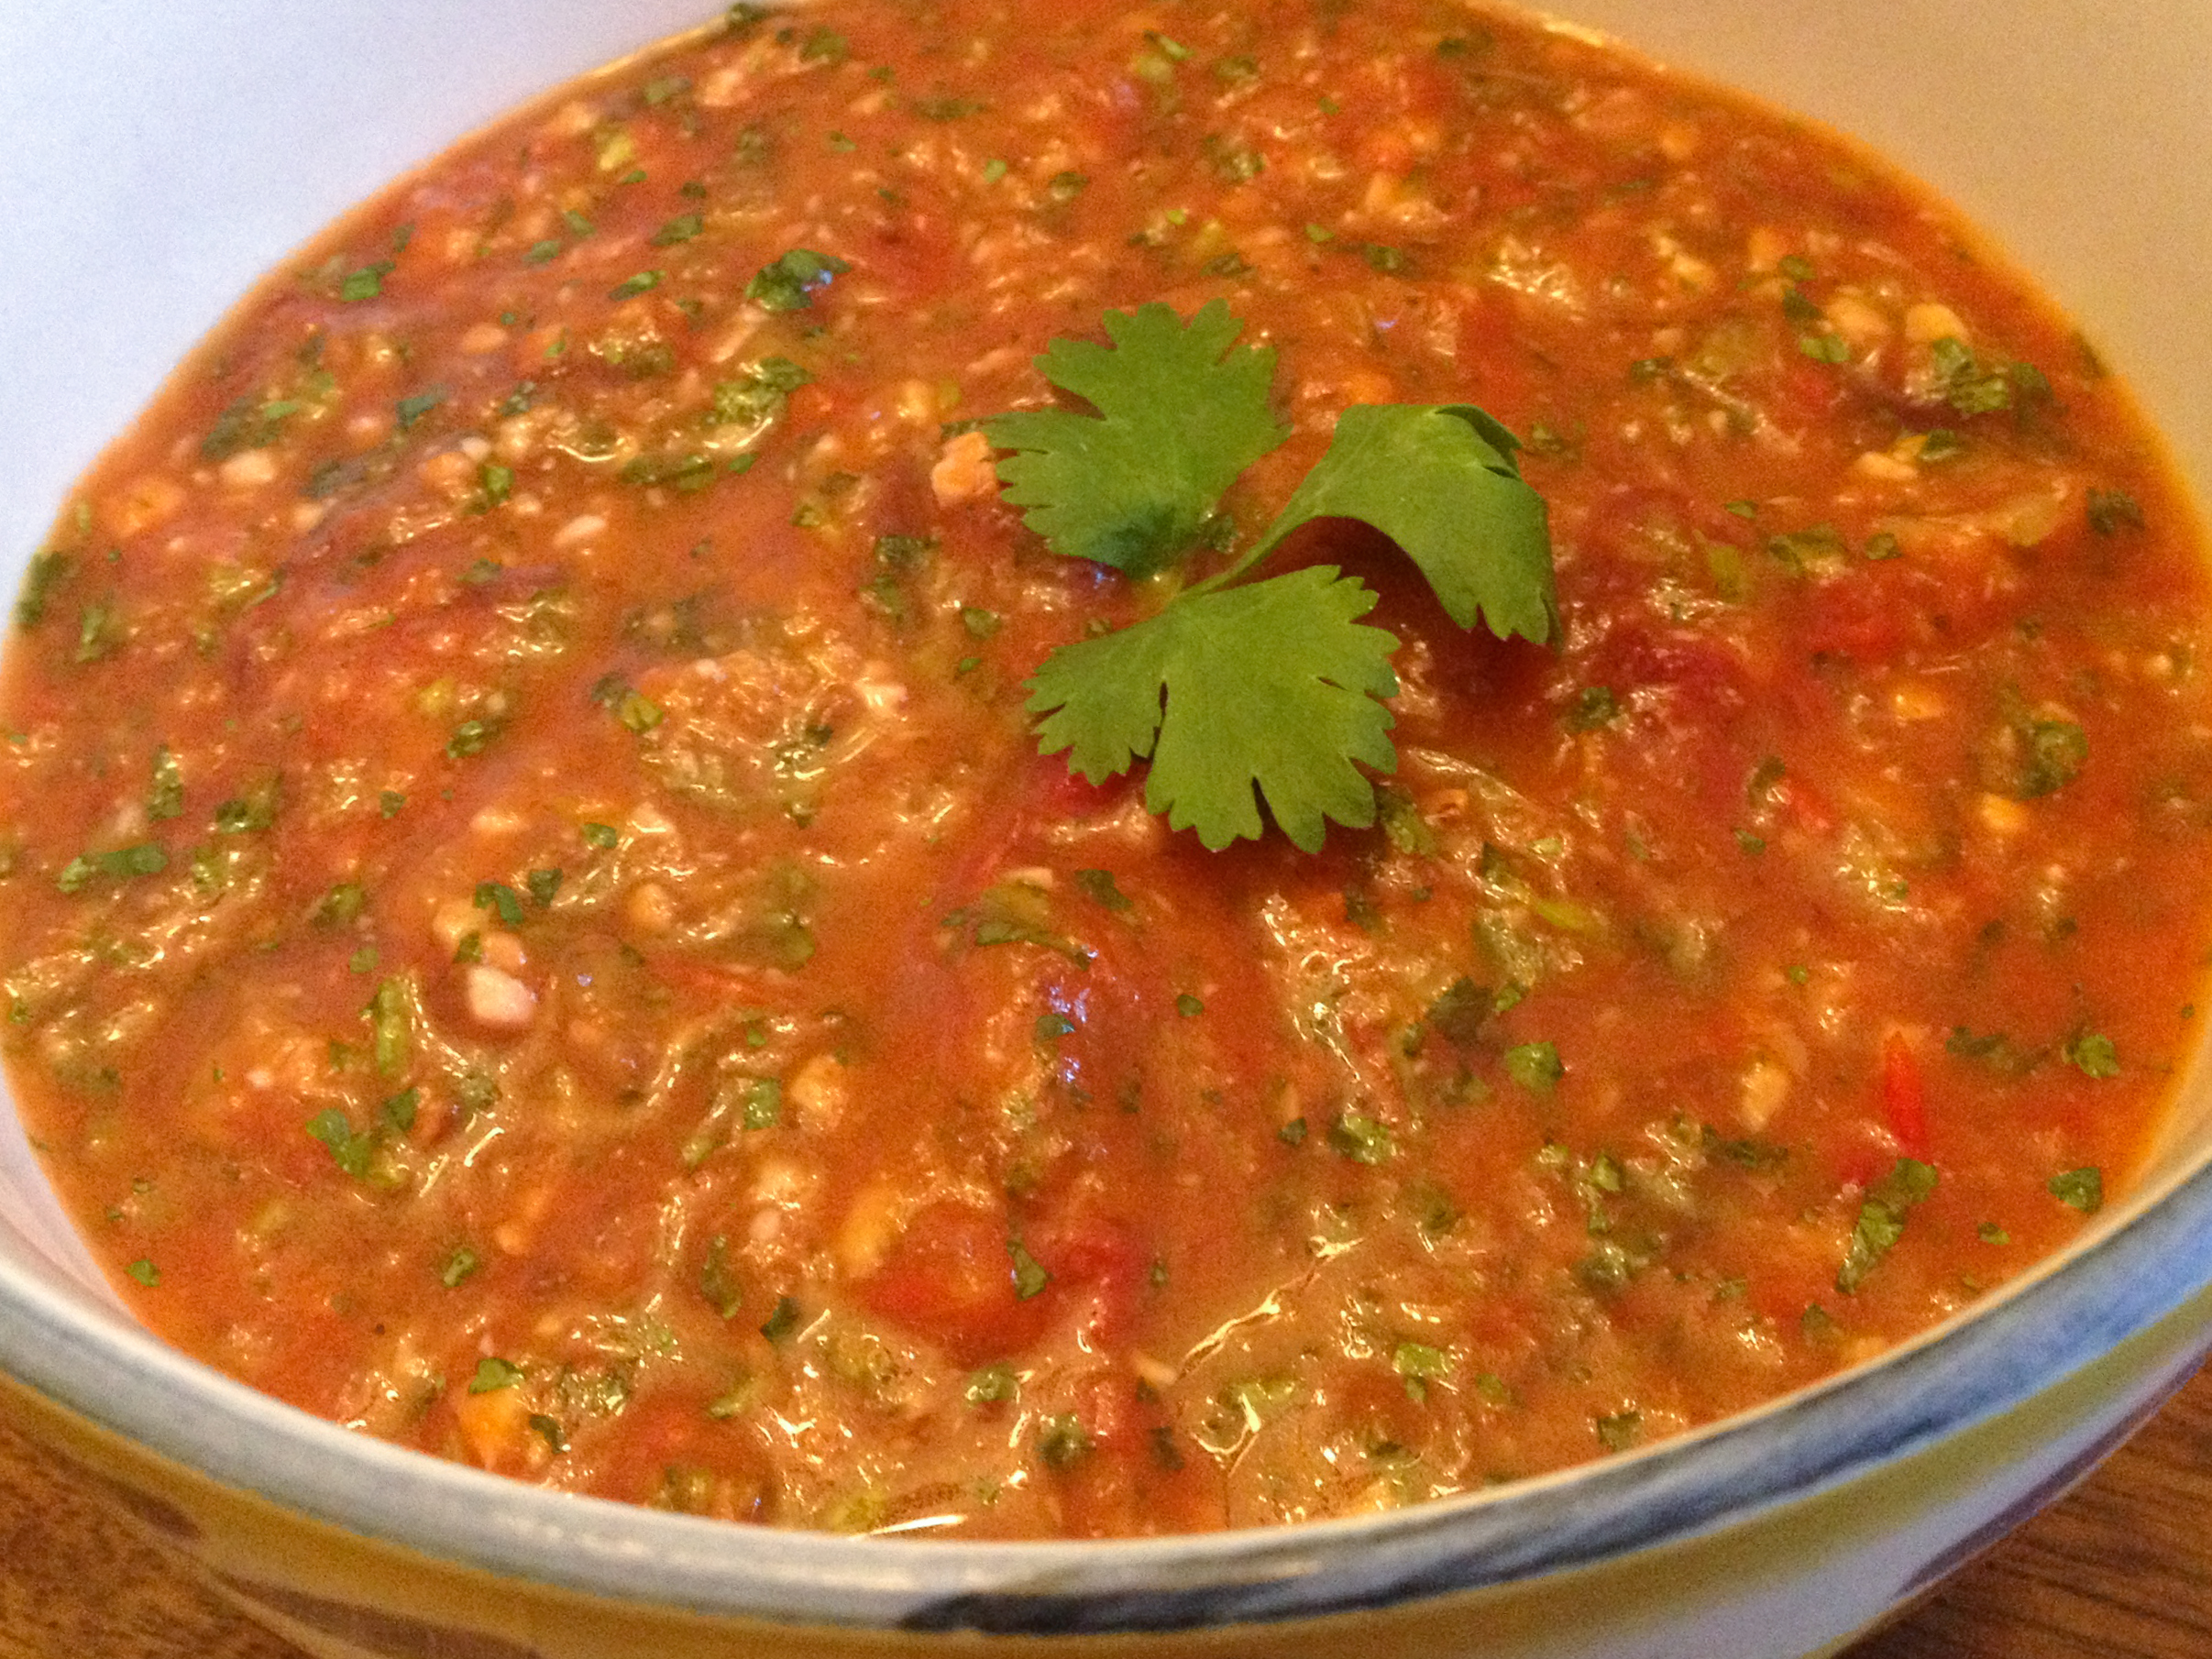
I planted my garden a little late this year, so my tomatoes are just getting ripe now.  My husband loves tomatoes in any form, in any dish.  As for me, the ONE food I don’t like is plain raw tomatoes.  I keep them off my sandwiches and salads.  Every other preparation is fine with me – ketchup, tomato sauce, anything with cooked tomatoes – and especially salsa!  And while I like raw tomato salsas a lot, I like this Roasted Chipotle Salsa even better!
Chiptole peppers in adobo sauce are easy to find – just check your local grocery store in the “ethnic” aisle with all the other Mexican food.  They’re cheap, and they are nearly pickled in the adobo sauce, so once you open the little can, you can keep the rest of the peppers and sauce in a small container in your fridge for months.  (A little Ball jar, or leftover jelly jar, is perfect for this.)  Then, if you find you love the smoky, mild heat of chipotles, use some of the others in your jar to make this dinner salad.  If you can’t find fresh cilantro at your store, you can leave it out, but it really adds a burst of freshness to this spicy sauce!
This recipe made a little more than a cup for me.  That said, my husband and I ate it all in one night!  It was “taco” night at our house, but we were using lettuce leaves instead of taco shells.  Ground beef with onions, avocado slices, and this salsa – delish!
Roasted Chipotle Salsa
Ingredients:
  • 3 regular-sized ripe tomatoes (around 1/2 pound, or a little more)
  • 1/2 onion
  • 3 cloves garlic
  • 2 teaspoons olive oil
  • salt
  • 1 chipotle pepper in adobo sauce (or more if you like it spicy!)
  • 1/2 teaspoon ground cumin
  • small handful cilantro, about half a cup
  • 1/2 lime or lemon
Directions:
  1. Preheat oven to Broil.  Line a baking sheet with aluminum foil.  Slice the tomatoes in half, removing any core or stem you don’t like.  Slice the onion into rounds.  Peel and smash the garlic cloves.  Lay these out on the baking sheet and drizzle lightly with olive oil.  Season with salt.
  2. Broil the vegetables until they start turning brown and are very juicy – about 8-10 minutes, depending on your oven.  Remove from the oven.  Pour the vegetables and any juices into a food processor.  Add in the cumin, chipotle pepper, cilantro, and hit start.  Process for a few seconds, then squeeze in the lime juice.  Process again – leave it chunky!  Taste for seasoning – maybe more salt or lime?  Process again until you reach your desired consistency.  I like mine to still have some texture and not be a puree.  Refrigerate until ready to use.  Tortilla chips, burritos, enchiladas – even over scrambled eggs – this stuff is yummy!

Wednesday, January 9, 2013

Fish Tacos


Fish tacos are a little bite of Southern California, via Baja, Mexico.  You can't have a few of these yummy tacos and a beer and NOT imagine you are near the Pacific Ocean.  If you don't live here, and don't have a Wahoo's or Green Burrito close by, you can make these at home, in a jiffy.  The key ingredient?  The lowly fish stick.  These are muy sabroso (very tasty!) and super easy.  Check out my recipe at GCH: What's on Your Plate!

Thursday, November 22, 2012

Happy Thanksgiving! Leftover Turkey Salad


Happy Thanksgiving, everyone!  I posted a recipe at Girlfriends Coffee Hour today.  It's for my favorite salad, and is a great way to use up turkey leftovers.  I always think of that scene in "A Christmas Story", when the narrator talks about all his favorite ways to eat leftover turkey - and none of them sound very light or healthy.  Try this one, with a fresh Mexican twist, for a great dose of veggies.  Enjoy, and God Bless!

Wednesday, August 15, 2012

Black Bean and Corn Salad


Corn is only around during the summer, which means the clock is ticking if you want to make recipes that benefit from fresh corn, as opposed to canned or frozen.  This is one salad that really needs the bought it, chopped it, ate it kind of corn!

I love how colorful this salad is - the festive colors even LOOK like summer!  And this is a great dish for a potluck or barbecue, because it can be out of the fridge and still taste great (and, uh, not make anyone sick.)  This comes together in a flash - try it this weekend with whatever you decide to grill!

Black Bean and Corn Salad

Ingredients:

  • 1 can black beans
  • 2 ears corn
  • 2 bell peppers (I used one red and one yellow), diced
  • 1/3 cup chopped cilantro
  • 2 green onions, diced
  • 1/2 lemon
  • 1 teaspoon cumin seeds, toasted and ground
  • 2 tablespoons olive oil 
  • salt to taste
Directions:
  1. Rinse the beans and place in a large bowl.
  2. Prepare the dressing:  mix the ground cumin with the juice of half a lemon.  Add the oil and shake, then pour over the beans.
  3. Slice the corn off the cob, and add it to the beans.
  4. Add the peppers, cilantro, and onion and stir thoroughly to combine.  You may want to add a little salt.
Put it in the refrigerator until you're ready to eat.  You can also add chopped avocado to this.  It's delicious and adds a creamy counterbalance to the crunchy peppers.  Just keep in mind that, while this salad is terrific the next day, avocados are not, so eat them all before you put the leftovers away.

Thursday, May 24, 2012

Fajitas Salad with Chipotle Dressing

Just as a painter needs to spend time in nature for inspiration, so must the Frugal Girlmet eat at a restaurant every once in a while, to taste new foods and get new ideas.  Sunday we took the family to Disney's California Adventure and had lunch at Cocina Cucamonga.  I ordered the Fajitas Ensalada.  I wasn't expecting much:  I mean, amusement park food doesn't have the greatest reputation.  But I was very pleasantly surprised!  

The salad was romaine and baby lettuces, topped with grilled chicken, and grilled onions, peppers, and zucchini.  But the best part by far was the chipotle dressing:  creamy, smoky, spicy and piquant.  I ate every last bite, and immediately began plotting how to make it at home.

It was so easy!  Buy a can of chipotles in adobo sauce (they're $1.69, so no big investment required!) and whole cumin seeds, and make this tonight!  (Note:  the veggies and chicken would be even tastier grilled, as they were in the original, but even with sautéed veggies and leftover chicken, this salad was amazing!)  Vegetarian?  Omit the chicken!  This sauce is so awesome, it would be great over grilled veggies - something to keep in mind for your BBQ plans this weekend...

Fajitas Ensalada (a la Frugal Girlmet)

Ingredients:
  • 1 teaspoon cumin seeds
  • 1 large chipotle pepper in adobo sauce
  • 1 large (or two small) cloves of garlic
  • 1/2 bunch cilantro (use the upper stems too!)
  • 1/2 cup mayonnaise
  • 1/2 cup plain yogurt
  • juice of 1/2 lemon
  • 1/2 teaspoon salt
  • 1/4 teaspoon sugar
  • 1 onion, sliced
  • 1 green bell pepper, sliced
  • 1 red or yellow bell pepper, sliced
  • 1 zucchini, sliced into pieces the same size as the bell peppers
  • 1 cup cooked chicken, shredded
  • 1 avocado, sliced
  • Salad greens - spring mix, romaine, whatever you like
Directions:
  1. Toast the cumin seeds over medium heat for a few minutes until they get a little darker and start smelling delicious.  When toasted, grind in food processor or pulverize in mortar and pestle.  (You could use pre-ground cumin, but please don't.  Seriously, that stuff has no odor or flavor.  Buy the whole seeds!)
  2. With cumin in the food processor, add chipotle and a little adobo sauce, garlic, cilantro, mayonnaise, yogurt, lemon juice, salt and sugar.  Buzz to combine.  Taste for seasoning - too spicy?  Add more mayo.  Too tart?  Add a pinch more sugar.  Put the dressing in the refrigerator while you cook the veggies.
  3. Add a little oil or butter to a large pan.  Add the sliced onions and sauté until golden, then add the peppers and zucchini.  Cook until hot and tasty (not for too long, don't let them get mushy!)
  4. To serve:  Lettuce on the bottom, top with hot veggies and shredded chicken, and dress liberally with the chipotle dressing.  Scatter some avocado over the top and dig in!
(The salad was also served with some tortilla chips over the top.  It was nice and crunchy, but I didn't need the extra carbs.  If you want, go crazy with them, but we skipped them and didn't miss them.)

Wednesday, August 4, 2010

Korean Tacos


I'm not a follower of trends; never have been. (Skinny jeans? Ugh, no thank you.) I prefer the tried-and-true basics, the classics that will never go out of style. Food is also subject to trends. 10 years ago you'd have been hard-pressed to find a cupcake outside of a kindergarden birthday party. Fast-forward to today, where gourmet cupcake shops can be found in every city, charging $3 and up for the kiddie confections! What's the newest culinary must-have? According to newspapers and food blogs nationwide, it's the Korean taco.

Korean tacos, a mash-up of Korean and Mexican fare, usually involve marinated "kogi" (Korean for meat) that's been grilled and served in a tortilla, although pork is gaining a following too. Restaurants and food trucks serve them with their own spin; some stay traditional and add only onion or cilantro, while others make cabbage slaws, mango relishes or kimchee purees to top them off.

As luck would have it, my mother-in-law dropped off a package of beef earlier this week. In typical Korean-grocery-store cryptic fashion, it only said "Sliced Chuck." Good enough, I thought - I don't need fancy short ribs for Korean tacos. Any old thinly-sliced (and therefore easily marinating) beef would do. It was pretty, though - nicely marbled, perfectly sliced ... this could be a tasty experiment!

I decided for the first run of Korean tacos, we'd go rustic: just kogi, onions, and cilantro in corn tortillas. I thought maybe it could use a tiny bump in both color and spice, so I threw together a quick Korean taco sauce. The result: delicious, simple, satisfying, and a natural melding of two food cultures. This is one trend I'm glad I followed!

Korean Tacos

Ingredients:
  • 1/2 cup apple juice
  • 1/8 cup soy sauce
  • 2 teaspoons sesame oil
  • 2 or 3 cloves of garlic, minced very fine
  • 1 small onion, finely sliced
  • 1/2 pound finely sliced chuck (you can use another cut of beef and slice as thin as possible at home)
  • 1/2 cup cilantro, chopped
  • 1/2 red onion, sliced very thin
  • small corn tortillas
Directions:

  1. Place the first six ingredients in a Ziplock bag, squish around to combine, and refrigerate for at least 2 hours, but 24 hours is preferable.
  2.  Grill or fry the beef (discarding the marinade, but feel free to cook up any onion slices or garlic chunks you can fish out.) Depending on the thickness of your meat, this could take anywhere from 2 minutes per side to longer, like if you marinated a flank steak.
  3. Warm the tortillas quickly in a dry saute pan over low heat, and top with meat, cilantro and onions. You can give it a squirt of regular hot sauce, or you can try my Korean version:
  • 1/2 teaspoon Korean hot pepper paste (gochujang) or more, if you're brave
  • 1 teaspoon sesame oil
  • 1 teaspoon soy sauce
  • 1/2 teaspoon sugar
Whisk the ingredients together and enjoy on your trendy kogi tacos!

Friday, July 23, 2010

Summer Dinner Salad, Part I

After a big pot of soup, the dinner salad is the easiest way to use up leftovers. Let's say it's Monday and you just got home from work. You open the fridge and see the chunk of flank steak and one ear of grilled corn from your weekend BBQ. You could either take it to work tomorrow and eat it for lunch -- a perfectly acceptable solution, saving you time and money and not wasting any food. But that's kinda boring - it's the exact same thing you ate when you made it the first time. Leftovers DO NOT have to mean repeats!

So what do you do? You make a dinner salad! You're using a fraction of the meat you'd normally need to feed the family (stretching the budget, and let's face it, saving wear and tear on your colon. We could all stand to eat less flesh.) Salads are a great way to use up cooked veggies, meat, eggs, cheese - almost anything can ride a salad and be the better for it.

The keys to making exciting (yes, I said exciting) salads are add-ins and dressing. The add-ins are your leftovers, nuts, raisins, croutons, cheese, herbs, etc. - anything that sits on top of your bed of lettuce. The dressing is what ties your creation all together thematically. The salad pictured above had some Mexican flavors going for it - the flank steak, the grilled corn - so I made a southwestern vinaigrette.

And that's all you need! Summer salads don't get better than this! Serve with whatever bread you have lying around (or mmmmm, cornbread!) or for a heartier meal, fry up some quesadillas. Que sabor!

Southwestern Dinner Salad

Ingredients:
  • 1 bag of salad greens (I like Trader Joe's varieties)
  • 1 piece of leftover beef - flank, steak, whatever, sliced thin, or even a crumbled-up burger
  • 1 ear of grilled corn, kernels cut from the cob
  • 1/4 red onion, sliced very thin
  • 1/2 red or yellow bell pepper, sliced very thin
  • 1/2 can black beans, rinsed well
  • handful of cherry tomatoes, sliced in half
Vinaigrette:
  • 1 tablespoon cumin seeds
  • 1/4 teaspoon dried oregano, or 1 teaspoon fresh oregano
  • 1 clove garlic
  • 3 tablespoons fresh-squeezed orange, lemon or lime juice
  • 2 tablespoons rice wine vinegar
  • splash of balsamic vinegar
  • 1/2 teaspoon salt
  • 1/2 teaspoon sugar
  • 1/4 cup olive oil
Directions:

  1. Put the cumin seeds in a small pan and toast over medium-low heat. This will take 3 - 5 minutes - just make sure they don't burn. You want them darker and smelling wonderfully and just starting to smoke. Remove from heat. Ideally, grind finely in a mortar and pestle, or if you don't have one, put the cumin in your food processor and buzz until they are as finely ground as you can get them.
  2. Transfer the ground cumin to your food processor and add the oregano and garlic, and buzz again. Add the sugar, salt, juices and vinegars and process again.
  3. Add the olive oil to the food processor and buzz again. Taste for seasoning (more acid? More sugar?) and serve.

Serves two. You can make fancy platings for your salad, but I just lay the lettuce down and throw everything else on top. Other options for add-ins that go well with this dressing are avocado, chopped cilantro, and cotija cheese.

Saturday, July 17, 2010

Enchilada Casserole or Mexican Lasagna ... Enchilasagna?


I really admire people who plan out their menus for days or even weeks ahead of time. I just can't seem to get that organized. So while others know how many zucchini they'll need for the week, I fly by the seat of my pants, and buy whatever looks good at the farmer's market and grocery store. This is great fun, but of course, it inevitably leads to me looking at single veggies in the crisper drawer, wondering how to make use of everything before it can go bad.

This recipe for an enchilada casserole came from a "perfect storm" in my fridge. I had a chicken carcass that needed attention (I'd used the legs and most of the breasts two days earlier, in my "French Chicken" (recipe to follow later)), some leftover brown rice, four zucchinis, and three ears of corn that were all about to outstay their welcome in the refrigerator. What to do?

Thankfully, ripe summer produce means Mexican food. Tomatoes, zucchini, corn, beans, squash, peppers and herbs are all looking great (and cheap!) at the farmer's market, so I'm sure you can re-create this, or something like it, very easily, where ever you are, this summer. If you want to make it vegetarian, leave out the chicken and add another can of beans - maybe pinto.

Enchilada Casserole / Mexican Lasagna ... Enchilasagna?

Ingredients:
  • 1 red onion, sliced approximately 1/8" thin
  • 3 ears of corn, sliced from the cob (you could use canned, but it won't be as tasty)
  • 4 smallish zucchini, sliced approximately 1/8" thin
  • 1 1/2 or 2 cups cooked rice (I used brown)
  • 3 cups cooked chicken, shredded, from one chicken carcass
  • 1 14-oz. can of black beans, drained and rinsed
  • 2 oz. tomato paste
  • 2 cups enchilada sauce (recipe below)
  • 1 36-count bag small corn tortillas
  • 2 or 3 cups shredded cheese (I used mozzarella and jack)

Directions:
1. Cook the carcass in enough salted water to cover. Boil until chicken is cooked through and easy to remove from the bone. Take the chicken out of the pot and place in a bowl to cool. If you are making your own enchilada sauce, reserve two cups of the water for that recipe.
2. While the chicken is cooling, slice your zucchinis and onion thinly. Cut the corn kernels from the cobs, and saute the corn, onion and zukes in a little butter in a very large pan. Salt, and stir occasionally to prevent sticking. You just want the onions to color a little, and the zucchini to give up some moisture.
3. Pour the vegetables from the saute pan into a large bowl. Add the rice, and the can of black beans.
4. Take all the meat off the chicken carcass, shred or chop, and add to the veggies and rice. Add in the tomato paste. Give it all a good stir.
5. Preheat your oven to 350 F. Spray a 9" x 13" baking dish with Pam, then smear a thin layer of enchilada sauce on the bottom of the pan. Cover this layer with tortillas, overlapping as needed. I used seven tortillas per layer - two rows of three, and one cut into quarters, pointy ends in the corners. On top of the tortillas, spread another layer of enchilada sauce, then half the chicken veggie mix, pressing down to cover the tortillas and sauce evenly. Sprinkle with 1/3 of your cheese. Follow with more tortillas, sauce, the rest of the chicken, another 1/3 of your cheese, and finish with tortillas, sauce and the rest of the cheese.
6. Cover with foil and bake for about 20 minutes, until the cheese is melty and everything is hot inside. Remove the foil and bake another 5 minutes.

Makes 6 servings. Goes well with salad and a beer. Garnish with cilantro or sour cream, if you are fancy.

Enchilada Sauce
(Courtesy of Emeril Lagasse)

Ingredients:
  • 3 tablespoons vegetable oil
  • 1 tablespoon flour
  • 1/4 cup chili powder
  • 2 cups chicken stock (I used the water I boiled my chicken in: multi-purposing!)
  • 10 ounces tomato paste
  • 1 teaspoon dried oregano
  • 1 teaspoon ground cumin
  • 1/2 teaspoon salt
(I also added 1/8 teaspoon ground cinnamon)

Directions:
1. In a medium saucepan, heat oil, add flour, smoothing and stirring with a wooden spoon. Cook for 1 minute. Add chili powder and cook for 30 seconds.
2. Add stock, tomato paste, oregano, and cumin. Stir to combine. Bring to a boil, reduce heat to low and cook for 15 minutes. The sauce will thicken and smooth out.

This sauce turned out GREAT! Here's the trick: Tomato paste comes in little 6 oz. cans. Use 10 ounces for the enchilada sauce, and you'll have two ounces left over to stir into the chicken and veggies in Step 4 of the Enchilasagna. Cool, right?