Showing posts with label Chicken. Show all posts

Friday, March 6, 2015

Easy Chicken Mole

Easy Chicken Mole
The first time I had mole (say moe-lay) it was at a small but very well-regarded Mexican restaurant in Los Angeles, La Loteria.  I had heard of mole poblano before and decided to take a chance.  Que rico!  What a glorious taste!  It was rich, a tiny bit spicy, a little bitter, and a little fruity.  It was really a savory fiesta in my mouth.  However, when I went home with the intent to find out more about this magical dish and how to make it, all the recipes I saw were 40 ingredients long and took days to make.  No me gusta – I just didn’t have time to mess with that.  So after some more research, I came up with this recipe – my Easy Chicken Mole!
The two ingredients that most moles share to give them such depth of flavor are dried chiles and chocolate.  Really!  Buy the darkest chocolate you can find.  You can use baker’s unsweetened chocolate, but that will make it bitter, and you’ll probably want to bring it back around with some added honey or brown sugar.  I used bittersweet chocolate, 63% cacao.  I think it worked well, and next time I might even add a little more.
As far as the chiles go, it gets a little confusing.  Oftentimes a chile will have one name when it’s fresh and a different name when it’s dried (I guess kind of like grapes vs. raisins.)  To be honest, I think I bought ancho chiles, but I’m not sure – there were two kinds and neither were labeled!  You want chiles that are a very dark reddish-brown—like the color of dried blood—and about fist-sized.  I used two but I may use three or even four next time.  I removed the seeds, and that’s where the heat resides, so you only get the smoky, fruity flavor of the chiles and not the spiciness.
Try this recipe.  If you’ve never had mole, this is a great place to start.  If you are a mole aficionado, go ahead and tweak my recipe to get the taste you like.  Either way, I bet you’ll say, Que sabor!  (Or if you don’t habla espanol, ‘So tasty!’)
Easy Chicken Mole
Ingredients:
  • 2-4 dried chiles (use ancho, pasilla, or guajillo)
  • 2 onions, chopped
  • 4 tablespoons butter
  • 4 cloves garlic, minced
  • 1/4 cup sesame seeds (or use pepitas, peanuts, or almond butter)
  • 1/4 cup dark chocolate chips
  • 1/4 cup raisins
  • 1/2 teaspoon ground cinnamon
  • 1/2 teaspoon salt
  • 1/2 teaspoon dried oregano
  • 2 cups chicken stock
  • 1/2 cup brewed coffee
  • 2 slices bread
  • 2 pounds boneless, skinless chicken thighs (or use breasts, up to you!)
  • diced avocado, cilantro, sesame seeds to serve
  • rice or tortillas to serve, optional
Directions:
  1. Put the dried chiles in a bowl and cover with boiling water.  Put a plate over the bowl and let the chiles soak for about 15 minutes.  When they have softened, remove the stem and seeds and roughly chop.  Discard the stem, keep some seeds if you want some heat.
  2. While the chiles are soaking, cook the onion in the butter in a very large pot or Dutch oven.  Stir to make sure they don’t burn.
  3. Add the chopped chiles, minced garlic, and sesame seeds.  Stir and cook for 3 minutes.
  4. Add the chocolate, raisins, cinnamon, salt, and oregano.  Stir to combine and cook for another 2 minutes.
  5. Add the chicken stock and coffee.  Crumble in the bread.  Cover the pot with a lid and simmer for 10 minutes.
  6. CAREFULLY transfer sauce to a blender and blend until pretty smooth.  You could use an immersion blender, too.
  7. Return the sauce to the pot and add the chicken thighs.  Tuck them into the sauce and stir.  Make sure the chicken is covered in sauce, then cover with the lid.  Let simmer for about 25 minutes.
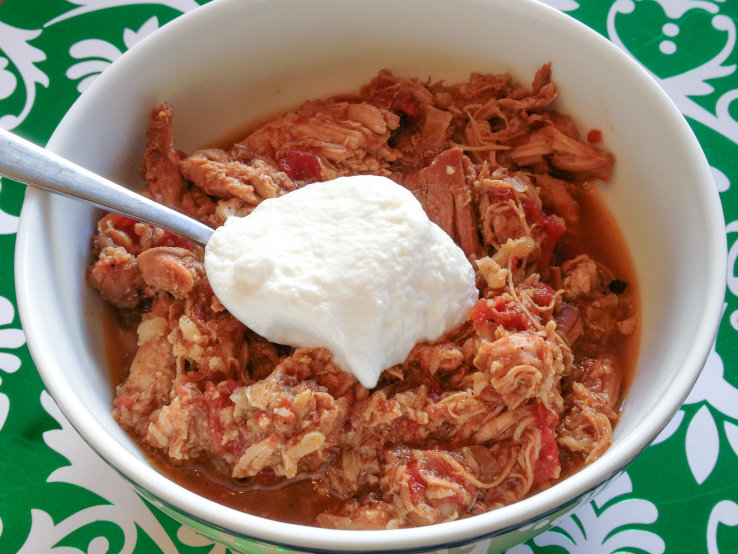
  8. The chicken is done when you can shred it with forks.  To serve, ladle the chicken and lots of mole into a bowl.  Garnish with lots of avocado, cilantro and sesame seeds.  You can also eat this in tortillas – just serve with less sauce if you are making tacos.  You can also serve it over rice to soak up the sauce.

Saturday, June 7, 2014

Crockpot Chicken Curry and Curry Chicken Stew


Two for the price of one!  That’s what you get when you start this recipe in the crockpot.  It’s not very glamorous, but oh boy! does it smell and taste divine!  A simple list of ingredients  and a crockpot are all you need to make two delicious meals: Crockpot Curry Chicken and Curry Chicken Stew!
First you need a can of coconut milk or coconut cream.  It needs to be a can, because the coconut milk “beverage” they put in cartons is all watery, and you need the high fat content of the canned stuff.  Trader Joe’s has both canned coconut milk and coconut cream, or you can try an Asian market or online.  Next thing you need is curry.  You can use curry paste; I just used curry powder and it was lovely.  You’ll need an 8-ounce package of mushrooms, any kind – I used regular button mushrooms, but shiitakes or creminis would be nice too, and give it a stronger flavor.  And last is this beauty:
Chinese Broccoli resize
I buy it at the farmer’s market from a Vietnamese lady who tells me it’s called “Chinese broccoli”.  A little online research shows its real name is kai lan.  Its leaves are like spinach, and its cooked stems have the consistency of asparagus.  If you can’t find it, use spinach instead…although the Chinese broccoli has a stronger, more bitter flavor.
I made this with whole chicken legs – skin, bones and all – but I think next time I’ll try it with just boneless, skinless thighs.  Chicken skin in the crockpot is not a nice thing – we actually peeled it off before we ate the Curry Chicken the first night because it just seemed kind of rubbery.  But I think the skin and bones do add to the stock for the stew the next day, so it’s up to you.  Either way, you get two healthy, delicious meals out of one crockpot – you can’t beat that!
Crockpot Curry Chicken
Ingredients:
  • 3 pounds whole chicken legs
  • 1 can of coconut cream, or use coconut milk (not low-fat)
  • 3 tablespoons curry powder or curry paste of your choice
  • juice of 1 lemon or lime
  • 1 tablespoon salt
Directions:
  1. In a large crockpot, set the time for 8 hours on low or 4-6 on high.  Put the chicken legs on the bottom.
  2. Mix together the coconut cream, curry, lemon juice and salt.  Pour over the chicken and stir to combine.
  3. Cook until a thermometer reads 180*F.  Remove chicken legs from the pot and cover them with foil.  Pour the coconut broth into a large pan and simmer for about 15 minutes.  It will reduce a little.  Serve chicken legs with coconut broth.
Now, at this point, I had 2 very large legs leftover and about a cup of coconut broth.  I put them together in a Tupperware container.  Then the next day, I made…
Curry Chicken Stew
Ingredients:
  • 1 tablespoon butter, coconut oil or olive oil
  • 8 ounces mushrooms, quartered
  • 1 pound Chinese broccoli, cut into 2-inch pieces  (or use fresh spinach)
  • 2 large cooked chicken legs (or use 1 pound of chicken thighs)
  • leftover coconut broth – as much as you have
  • optional chicken broth
  • optional jasmine rice to serve
Directions:
  1. In a large pan, saute the mushrooms in 1 tablespoon butter, coconut oil, or olive oil.  Stir, and after five minutes, add the Chinese broccoli and cover.
  2. While the mushrooms are cooking, prepare the chicken:  peel off the skin and any subcutaneous fat you find from the cooked chicken legs.  Remove the meat from the bones and roughly chop.
  3. Add the chopped chicken and remaining coconut broth to the mushrooms and Chinese broccoli.  If you want it to be soupier, add some chicken broth.  Cook until the chicken is hot, about ten minutes.
This would be lovely with some steamed jasmine rice!  I ate this for lunch, and liked it so much I ate it again for breakfast.

Saturday, April 26, 2014

Tzatziki Wrap


What a fun word to say:  Tzatziki!  With spring in full swing now, I am in love with using fresh herbs in as many ways possible.  This recipe for my Tzatziki Wrap uses a small handful of dill. Dill is a lovely thing to grow in a windowbox, if you can, or in your garden, because it goes with so many other flavors and cuisines.  If you have leftover dill after making the tzatziki, use it on fresh or smoked salmon.
Tzatziki is just a fancy way to say “yogurt dip.”   It is found in Greek and Mediterranean dishes, and goes well with all grilled meats—chicken, beef, lamb, salmon—as well as vegetarian dishes like falafel.  Blend this up in your food processor in five minutes, and enjoy for lunch or a light dinner tonight!
Tzatziki Wrap 
(Makes two wraps)
Ingredients:
  • 1/2 cup plain yogurt (Greek yogurt or regular.  Avoid nonfat as the texture is too runny)
  • 1 big handful dill sprigs, any tough parts trimmed away
  • juice of 1/2 lemon
  • salt and pepper
  • 1 teaspoon minced garlic
  • 1/2 large cucumber, peeled and seeded
  • 1/2 red bell pepper
  • 1/2 green bell pepper
  • 1 cup baby spinach, or a few leaves of romaine lettuce
  • 1 cooked chicken breast
  • tortillas or pita bread for wrapping
Directions:
  1. Make the tzatziki:  In a food processor or blender, blend the yogurt, dill, lemon juice, salt, pepper, and garlic together.  Cut the half a cucumber in half again, and add one half to the blender and combine.  (You should now have one-quarter of a cucumber left.  Math!)  Refrigerate the tzatziki until ready to use.
  2. Slice the peppers and cucumber into very fine strips.  If you are using romaine lettuce, wash and dry the leaves and stack them on a cutting board.  Cut the leaves into fine strips.  Mix the peppers, cucumber, and lettuce in a large bowl and toss to combine.
  3. Very thinly slice the chicken breast.  Prepare your tortilla or pita bread for filling.  (I always warm up tortillas in the microwave, covered with a damp paper towel, so they’re pliable and won’t break.)  Fill tortilla with chicken breast slices, vegetables, and a big drizzle of tzatziki.  Roll up and eat, with more tzatziki if you like.
  4. Cutting carbs, or do you have leftover wrap filling?  Toss with tzatziki and eat it like a salad!  It also goes great as a dip—try with carrots.


Saturday, January 11, 2014

Chinese Chicken Salad


Chinese Chicken Salad Resize
Did you know that January is National Soup Month?  Sounds perfect to me - a big bowl of soup and a salad makes one of the best lunches imaginable.  One of my favorite salads is Chinese Chicken Salad!
This is perfect for winter, because all of the ingredients are in season now.  Instead of canned mandarin oranges, you can probably find fresh ones now – I’ve got Clementines and Satsumas left and right at my grocery store.  Red cabbage and carrots are always around, as are green onions.  For the base, I used Napa cabbage, but if you don’t have that, you can use any kind of lettuce you like, or really finely chopped green cabbage.  I cooked some extra chicken breasts last night so I could chop them up cold and throw them over the salad, but you can use whatever chicken you like – roasted, store-bought rotisserie, or even breaded chicken nuggets!
This recipe serves two as part of a lunch or dinner menu.  Try this salad with any soup you like, or paired up with a sandwich, wrap, or pasta dish.  Filling, nutritious and delicious – and it won’t break any of your New Year’s resolutions!
Chinese Chicken Salad
Ingredients:
  • 1 small head Napa cabbage, or romaine lettuce
  • 1/2 head small red cabbage
  • 2 carrots
  • 2 or 3 green onions
  • 2 mandarin oranges
  • 2 cooked chicken breasts, or 3 cups chopped cooked chicken
  • 2 tablespoons sesame oil
  • 2 tablespoons rice vinegar
  • 1 tablespoon sesame seeds
  • salt and pepper to taste
Directions:
  1. Chop the Napa cabbage into inch-wide strips.  Finely slice the red cabbage.  Place both in a salad spinner and rinse under cold water, then spin dry.
  2. Cut the carrots into matchsticks.  Finely slice the green onions.  Peel the oranges and remove as much of the white pith as possible.  Separate into segments.  Dice or thinly slice the chicken breasts.
  3. To assemble:  In two very large bowls, mix together the cabbages, carrots, and onions.  Arrange the oranges and chicken breasts on top.  Drizzle each salad with one tablespoon each of sesame oil and rice vinegar, and sprinkle the sesame seeds, salt, and pepper on top.

Friday, December 27, 2013

Zoe's Crockpot Chicken


Zoe's Crockpot Chicken resize
This past weekend, I invited my best friend and her family up to our house for dinner.  Instead of trying to make a meatloaf large enough to feed eight people, I decided to use my two crockpots to save time and effort in my prep.  In the one, a mushroom pot roast.  In the other, I made a lightly curried pot of chicken thighs.  I wasn’t sure if my friends’ kids would like it – they’re eight and ten years old, and I didn’t know if it would be a hit.  Ten year-old Zoe took one bite and her face lit up.  ”Mama,” she excitedly told my friend, “you have to ask Dana for this recipe so you can make it at home!”  I have to tell you, I’ve never been so proud of a recipe in all my life!  This, then, will be called Zoe’s Crockpot Chicken.
You can use one or two pounds of boneless, skinless chicken thighs.  If you use one pound, you’ll have more sauce, and will probably want to serve this over rice or noodles.  If you use two pounds, like I did this time, it’s a thicker stew and doesn’t need anything under it – but jasmine rice would certainly be delicious.  Use any store-bought curry powder you like.  I have two, and the one I used this time was just a $4 jar from Trader Joe’s – nothing fancy.  I also used half a head of cauliflower, diced.  It doesn’t add much to the flavor, but it adds nutrition and body to the sauce.  I like to garnish with a big dollop of plain yogurt, and if you have cilantro, sprinkle some of that on top.  If you need a quick chicken dish that promises to please grown-ups and kids alike, check this one out.
Zoe’s Crockpot Chicken
Ingredients:
  • 1 large onion, sliced fine
  • 1 or 2 pounds chicken thighs
  • 2 tablespoons curry powder
  • 1/2 teaspoon salt
  • 15 ounce can of diced tomatoes (I like fire-roasted)
  • plain yogurt and cilantro to garnish, optional
  • rice or noodles, optional
Directions:
  1. Place the sliced onions on the bottom of the crock pot.  Layer the chicken thighs on top.  Season well with curry powder and salt.  Open the can of tomatoes and dump on top.
  2. Cover and cook on high for 4 hours or low for 6 hours.  When ready to serve, shred the chicken with a fork and mix all the ingredients.  Serve on top of optional rice, garnish with optional yogurt and cilantro, and enjoy!

Monday, December 2, 2013

Chicken with Fennel and Olives


Chicken with Fennel and Olives resize

I hope everyone had a lovely Thanksgiving!  If you have leftovers, by all means, eat those first.  Once you finish off your turkey, ham, or whatever else you had, try this recipe for Chicken with Fennel and Olives.
Fennel is in season now and has a delicious anise flavor.  When you are shopping for the olives, buy the biggest green olives in a jar you can find – sometimes they’re called Queen olives – and make sure they’re pitted.  You can find them plain, but I used a jar of large green olives stuffed with cloves of garlic.  Amazing!  You can also find them stuffed with almonds (but for this recipe, I would avoid the ones stuffed with blue cheese or hot peppers!)  This recipe also calls for a cup of white wine.  Use a chardonnay, sauvignon blanc, or pinot grigio – these are dry white wines that will pair perfectly with the chicken.  If you prefer, you can substitute chicken broth.
This is a healthy, light recipe that will warm your house and keep you from feeling like a slug after all the Thanksgiving feasting is over.  (But feel free to have that last piece of pie for dessert!)
Chicken with Fennel and Olives
Ingredients:
  • 1 whole chicken, or a package of skin-on chicken thighs, or skin-on chicken breasts
  • 2 tablespoons olive oil or bacon fat for cooking
  • 1 large fennel bulb
  • 1 large onion
  • 1 jar large green pitted olives
  • 1 cup dry white wine (or substitute chicken broth)
  • salt and pepper to taste
Directions:
  1. Preheat oven to 375F.  If you are using a whole chicken, remove the legs and breasts – you should have 4 pieces.  Reserve the rest of the chicken for soup or another use.  Season the skin with salt.
  2. In a very large oven-proof pan, heat the olive oil or bacon fat.  When very hot, add the chicken pieces skin-side down and cook over medium heat for about ten minutes.  When chicken skin is crisp, remove the chicken pieces from the pan and place skin-side up on a platter and set aside.  Set the pan aside – do not drain!
  3. While the chicken is cooking, slice the onion into thin strings.  Cut off the stalks of the fennel, but keep a few green fronds for garnish.  Cut the fennel into very thin rings or slices, about the same size as the onion.  Drain the jar of olives and slice the olives in half.
  4. Heat the pan again and add the wine, stirring to scrap up any stuck-on bits of chicken.  Add the onion, fennel and olives and stir to combine.  Remove from heat.  Place the chicken pieces skin-side up (so it stays crispy) on top of the bed of vegetables and place in the oven.
  5. Cook for 30 minutes.  Use a meat thermometer to check for doneness.  To serve, make a bed of vegetables, place a chicken piece on top, and add a sprig of fennel frond.  Season with salt and pepper.

Tuesday, July 30, 2013

Roasted Chicken and Broccoli with Raisin Sauce


Roasted Broccoli and Chicken with Raisin Sauce
Wait, wait, where are you going?  This isn’t a joke!  Raisin sauce!  It’s real, and it’s delicious!
Let me back up a bit.  We love roasted broccoli at our house.  We eat it two, sometimes three times a week.  And while I enjoy it, I really do, there came a day (last week) when I wanted to add a little something new to our dinner repetoire.  Google is my friend, and I quickly came across several different recipes for Broccoli with Raisin Sauce.  Well, if so many other people thought it good enough to make, photograph, and write about, it must be worth a try.
And it was an unmitigated success!  This simple sauce has it all – sweet and spicy, with a little bite from the vinegar.  I served this with roasted chicken thighs, and the raisin sauce was amazing with those too!  For an easy dinner, roast the broccoli on one sheet pan, chicken thighs on another, and make the sauce when they’re done.  Be bold, try something new, and surprise yourself with a funky, fun new recipe!
Roasted Broccoli and Chicken with Raisin Sauce
Ingredients:
  • 3 large bunches of broccoli, chopped into florets
  • 1 to 1 1/2 pounds boneless, skinless chicken thighs
  • salt and pepper
  • 9 tablespoons olive oil, divided
  • 1/2 cup raisins (I used golden raisins, but use what you like)
  • 2 tablespoons sherry or red wine vinegar
  • 1/2 teaspoon ground cumin
Directions:
  1. Preheat oven to 400*F.  Line two cookie sheet pans with aluminum foil.  On one pan, lay out the chicken thighs, making sure there is room between them; don’t crowd.  Drizzle with 3 tablespoons of olive oil, and sprinkle with salt and pepper (and a little garlic powder is nice too).  Place in the oven on the top rack.
  2. On the second sheet pan, spread out the broccoli florets and drizzle with 3 tablespoons of oil.  Sprinkle with salt and place in the oven on the bottom rack.
  3. While the chicken and broccoli cook, make the raisin sauce:  combine remaining 3 tablespoons of oil, raisins, vinegar, and cumin in a blender or food processor.  Blend until relatively smooth – until the raisins are broken down and saucy.
  4. The chicken is done when a thermometer reads 160*F, and the broccoli is done when it’s getting some crispy brown spots.  Serve both with the raisin sauce!

Tuesday, April 23, 2013

Chicken en Papillote with Homemade Pesto


One of the tenets of the Paleo diet, especially when you are exercising a few times a week, is making sure you get enough protein.  I confess, as a former vegetarian, I don't always enjoy meat.  Chicken breasts in particular can be tough for me to get down, since they so often turn out dry and mealy.  But they are such an easy and versatile source of protein - how do I make them moist and flavorful instead of chalky and yuck?

This recipe solved my chicken breast dilemma!  Cooking "en papillote" means cooking in paper - parchment paper to be exact.  Cooking the breasts with some vegetables inside a sealed packet means all the moisture stays locked inside.  Groovy!  Even better?  The homemade pesto adds flavor, fat, and a burst of fresh green springtime color.

If you need a clean source of protein, check out the recipe.  If you love pesto, check out the recipe.  And if you like both, definitely read on at GCH!

Thursday, November 22, 2012

Happy Thanksgiving! Leftover Turkey Salad


Happy Thanksgiving, everyone!  I posted a recipe at Girlfriends Coffee Hour today.  It's for my favorite salad, and is a great way to use up turkey leftovers.  I always think of that scene in "A Christmas Story", when the narrator talks about all his favorite ways to eat leftover turkey - and none of them sound very light or healthy.  Try this one, with a fresh Mexican twist, for a great dose of veggies.  Enjoy, and God Bless!

Saturday, November 17, 2012

Chicken with Hollandaise


If it were my last day on Earth, I would have something with hollandaise for every meal.  My Mom made a dish called Chicken Falbrook, which was a pan-fried chicken breast with hollandaise sauce and sliced avocado.  It was rich and delicious, my first encounter with hollandaise sauce, and it was love at first bite!  Unfortunately, making hollandaise can be tricky - I remember Mom stirring and stirring the sauce over a double-boiler, fingers crossed that it wouldn't curdle.  Needless to say, we only ate it on special occasions, since the sauce was so finicky.

My Mom never learned the greatest innovation in French sauce technology:  Julia Child's Blender Hollandaise!  What a revelation!  No more double-boiler, no more whisking and praying!  Once I discovered it online, I searched for Mom's recipe, but couldn't find it.  Chicken Falbrook is nowhere to be found in Mom's cookbooks or online, so I'm guessing it's something she and my Dad had at a restaurant, and she reverse-engineered it at home.  In any case, Julia, Mom and I have collaborated to make the richest, most delicious, and easiest Chicken with Hollandaise ever.  I always serve it with steamed broccoli, because broccoli and hollandaise are a treat in themselves.  Asparagus would also be great - use fresh and steam it til it's just tender.

Chicken with Hollandaise

Ingredients:

  • 4 boneless, skinless chicken breasts
  • salt and pepper
  • 1/4 cup flour
  •  oil for sautéing
  • 1 1/2 pound broccoli
  • 1 stick butter
  • 3 teaspoons lemon juice
  • 2 egg yolks
  • pinch cayenne pepper (optional)
  • 1 avocado
Directions
  1. Place each breast between two sheets of plastic wrap and pound down to 3/8-inch thickness.  Season with salt and pepper and dredge in flour.  In a large sauté pan over medium heat, add the oil, and brown chicken on one side, for about 10 minutes.  Lower the heat to medium-low and brown the other side, about 8 minutes.  Remove chicken from heat and keep warm on a plate under a tent of foil.
  2. Meanwhile, steam the broccoli - I always do this in the microwave.  Keep warm.
  3. In the microwave, melt the butter.  You want it hot and liquid!  In a blender or food processor, blend the egg yolks, lemon juice and cayenne pepper for 30 seconds.  Then add a tiny bit of the melted butter, blend for ten seconds, and repeat, adding the butter in a thin stream, or a bit at a time, and blending in between additions.  When all the butter has been added, blend for 20 seconds.
  4. To serve, pour a generous amount of hollandaise on the chicken breast, top with 1/4 avocado, sliced, and  a side of broccoli.  Try not to lick the plate when you're done!

Wednesday, June 27, 2012

Chicken Satay Skewers with Peanut Sauce


Summer is here, time to get grilling!  While I love barbecue chicken, it's nice to mix it up a little.  Time to try some Thai!

When trying a new recipe, I like to read as many different versions of it as possible, online and in cookbooks, and then synthesize my own.  For example, about 75% of the recipes I read for the chicken marinade included yogurt, so I decided to use that as a base.  Only 25% used coconut milk, and since I didn't have any in my pantry, and since it was in the minority of recipes, I decided to exclude it.  If you have a favorite cookbook that you trust, or a favorite online resource that never steers you wrong, by all means, use their recipe to the letter the first time you make a dish, and change it next time to suit your tastes.  But I sometimes I like to formulate my own recipe, knowing the preferences of my family and the ingredients in my fridge.

So here goes, my attempt at Thai Chicken Satay Skewers.  And you know what?  They came out really well!  My husband did the grilling, my family did the eating, and everyone liked them.  Synthesis:  Success!

Chicken Satay Skewers

Ingredients:

  • 1 pound boneless, skinless chicken thighs
  • 1 cup plain yogurt
  • 1 teaspoon curry powder
  • 1 teaspoon grated fresh ginger (use powdered if you don't have fresh)
  • 2 cloves garlic, minced
  • 2 tablespoons minced fresh cilantro
  • juice from 1/2 lime
  • 10 wooden skewers, soaked in water for 20 minutes before grilling
Directions:
  1. Slice chicken thighs into 1" strips.
  2. Mix together everything else and stir in the chicken pieces.  Let this marinate in the refrigerator for 2 hours.
  3. When the grill is hot and the skewers are soaked, thread the chicken onto the skewers.  Grill for 5-8 minutes per side.  Serve with peanut sauce and fresh cilantro.
Peanut Sauce

Ingredients:
  • 1/2 cup chunky peanut butter
  • 1/2 teaspoon soy sauce
  • 1 clove garlic
  • 3 tablespoons brown sugar
  • 1/2 teaspoon minced ginger
  • 1/2 teaspoon Sriracha hot sauce (or more to taste)
  • juice from 1/2 lime
  • 1 teaspoon coconut oil, or 1 teaspoon grape seed or other mild-tasting oil
Directions:
  1. Blend in the food processor.  That's it!  If you want a thinner consistency, add more coconut oil, or water if you like.  
We had a few skewers left over.  They made an excellent salad the next day!  I chopped the chicken and tossed it with salad greens and chopped bell pepper.  To turn the peanut sauce into salad dressing, I thinned it out with grape seed oil in the food processor, and added a little more lime juice.  

Tuesday, January 18, 2011

Curried Chicken Salad


After using leftovers creatively, my most frugal tip is to buy whole chickens and cut them up yourself as opposed to buying chicken pieces at the grocery store. This guarantees that, if you are cooking for two (or two plus a toddler, like I am) you will get two meals out of one bird. The first, of course, is what you make with the thighs, drums, and breasts. The second is what you do with the carcass. Here is what I did with my bird last week: Curried Chicken Salad.

Chicken salad is an incredibly flexible dish and can be simple (mayo, celery and dill) or all dolled up, like it is here. Apples and raisins are always in my house, so that was easy. Celery is a useful veggie and adds base flavors in soups and stews - just be sure to wrap it tightly in aluminum foil so it doesn't wilt within the week. Curry powder is another staple to have on hand. Experiment with different brands - some are sweeter, some are spicier - and find one you like. I stuffed the Curried Chicken Salad into a split croissant, but it goes great on whole wheat bread, and is even easier on the diet when served in Bibb lettuce leaves.

Curried Chicken Salad
Ingredients:
  • I chicken carcass, or two bone-in breasts
  • 1 small apple, diced
  • 2 ribs celery, diced
  • 1/3 cup raisins (or dried cranberries)
  • 1/2 lemon, juiced
  • 1/2 cup mayonnaise
  • 1 - 2 teaspoons curry powder, to taste
  • 1/4 cup cilantro, chopped
  • salt and pepper to taste
Directions:
  1. Boil the chicken carcass in salted water until cooked through and falling off the bone. When done, remove from water and let cool in a bowl.
  2. While the chicken is cooking, dice the apple and celery and add them in a large bowl. Squeeze the lemon over them to keep the apples from browning. Add the raisins and cilantro.
  3. Mix the curry powder and mayo together, and taste - it will need salt and maybe pepper and more lemon juice.
  4. Remove the chicken from the bones and shred or chop finely. Add to the apple mixture and stir in mayo and curry dressing and chopped cilantro. Mix well and chill until ready to eat.
You can substitute plain yogurt for half of the mayo, if you like. Also, chopped walnuts would be great in this!

Thursday, January 13, 2011

Chicken with Tarragon and White Wine


Of all the things in the refrigerator that can go bad, fresh herbs are the worst. I can't tell you how many times I've purchased a bunch of cilantro / parsley / basil / et cetera for one recipe, put the remainder in the veggie drawer, and forgotten about it until it was useless green mush. Herbs are expensive, especially in the winter when you can't grow them outside, so to waste them is painful to me.

Case in point: I made the Green Goddess Salad, which used a few tablespoons of chopped tarragon, a few nights ago. I still had more than half a container of tarragon to use, and desperately needed a recipe for it. A quick search of foodnetwork.com found a Giada De
Laurentis recipe for Chicken with Tarragon and White Wine.

Buy a whole chicken, cut it up for this recipe, and use the carcass for another. I didn't have cippolini onions, so I diced half a red onion instead. For the wine, I had half a bottle of Reisling in the fridge, and I liked the brightness and gentle acidity it lent to the sauce. We mopped up the leftovers with crusty bread and ate it with a salad.

Chicken with Tarragon and White Wine
(recipe by Giada De Laurentis, courtesy of foodnetwork.com)

Ingredients:
  • 1/4 cup vegetable oil
  • 1 (4 -5 pound) chicken, cut into 8 pieces
  • salt and pepper
  • flour for dusting
  • 1 1/2 cups cipollini or pearl onions, trimmed and peeled
  • 4 cloves garlic, halved
  • 1 cup white wine, such as Riesling
  • 3 cups low-sodium chicken broth, plus 1/3 cup
  • 1/2 cup chopped fresh tarragon leaves, plus 2 tablespoons
  • 2 tablespoons flour
  • 2 tablespoons butter
Directions:
  1. In a Dutch oven or large saucepan, heat the oil over high heat. Season the chicken with salt and pepper, to taste, and dust with flour. Cook the chicken, turning occasionally, until brown on all sides, about 8 minutes. Remove the chicken and set aside.
  2. Heat the same pan used for the chicken over medium-high heat. Add the onions and garlic and season with salt and pepper, to taste. Cook, stirring frequently, until softened, about 5 minutes. Increase the heat to high. Add the wine and scrape up the brown bits that cling to the bottom of the pan with a wooden spoon.
  3. Return the chicken pieces to the pan. Add 3 cups of chicken broth and 1/2 cup of tarragon and bring the mixture to a boil. Reduce the heat to a simmer, cover the pan and cook, turning the chicken pieces over every 10 minutes, until cooked through, about 30 minutes total for the breasts and wings and 40 minutes total for the legs and thighs. Transfer the chicken to a platter and loosely tent with foil while finishing the sauce.
  4. In a small bowl, mix together the remaining 1/3 cup chicken broth and flour. Whisk the flour mixture into the sauce until smooth. Bring the sauce to a simmer and cook, uncovered, until thickened, about 8 to 10 minutes. Stir in the butter and season with salt and pepper, to taste. Serve the sauce over the chicken and garnish with the remaining 2 tablespoons of tarragon.

Friday, December 10, 2010

Avgolemono


It's that most wonderful time of the year -- Soup Season! When it gets cold, nothing is better than a giant bowl of soup. Avgolemono (coming from the Greek, "avgo" means egg, and "lemono", well, you can probably guess that one!) is a quick, easy chicken soup spiked with lemon, thickened with egg, colored with spinach, and chock full of bright, cheery flavors!

If you are looking for more recipes to use up chicken carcasses, here is one of the best. I'm sure a turkey carcass would work just as well. Use two breasts with bones if you don't have a carcass handy. The starch component offers a little leeway: I like orzo best, but you can try rice (be sure to add the rice about 20 minutes before the spinach and other ingredients so it has time to cook through) or another small pasta or grain.

Avgolemono

Ingredients:
  • 1 chicken carcass, or 2 chicken breasts with bones and skin included
  • 1 10-ounce box of frozen chopped spinach
  • 3/4 cup orzo
  • 2 bay leaves
  • 2 eggs
  • 1/2 cup fresh lemon juice
  • salt and pepper

Directions:
  1. Put the chicken carcass in a large pot with enough water to cover. Boil until chicken is cooked through and falling off the bone. Remove carcass to a large bowl to cool. Strain broth and return to pot.
  2. When the chicken is cool enough to handle, remove from bones and chop into small pieces. You should have 2 - 3 cups of chicken.
  3. Return broth to the stove and heat on medium. Add the box of spinach (it's fine it it's still frozen, just drop that green block in there!) to the broth, along with the bay leaves and the chicken. Now look at the consistency of your soup. Do you like it really brothy? Add more water. Do you like your soup thicker? Now is the time to raise the heat and reduce your broth.
  4. When you have your preferred consistency, add the orzo to the soup. Cook on medium heat for about 8 minutes.
  5. In a bowl, whisk together the eggs with the lemon juice. Slowly add a ladle-full of your broth to the eggs, to temper them, so they don't seize up when you introduce them to the soup. When the eggs have been warmed by the broth, turn the heat off the stove. Slowly stir the egg and lemon mixture into the soup. Keep stirring to make sure you don't get any eggy clumps. Season with salt and pepper.
I like this soup with a big salad and some bread. Enjoy!

Saturday, July 24, 2010

Randomly French Chicken


One of the best money-saving kitchen skills to learn is how to cut up a whole chicken. Up until 3 months ago, I had never done it. It seemed like too difficult a task, with too little reward. Then I saw an episode of "America's Test Kitchen" on PBS that featured a skillet-roasted chicken recipe (which is delicious, and which will probably end up here later on.) I've posted the link to that video
here because the first four minutes are an excellent tutorial on how to part a chicken. Go ahead and watch it, I'll wait.

... Done? Okay, now you can buy whole chickens, which are always cheaper than those already cut up in the grocery store. What's more, you get what's left of the chicken once you take off the legs and breasts. It may not look like much, but it can be the basis for an entirely new meal! (See the recipe below for "Enchilasagna", and others, to be posted in the future.)

This recipe, which I'm calling "Randomly French Chicken", is an amalgam of a few different recipes. The technique is French, and calls for tomatoes, onions, and olives, as well as either white or red wine for braising the chicken and veggies. There is a lot of wiggle room as far as what else you want to add in. 8 oz. of sliced mushrooms would be great, making for more of a cacciatore approach, while the red peppers I used in this incarnation is more of a Basque presentation. You can add either chopped parsley or basil (like I did) to punch up the flavor a little more. Bon appetit!

Randomly French Chicken

Ingredients:
  • Vegetable oil or butter, or a combination of the two, about 2 tablespoons
  • 1 whole chicken, cut into 2 leg pieces and 2 breast pieces (so you have 4 pieces total)
  • 1 small onion, chopped
  • 2 cloves garlic, minced
  • 1 - 2 cups red or white wine (I prefer white)
  • 14 oz. can of diced tomatoes
  • 14 oz. can of black olives, or about a cup of Kalamata olives, if you have them
  • 1 red bell pepper, chopped
  • 1 tablespoon chopped parsley or basil
Directions:
1. In a large pot or Dutch oven, heat butter / oil combo over medium heat, and when very hot, add the chicken pieces, skin-side down. This WILL splatter - I suggest a metal splatter guard. Cook for approximately 8 minutes, until browned. Remove from pot to a plate, cover with foil, and set aside.
2. To the pot, add the onion and garlic. Keep them moving so nothing burns. When the garlic starts taking on color, add the wine and deglaze the pan, scraping up all the stuck-on bits of chicken.
3. Add the tomatoes, olives and peppers to the pan, and salt and pepper to taste. Simmer for a few minutes. Now take the chicken pieces and nestle them in among the veggies, skin-side up. Cover and turn the heat down to medium-low, keeping it at a high simmer.
4. Depending on how hot and conductive your pan is, check on the chicken every 10 minutes, stirring and adjusting the heat as necessary so nothing burns. If it looks too dry, add more wine. After about 30 minutes, using a meat thermometer, check for doneness. The thigh of the chicken should be at least 170F.
5. When your chicken is done, stir in the chopped parsley or basil, check again for seasoning, and serve.

The chicken would do well with rice or noodles to soak up the yummy sauce. This is one of those great recipes that is actually better the next day, so try not to eat it all at once!

Saturday, July 17, 2010

Enchilada Casserole or Mexican Lasagna ... Enchilasagna?


I really admire people who plan out their menus for days or even weeks ahead of time. I just can't seem to get that organized. So while others know how many zucchini they'll need for the week, I fly by the seat of my pants, and buy whatever looks good at the farmer's market and grocery store. This is great fun, but of course, it inevitably leads to me looking at single veggies in the crisper drawer, wondering how to make use of everything before it can go bad.

This recipe for an enchilada casserole came from a "perfect storm" in my fridge. I had a chicken carcass that needed attention (I'd used the legs and most of the breasts two days earlier, in my "French Chicken" (recipe to follow later)), some leftover brown rice, four zucchinis, and three ears of corn that were all about to outstay their welcome in the refrigerator. What to do?

Thankfully, ripe summer produce means Mexican food. Tomatoes, zucchini, corn, beans, squash, peppers and herbs are all looking great (and cheap!) at the farmer's market, so I'm sure you can re-create this, or something like it, very easily, where ever you are, this summer. If you want to make it vegetarian, leave out the chicken and add another can of beans - maybe pinto.

Enchilada Casserole / Mexican Lasagna ... Enchilasagna?

Ingredients:
  • 1 red onion, sliced approximately 1/8" thin
  • 3 ears of corn, sliced from the cob (you could use canned, but it won't be as tasty)
  • 4 smallish zucchini, sliced approximately 1/8" thin
  • 1 1/2 or 2 cups cooked rice (I used brown)
  • 3 cups cooked chicken, shredded, from one chicken carcass
  • 1 14-oz. can of black beans, drained and rinsed
  • 2 oz. tomato paste
  • 2 cups enchilada sauce (recipe below)
  • 1 36-count bag small corn tortillas
  • 2 or 3 cups shredded cheese (I used mozzarella and jack)

Directions:
1. Cook the carcass in enough salted water to cover. Boil until chicken is cooked through and easy to remove from the bone. Take the chicken out of the pot and place in a bowl to cool. If you are making your own enchilada sauce, reserve two cups of the water for that recipe.
2. While the chicken is cooling, slice your zucchinis and onion thinly. Cut the corn kernels from the cobs, and saute the corn, onion and zukes in a little butter in a very large pan. Salt, and stir occasionally to prevent sticking. You just want the onions to color a little, and the zucchini to give up some moisture.
3. Pour the vegetables from the saute pan into a large bowl. Add the rice, and the can of black beans.
4. Take all the meat off the chicken carcass, shred or chop, and add to the veggies and rice. Add in the tomato paste. Give it all a good stir.
5. Preheat your oven to 350 F. Spray a 9" x 13" baking dish with Pam, then smear a thin layer of enchilada sauce on the bottom of the pan. Cover this layer with tortillas, overlapping as needed. I used seven tortillas per layer - two rows of three, and one cut into quarters, pointy ends in the corners. On top of the tortillas, spread another layer of enchilada sauce, then half the chicken veggie mix, pressing down to cover the tortillas and sauce evenly. Sprinkle with 1/3 of your cheese. Follow with more tortillas, sauce, the rest of the chicken, another 1/3 of your cheese, and finish with tortillas, sauce and the rest of the cheese.
6. Cover with foil and bake for about 20 minutes, until the cheese is melty and everything is hot inside. Remove the foil and bake another 5 minutes.

Makes 6 servings. Goes well with salad and a beer. Garnish with cilantro or sour cream, if you are fancy.

Enchilada Sauce
(Courtesy of Emeril Lagasse)

Ingredients:
  • 3 tablespoons vegetable oil
  • 1 tablespoon flour
  • 1/4 cup chili powder
  • 2 cups chicken stock (I used the water I boiled my chicken in: multi-purposing!)
  • 10 ounces tomato paste
  • 1 teaspoon dried oregano
  • 1 teaspoon ground cumin
  • 1/2 teaspoon salt
(I also added 1/8 teaspoon ground cinnamon)

Directions:
1. In a medium saucepan, heat oil, add flour, smoothing and stirring with a wooden spoon. Cook for 1 minute. Add chili powder and cook for 30 seconds.
2. Add stock, tomato paste, oregano, and cumin. Stir to combine. Bring to a boil, reduce heat to low and cook for 15 minutes. The sauce will thicken and smooth out.

This sauce turned out GREAT! Here's the trick: Tomato paste comes in little 6 oz. cans. Use 10 ounces for the enchilada sauce, and you'll have two ounces left over to stir into the chicken and veggies in Step 4 of the Enchilasagna. Cool, right?