Saturday, October 12, 2013

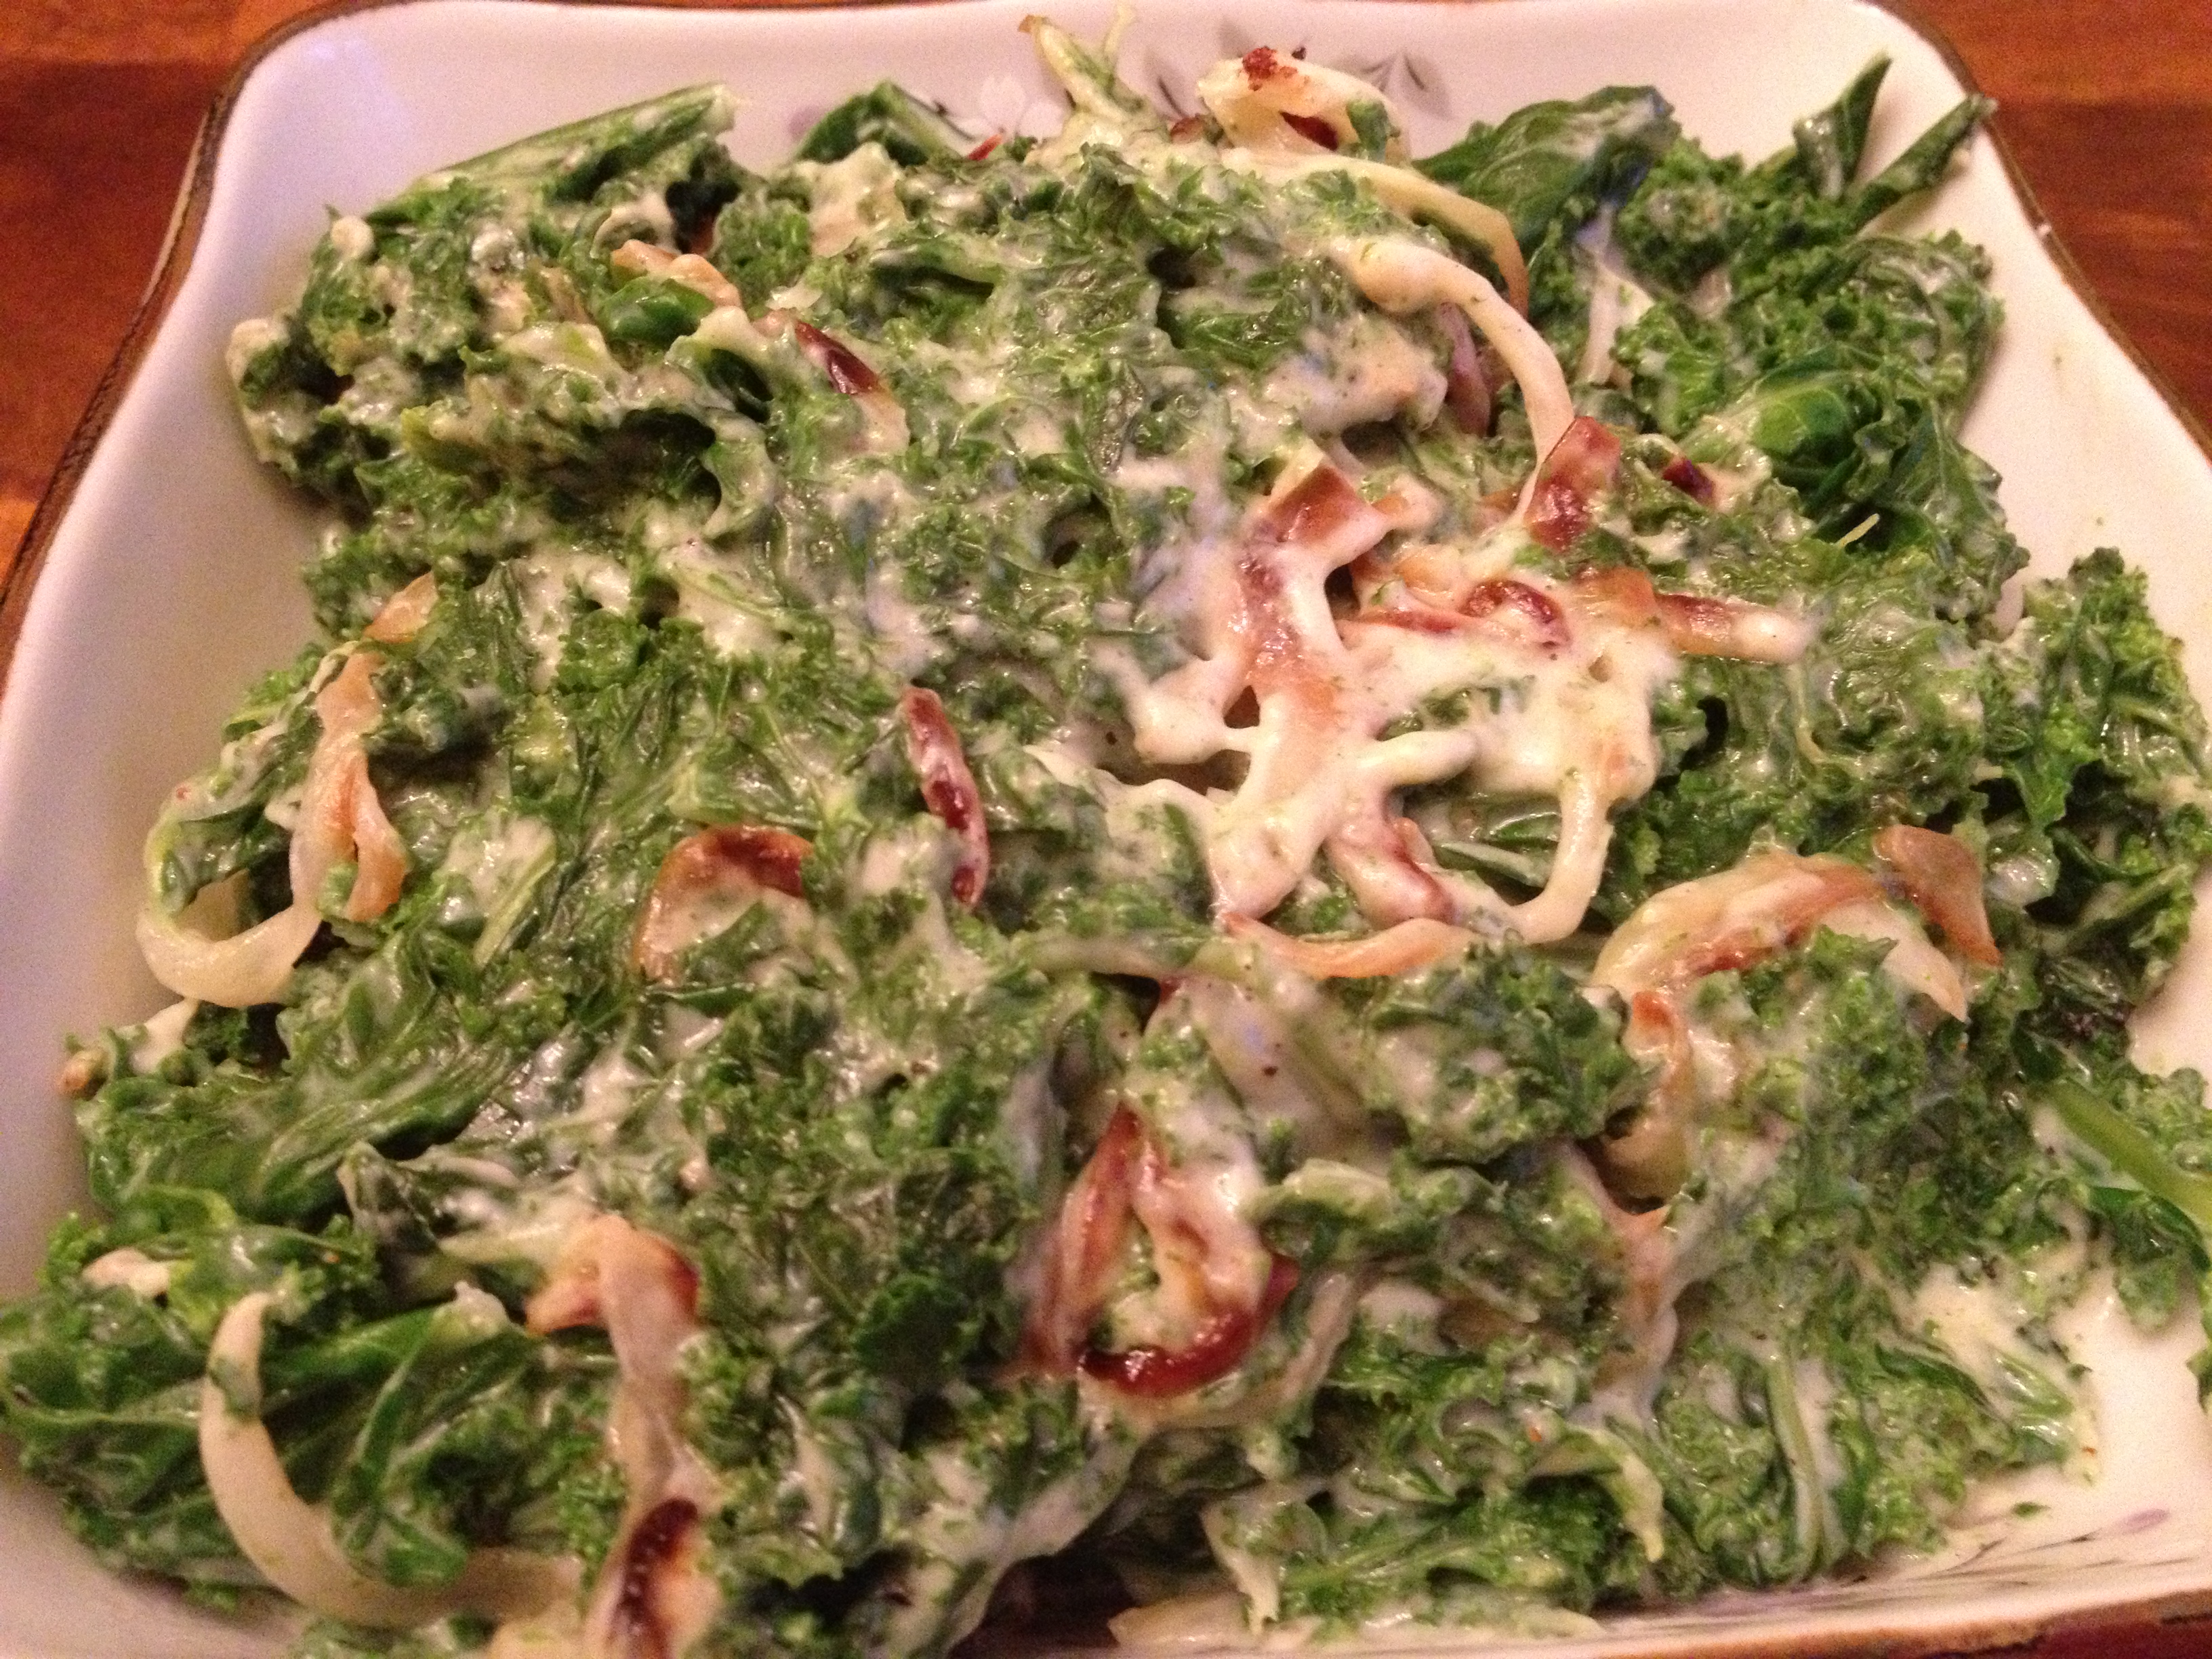
Creamed Kale


Creamed Kale
My favorite side dish in restaurants is creamed spinach.  There’s just something about it that I crave.  And lucky for me, it’s not hard to make at home.  But spinach is a little fussy – it goes mushy in the fridge really quickly, so I don’t have it on hand unless I’m cooking it that day.  But kale on the other hand … that hearty veggie will hang out in your fridge for a few days without appreciable loss of texture or taste.  So I had 2 bunches of curly kale hogging space in my fridge and decided to see if I could cream it.  In short, yes I did!  Creamed Kale for dinner!
Use whatever hearty green you have – kale, chard, or spinach.  If you are using spinach, just wash and blanch it quickly.  Kale and chard need more time in the pot to soften up, so plan accordingly.  I made this with one part whole milk and one part half-and-half, but I think next time I can just use whole milk.  If you like a richer flavor, use all half-and-half.  As for the onion, I used just a regular brown onion.  I think a sweet variety would be even better, so if you see Vidalias or Walla Wallas, pick one up!  Also, I left it out, but you can certainly add a little (or a lot, your choice) grated parmesan cheese to garnish.  Ready to check it out?  Let’s go!
Creamed Kale
(serves 2 as a side dish)
Ingredients:
  • 2 bunches kale, any kind, or chard, or spinach (see note above if using spinach)
  • 1 onion
  • 3 tablespoons butter, divided
  • 1/2 cup whole milk
  • 1/2 cup half-and-half
  • 1 teaspoon corn starch
  • salt and pepper
  • 1/8 teaspoon grated nutmeg
Directions:
  1. Set a large pot of water to boil.  Prepare the kale:  tear out the tough center stem, and tear the leaves into bite-sized pieces.  Wash well.
  2. Slice the onion as fine as possible – you want thin strings.  In a large pan, cook the onions in 2 tablespoons of butter, stirring to make sure they don’t burn.
  3. Boil the kale for about 3 or 4 minutes.  You don’t want it too soft – a little chew is nice.  Remove to an ice bath.  When cool enough to handle, squeeze out as much water as possible from the kale.
  4. When the onions are soft and browning, add the kale to the pan.  In a bowl, whisk together the milk, half-and-half, and cornstarch.  Pour over kale and onions and stir to incorporate.  Turn the heat down to medium low and simmer for 3 minutes until thick and creamy.  Season with salt, pepper, and nutmeg.  Stir in last tablespoon of butter, then serve hot.

Tuesday, October 1, 2013

Basic Meatloaf (Paleo)


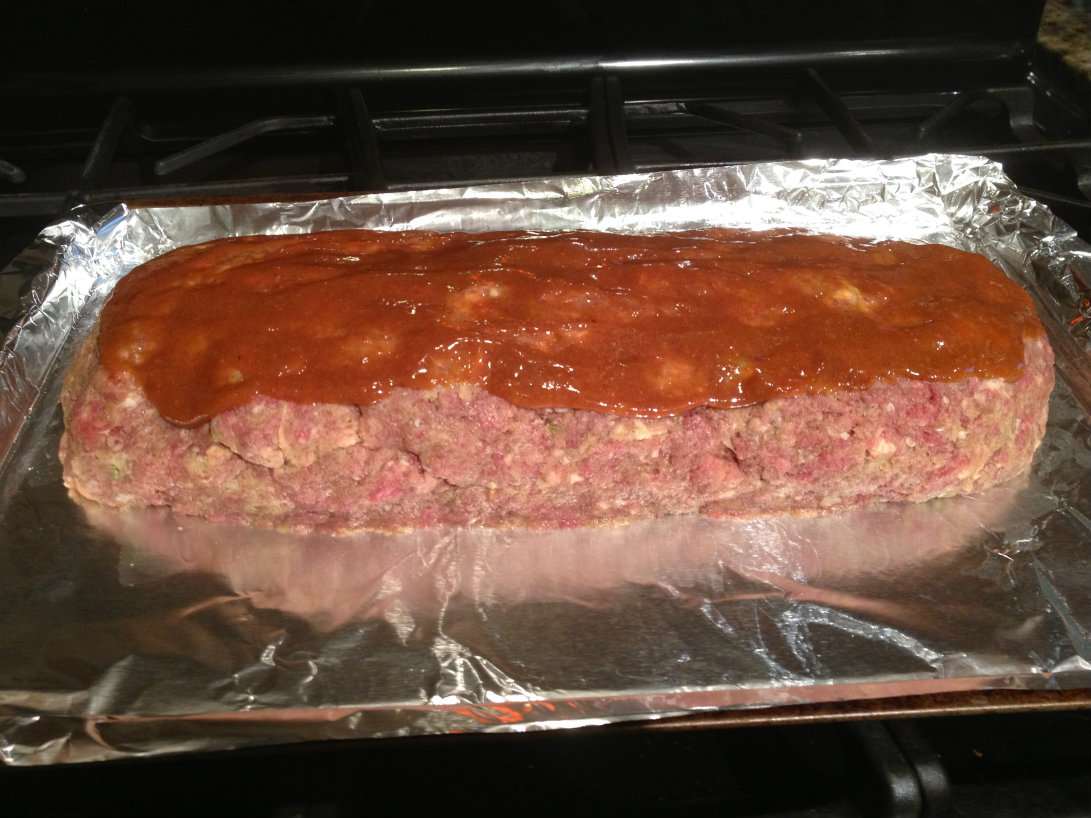
This Meatloaf started out following one of Martha Stewart’s recipes, but over the years I’ve kind of made it my own.  I think what makes this a great meatloaf is that it’s not actually baked in a loaf pan.  It’s a freeform meat sculpture!  But making it on a sheet pan instead of in a loaf pan lets the fat drain away, and all the sides get nice and crusty.  It’s easy, it’s a crowd pleaser, and it doesn’t take long to put together.  If you make your own ketchup, this recipe is Paleo.  (I haven't taken that step yet, but I'll get there eventually.)  Let’s get into it!

Meatloaf

Ingredients:
  • 1 small onion
  • 4 cloves garlic
  • 2 stalks celery
  • 1 carrot
  • 4 slices bacon
  • 1/2 teaspoon dried Italian herbs, or oregano
  • 2 pounds ground beef
  • 2 eggs
  • a big squirt of ketchup (maybe 2 tablespoons)
  • a big squirt of yellow mustard (maybe 2 tablespoons)
  • 1/2 teaspoon Worcestershire sauce
  • 1/2 teaspoon hot sauce, your choice (Sriracha or Tabasco, whatever you have)
  • 1/3 cup coconut flour (you could use 1/2 cup bread crumbs if you like, or even ground oats)
  • salt and pepper
  • 4 tablespoons ketchup
  • 3 tablespoons mustard
  • 1/4 cup brown sugar or coconut sugar

Let's bake this bad boy!
Let’s bake this bad boy!
Directions:
  1. Preheat oven to 400*F.  Line a baking sheet with aluminum foil.
  2. Add the onion, garlic, celery, and carrot to the food processor and blend until combined and kind of pureed.  You don’t want any big chunks.  Empty the veggie puree into a very large mixing bowl, then add the bacon to the food processor.  Blend until ground and add to the veggie puree.
  3. Add the rest of the ingredients—up through the salt and pepper—to the mixing bowl.  Mix with your hands until combined.  Dump out the meatloaf mix onto the baking sheet and form a loaf with your hands.  You want it to be long and flat, kind of like a loaf of French bread.  Smooth it out and make it even.
  4. In a small bowl, stir together the remaining ketchup, mustard, and brown sugar.  Frost the top of the meatloaf with the ketchup mixture.
  5. Bake for one hour, or until internal temperature reaches 165*F.  My kids eat this with lots of additional ketchup!

Friday, September 13, 2013

Roasted Chipotle Salsa


Roasted Chipotle Salsa
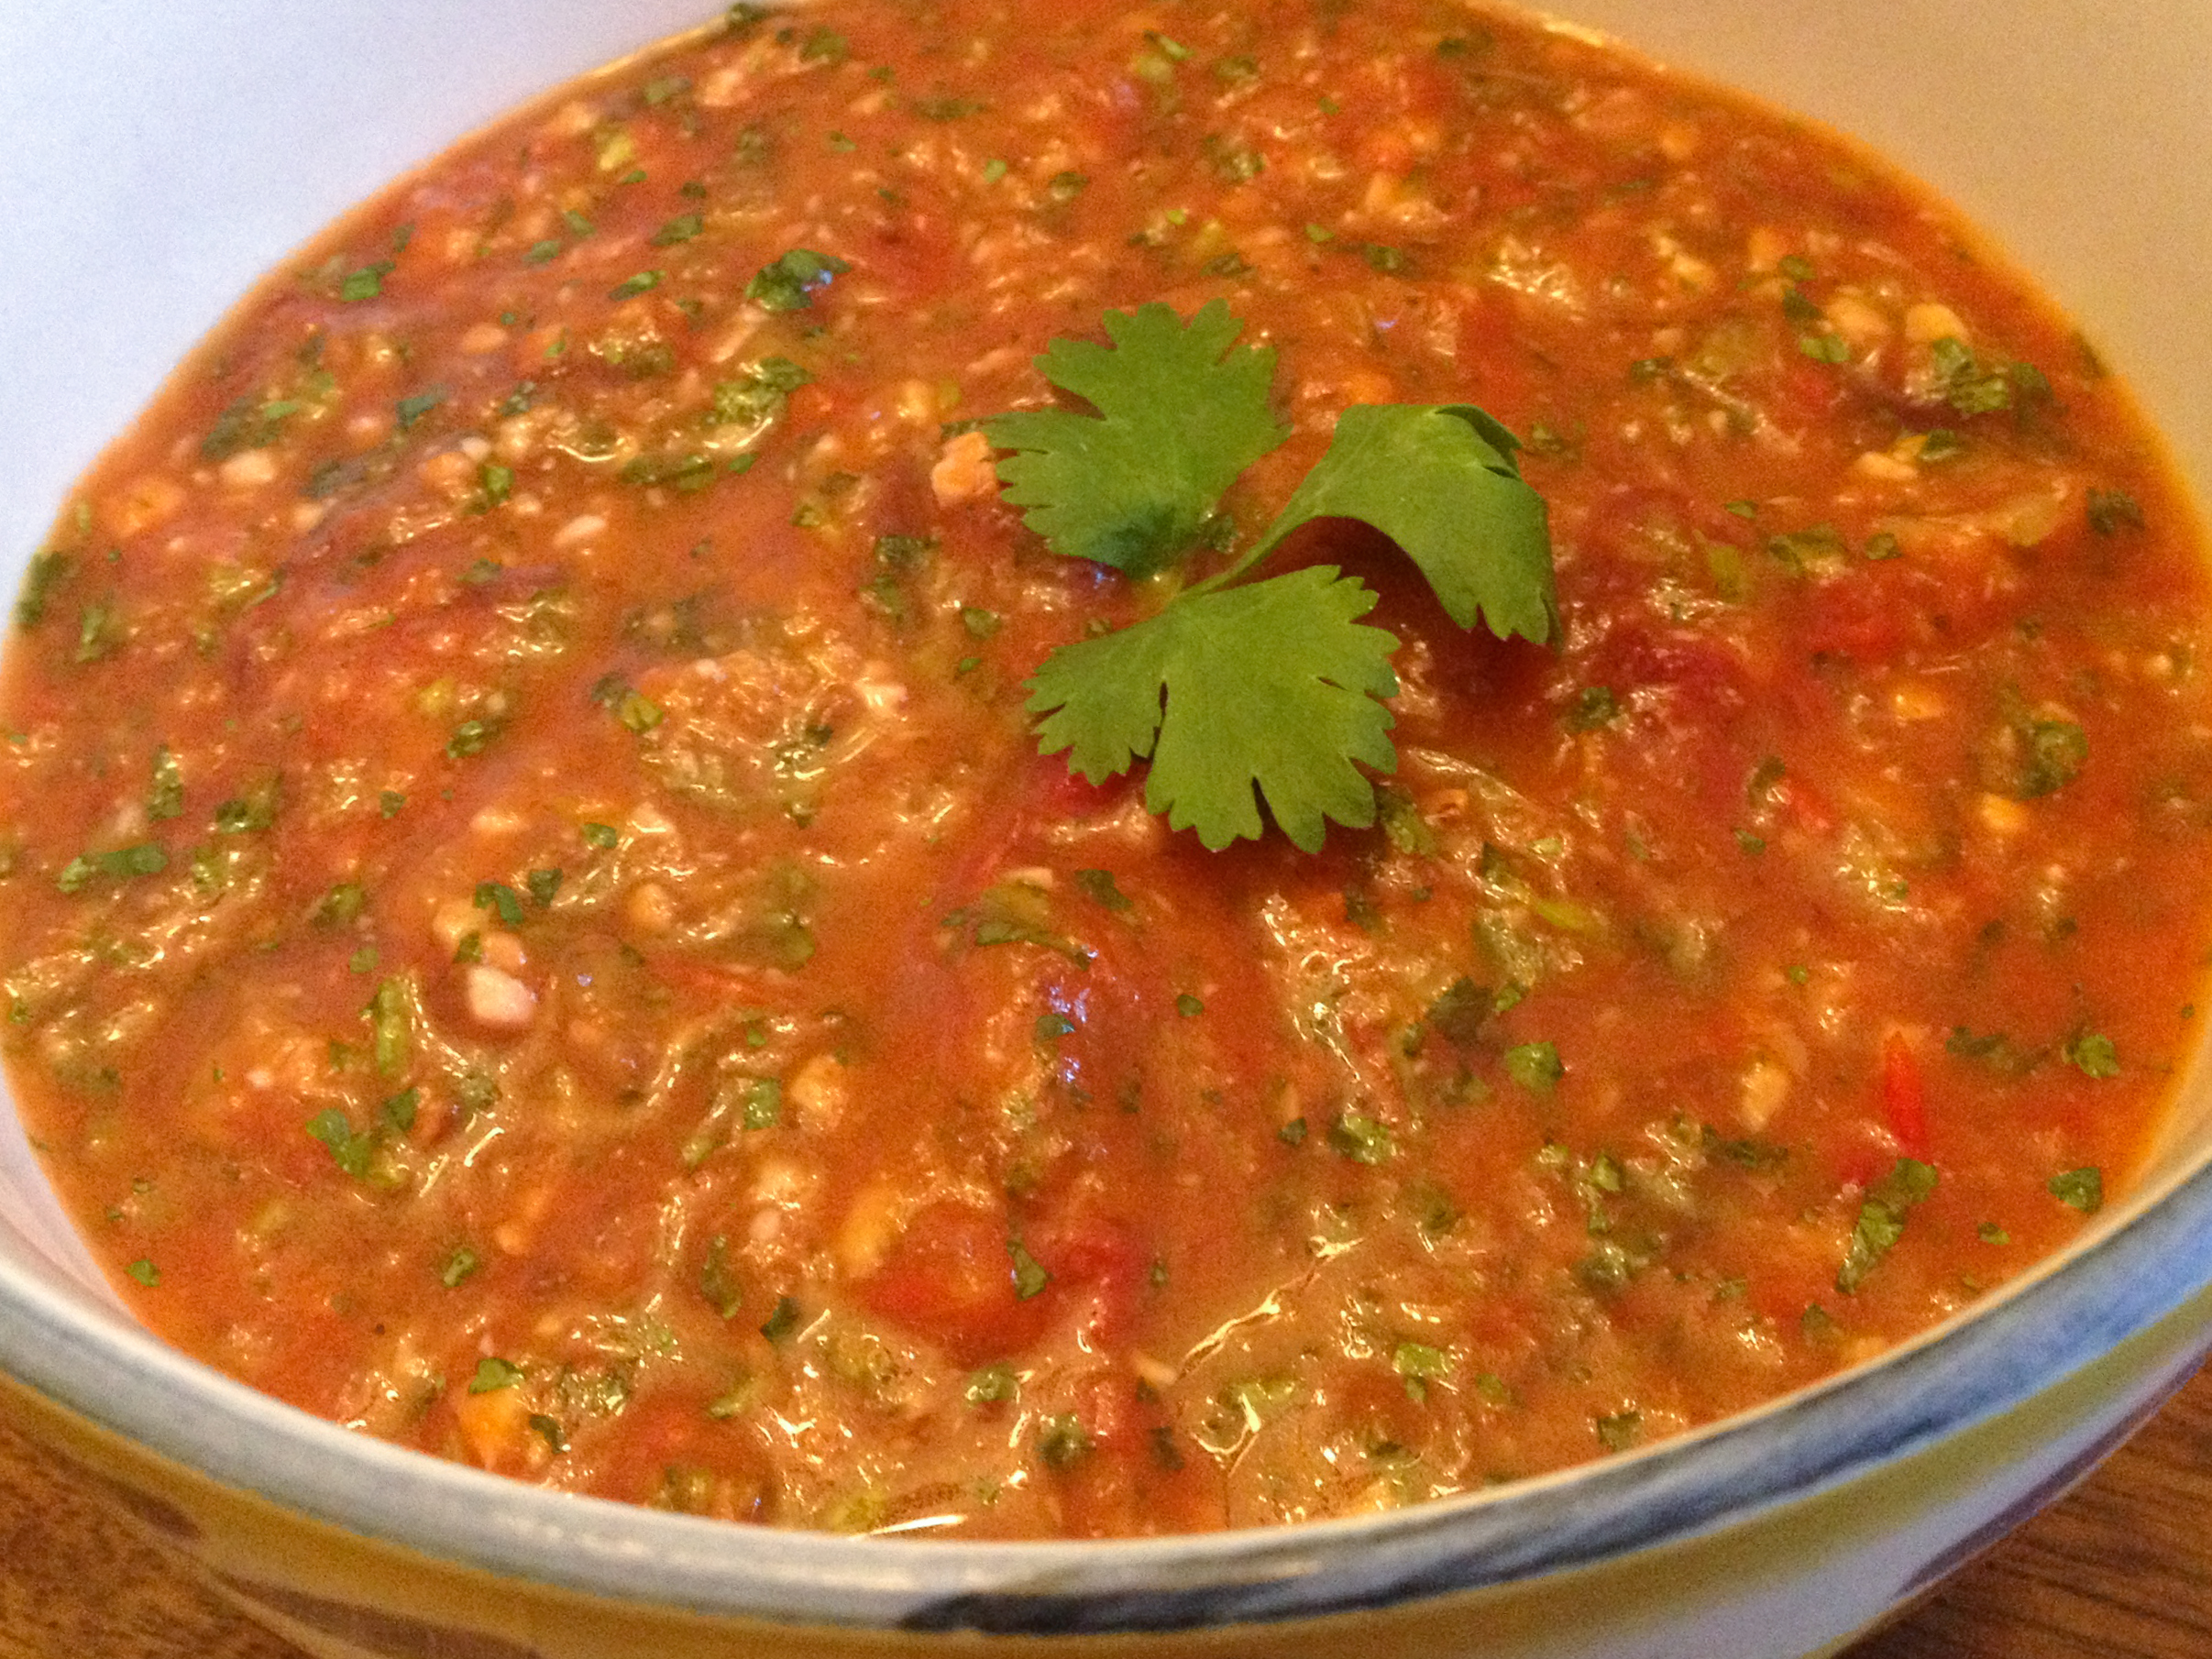
I planted my garden a little late this year, so my tomatoes are just getting ripe now.  My husband loves tomatoes in any form, in any dish.  As for me, the ONE food I don’t like is plain raw tomatoes.  I keep them off my sandwiches and salads.  Every other preparation is fine with me – ketchup, tomato sauce, anything with cooked tomatoes – and especially salsa!  And while I like raw tomato salsas a lot, I like this Roasted Chipotle Salsa even better!
Chiptole peppers in adobo sauce are easy to find – just check your local grocery store in the “ethnic” aisle with all the other Mexican food.  They’re cheap, and they are nearly pickled in the adobo sauce, so once you open the little can, you can keep the rest of the peppers and sauce in a small container in your fridge for months.  (A little Ball jar, or leftover jelly jar, is perfect for this.)  Then, if you find you love the smoky, mild heat of chipotles, use some of the others in your jar to make this dinner salad.  If you can’t find fresh cilantro at your store, you can leave it out, but it really adds a burst of freshness to this spicy sauce!
This recipe made a little more than a cup for me.  That said, my husband and I ate it all in one night!  It was “taco” night at our house, but we were using lettuce leaves instead of taco shells.  Ground beef with onions, avocado slices, and this salsa – delish!
Roasted Chipotle Salsa
Ingredients:
  • 3 regular-sized ripe tomatoes (around 1/2 pound, or a little more)
  • 1/2 onion
  • 3 cloves garlic
  • 2 teaspoons olive oil
  • salt
  • 1 chipotle pepper in adobo sauce (or more if you like it spicy!)
  • 1/2 teaspoon ground cumin
  • small handful cilantro, about half a cup
  • 1/2 lime or lemon
Directions:
  1. Preheat oven to Broil.  Line a baking sheet with aluminum foil.  Slice the tomatoes in half, removing any core or stem you don’t like.  Slice the onion into rounds.  Peel and smash the garlic cloves.  Lay these out on the baking sheet and drizzle lightly with olive oil.  Season with salt.
  2. Broil the vegetables until they start turning brown and are very juicy – about 8-10 minutes, depending on your oven.  Remove from the oven.  Pour the vegetables and any juices into a food processor.  Add in the cumin, chipotle pepper, cilantro, and hit start.  Process for a few seconds, then squeeze in the lime juice.  Process again – leave it chunky!  Taste for seasoning – maybe more salt or lime?  Process again until you reach your desired consistency.  I like mine to still have some texture and not be a puree.  Refrigerate until ready to use.  Tortilla chips, burritos, enchiladas – even over scrambled eggs – this stuff is yummy!

Saturday, September 7, 2013

Zucchini Lasagna


Zucchini Lasagna Resize
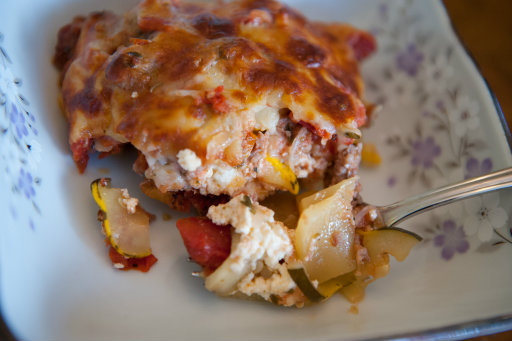
This recipe came about, as many do, in my house:  I start with an ingredient and brainstorm what in the world I’m going to do with it.  I had a bag of summer squash from the farmer’s market – it was so inexpensive, I couldn’t pass it up.  But aside from making zucchini bread, I couldn’t think of how to use it.  That was when I stumbled upon a recipe for Homemade Ricotta, and it came to me:  Zucchini Lasagna!
The zucchini stands in for traditional noodles in this recipe, so if you are following a low-carb diet, or if you are avoiding gluten, you’re in luck!  If you are making ricotta, drain and squeeze it to keep any extra liquid out of the casserole.  Nobody likes a soggy lasagna!  Feel free to saute and add other veggies or herbs to the lasagna, too – baby spinach, bell peppers, black olives, or fresh basil would all be lovely!
This is a small casserole, so we ate it with a big salad for dinner.  You can easily double or quadruple this recipe to serve more people.  Hope you like it!
Zucchini Lasagna
Ingredients:
  • 1 or 2 zucchinis or other summer squash, about 3/4 pound
  • cooking spray
  • 1/2 pound sausage
  • 1/2 small onion
  • 1 clove garlic
  • 1 can diced tomatoes, drained (I used fire-roasted canned tomatoes)
  • 1/2 teaspoon Italian herbs, or oregano
  • salt and pepper
  • 1 cup Homemade Ricotta, or store-bought
  • 1 cup shredded mozzarella cheese
Directions:
  1. Preheat oven to 400*F.  Line a baking sheet with aluminum foil and spray lightly with cooking spray.  Chop the zucchini into thin coins – about 1/8″-thick.  Lay out on the baking sheet and bake for about 8 minutes.  They don’t need to be cooked through at all – you just want to dry them out a little bit.  Remember, no one likes a soggy lasagna!
  2. While the zucchini is drying out, dice the onion, and mince the clove of garlic.  In a large pan, brown the sausage with the onion and garlic.  Drain any fat that accumulates.  Add in the drained tomatoes, oregano, and salt and pepper, and heat through.
  3. In a casserole dish, spray a little cooking spray so nothing sticks.  Layer half the zucchini slices to cover the bottom of the casserole dish.  Spread half the ricotta over the zucchini, then spread half the sausage mixture over the ricotta.  Repeat with the rest of the zucchini, then ricotta, then sausage.  Cover with the shredded mozzarella.
  4. Cover with a lid or aluminum foil, and bake for 20 minutes.  Remove lid and bake for another ten minutes, until the cheese is golden and melty.

Friday, August 23, 2013

Homemade Ricotta


Homemade Ricotta Resized
When I was in high school, 25 years ago, I thought the funniest movies in the world were Monty Python movies.  Yes, I was one of those nerds who could rattle off quotes from all the movies (in the intervening years, my skills have gotten rusty, but I still have a few).  One of my favorite scenes in the movie “The Life of Brian” was when a group of people are listening to the Sermon on the Mount.  Unfortunately, they are way, way at the back of the crowd and can’t hear well. When Jesus says, “Blessed are the peacemakers,” the crowd in back misinterpret it as “Blessed are the cheese makers.”  So when I came across this recipe for Homemade Ricotta, I immediately started giggling.  I want to be a blessed cheese maker, and you can be too!
You already have the ingredients you need.  Use whole milk, or else the ricotta won’t set up.  One lemon, a little salt, and a tablespoon of white vinegar – what could be easier?  You’ll also need a thermometer.  I have a candy thermometer that clips to the side of the pan, but you could use a meat thermometer, or one of those fancy infrared ones too!  The only equipment you might need to buy is cheesecloth.  I found it at my regular grocery store, and have used it before in making Homemade Coconut Milk.
Ricotta is one of those amazing ingredients that can be used in either sweet or savory recipes.  In the following two weeks, I’ll have recipes that use fresh ricotta in a zucchini “lasagna” (with no noodles!), and in a dessert with fresh summer fruit.  Until then, you can serve fresh ricotta as an appetizer, spread on thin slices of bread, with either cracked pepper and minced herbs, or with a light drizzle of honey and crushed walnuts.  Ready?  Let’s make some cheese!
Homemade Ricotta  
(Makes one cup of ricotta)
Ingredients:
  • 4 cups whole milk
  • 1/2 teaspoon salt
  • 1 tablespoon lemon juice
  • 1 tablespoon white vinegar (you may need more, but I didn’t)
Directions:
  1. In a pot, heat milk and salt over medium-high heat.  Stir occasionally to make sure it’s not burning on the bottom.
  2. Prepare your utensils:  Line a mesh sieve with a double-layer of cheesecloth.  If you want to save the whey, place the sieve over a large bowl.  (I saved my whey – next week I’ll show you how I used it.)
  3. When the temperature of the milk reaches 185*F, turn off the heat and pour in the lemon juice and vinegar.  Stir gently.  You just made what Little Bo Peep was eating – curds and whey!  Let it sit for about ten minutes, and stir again.  If you see any milk in your pot that hasn’t curdled, you can add another teaspoon of vinegar, stir, and let sit another ten minutes.  Mine didn’t need any extra and separated easily.
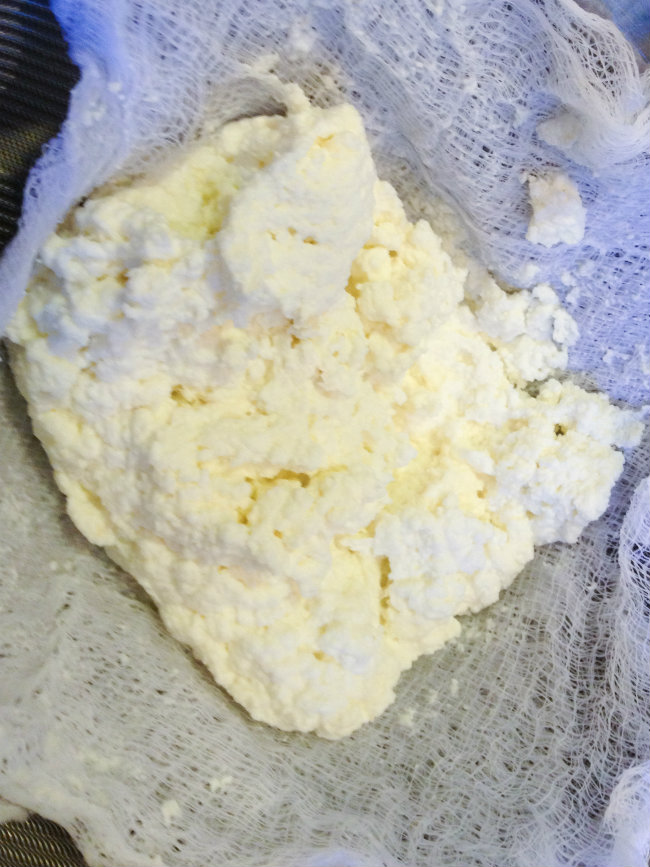
  4. Pour the curds and whey into the cheesecloth-lined sieve.  The whey, the yellowish liquid, will end up in the bowl.  Let cool and refrigerate for later use.  Let the cheese curds, aka your lovely homemade ricotta, drain in the cheesecloth.  If you want it soft and moist, let it drain for about ten minutes.  This is good for spreading on bread, or in dessert applications.  I let mine drain for much longer – about half an hour – because I was baking it in a “lasagna” and didn’t want extra water in the casserole.
  5. This keeps for about 5 days, refrigerated.  I challenge you to make it last more than a few hours!

Monday, August 12, 2013

Bacon-Wrapped Figs


Fresh Figs
Ah summer!  You bring us such a variety of delectable little fruits and veggies, some that are only in season and available for a few weeks!  Figs are one of those little gifts from God.  I saw them at my farmer’s market two weeks ago, and Sunday I bought a basket.  Tender little nuggets of sweet pink flesh, hidden under an unassuming brown skin, figs are a sweet treat!  If you’ve only ever had them in Fig Newton form, try this recipe for Bacon-Wrapped Figs!
Simple ingredients, simple preparation – so easy!  Look for figs that are a little soft, but not squishy.  These little bites are sweet and salty and kind of rich, so you don’t need to eat a dozen to feel satisfied.  Try them with a green salad for a light lunch, or with some sparkling wine as an appetizer.

Bite-sized bacon goodness!

Bacon-Wrapped Figs

Ingredients:
  • 6 ripe figs
  • 6 slices bacon
  • 6 teaspoons cream cheese
  • fresh-ground black pepper
  • optional: honey
Directions:
  1. Preheat oven to 400*F.  Line a baking sheet with aluminum foil.  
  2. Rinse off figs and pat dry.  With a knife, trim off the little stem nub at the top and slice in half lengthwise, so you have 12 halves.  Cut the bacon in half so you have 12 short pieces.
  3. To assemble:  Place half a teaspoon of cream cheese on top of each fig half.  Season with a grind or two of black pepper.  If you want them sweeter, add a drop of honey on top of the cream cheese.  I didn’t use honey and mine were delicious, but it’s up to you how sweet you want them.  Wrap each cream cheese-topped fig in bacon.  I wrapped them so the open end is underneath the fig, but some had the open end on top and it didn’t unravel.  You could use toothpicks if you are worried they won’t stay wrapped in the oven, but mine were fine without.  Lay the bacon-fig bundles on the baking sheet.
  4. Bake for 20 minutes.  Turn off the oven and let them figs rest for 5 more minutes in the oven.  Take them out and serve hot.  Watch your fingers!

Tuesday, July 30, 2013

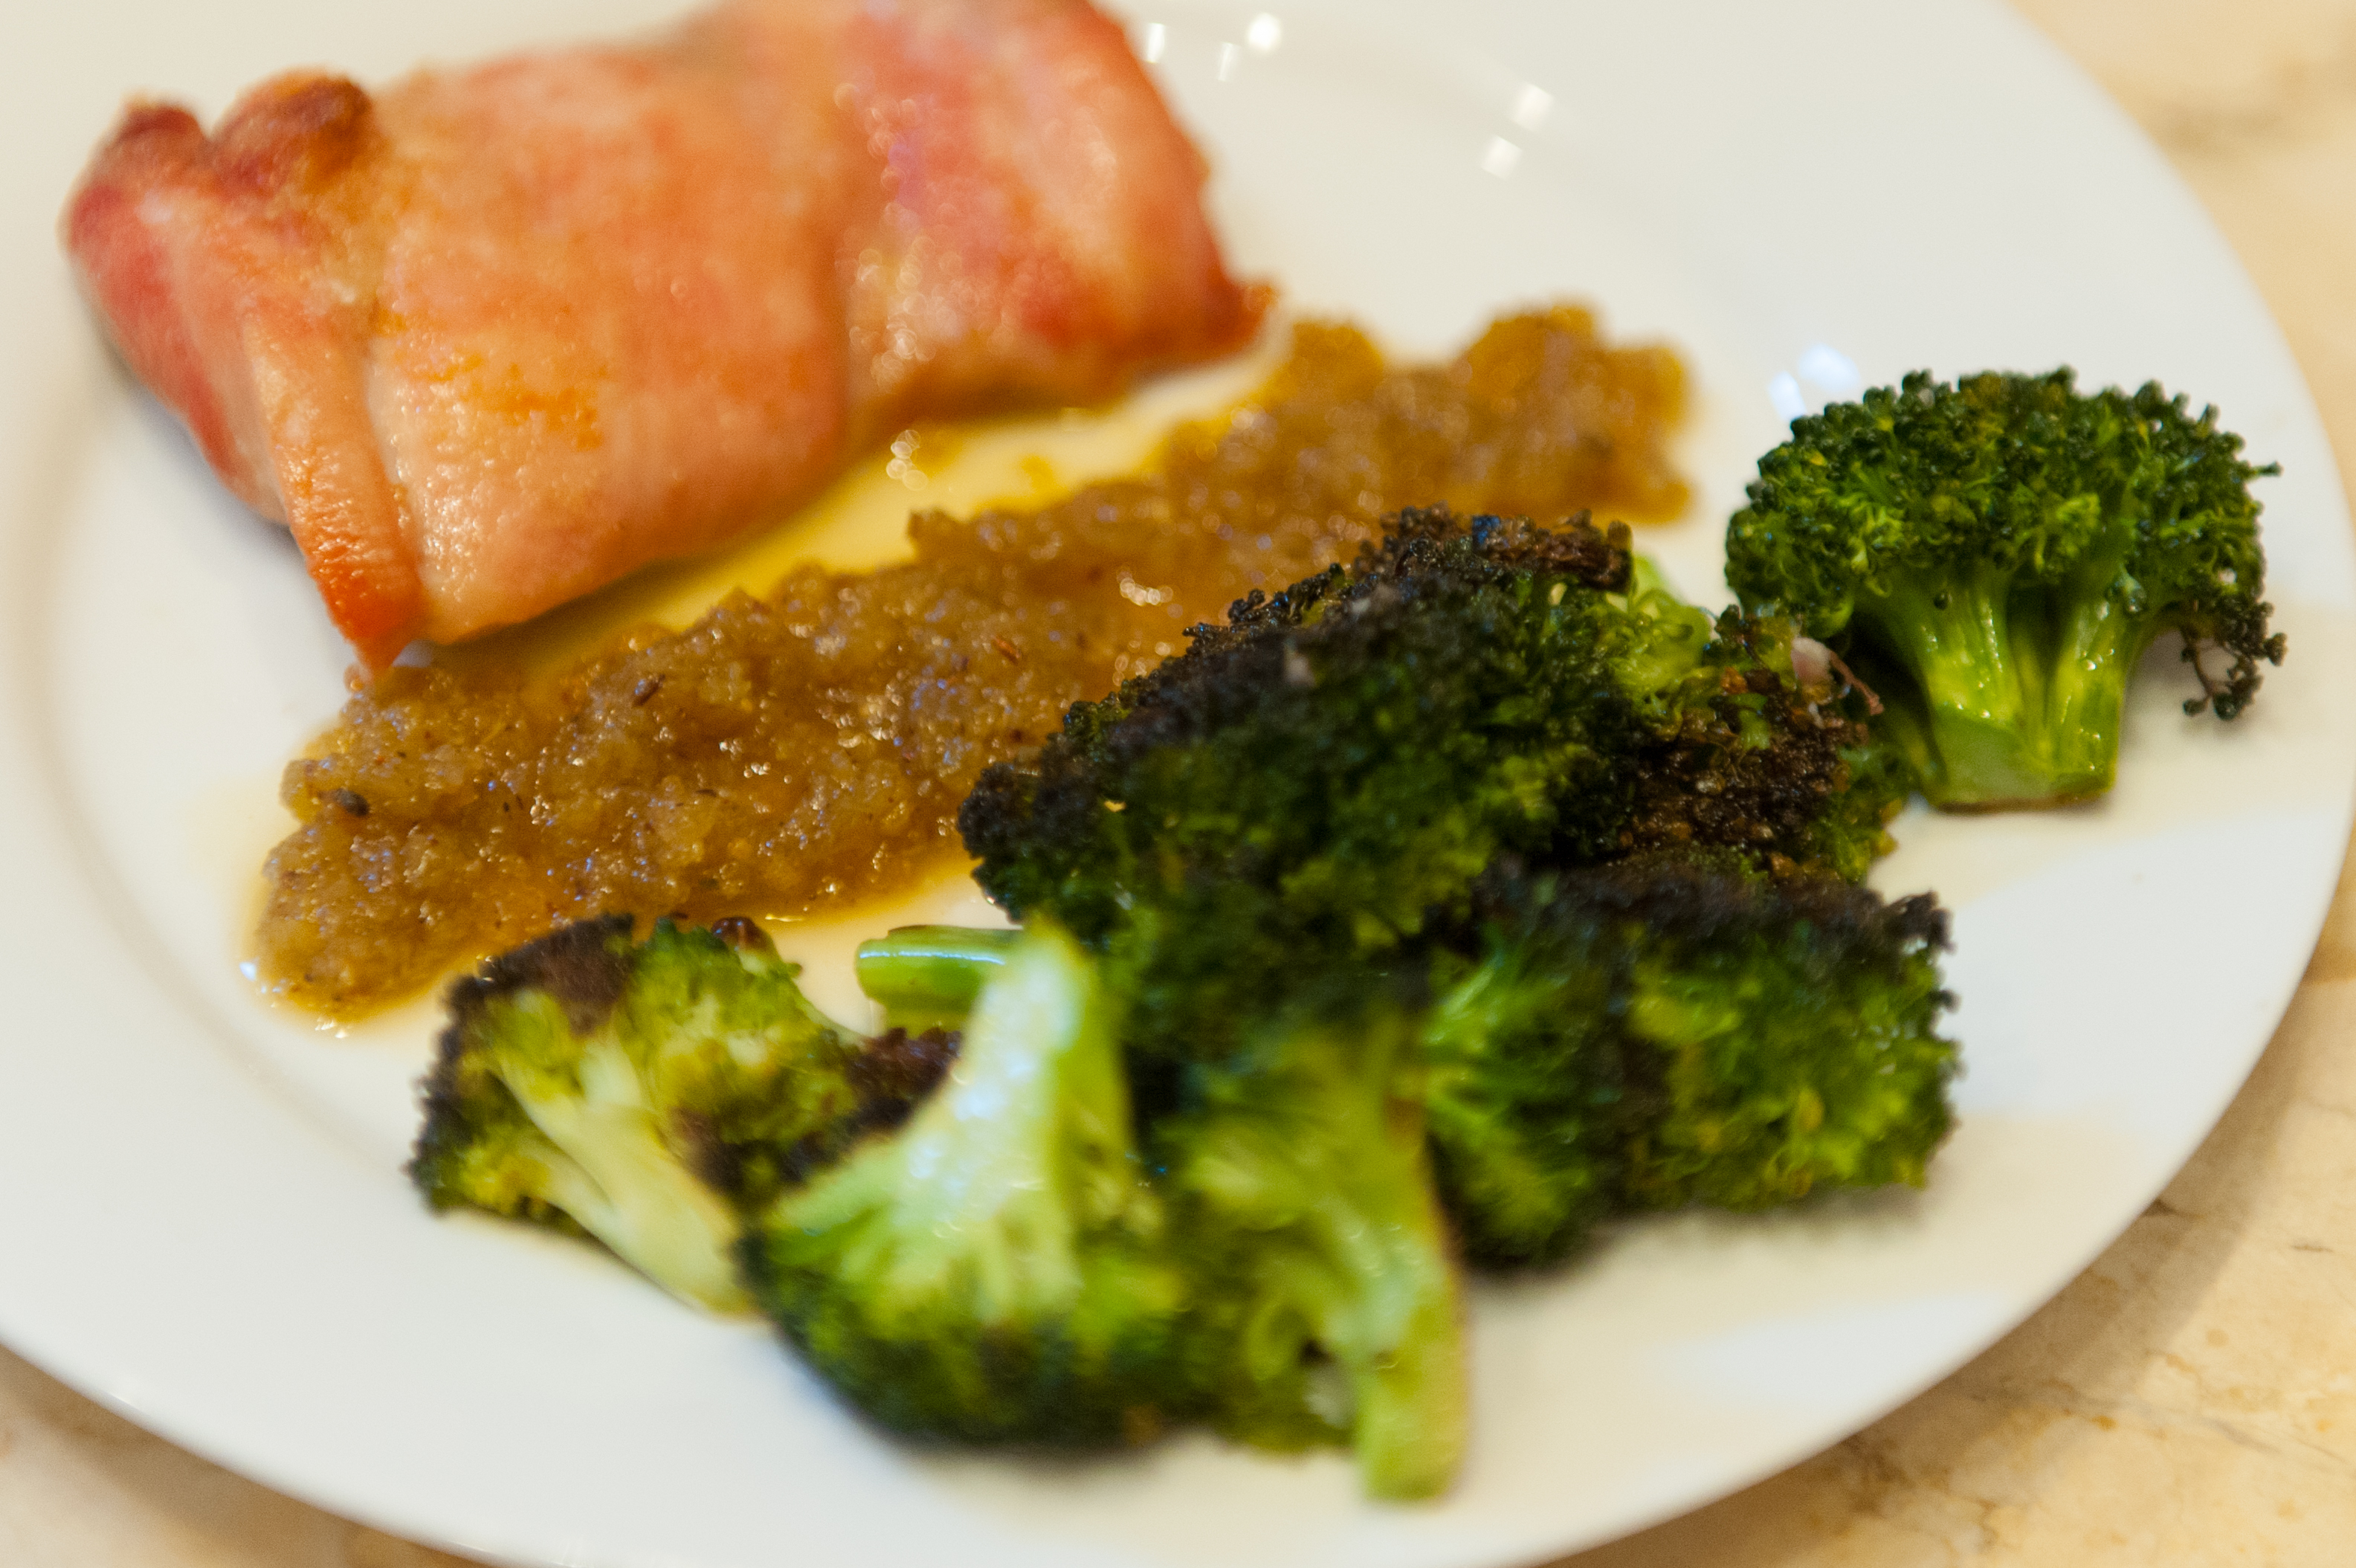
Roasted Chicken and Broccoli with Raisin Sauce


Roasted Broccoli and Chicken with Raisin Sauce
Wait, wait, where are you going?  This isn’t a joke!  Raisin sauce!  It’s real, and it’s delicious!
Let me back up a bit.  We love roasted broccoli at our house.  We eat it two, sometimes three times a week.  And while I enjoy it, I really do, there came a day (last week) when I wanted to add a little something new to our dinner repetoire.  Google is my friend, and I quickly came across several different recipes for Broccoli with Raisin Sauce.  Well, if so many other people thought it good enough to make, photograph, and write about, it must be worth a try.
And it was an unmitigated success!  This simple sauce has it all – sweet and spicy, with a little bite from the vinegar.  I served this with roasted chicken thighs, and the raisin sauce was amazing with those too!  For an easy dinner, roast the broccoli on one sheet pan, chicken thighs on another, and make the sauce when they’re done.  Be bold, try something new, and surprise yourself with a funky, fun new recipe!
Roasted Broccoli and Chicken with Raisin Sauce
Ingredients:
  • 3 large bunches of broccoli, chopped into florets
  • 1 to 1 1/2 pounds boneless, skinless chicken thighs
  • salt and pepper
  • 9 tablespoons olive oil, divided
  • 1/2 cup raisins (I used golden raisins, but use what you like)
  • 2 tablespoons sherry or red wine vinegar
  • 1/2 teaspoon ground cumin
Directions:
  1. Preheat oven to 400*F.  Line two cookie sheet pans with aluminum foil.  On one pan, lay out the chicken thighs, making sure there is room between them; don’t crowd.  Drizzle with 3 tablespoons of olive oil, and sprinkle with salt and pepper (and a little garlic powder is nice too).  Place in the oven on the top rack.
  2. On the second sheet pan, spread out the broccoli florets and drizzle with 3 tablespoons of oil.  Sprinkle with salt and place in the oven on the bottom rack.
  3. While the chicken and broccoli cook, make the raisin sauce:  combine remaining 3 tablespoons of oil, raisins, vinegar, and cumin in a blender or food processor.  Blend until relatively smooth – until the raisins are broken down and saucy.
  4. The chicken is done when a thermometer reads 160*F, and the broccoli is done when it’s getting some crispy brown spots.  Serve both with the raisin sauce!