Saturday, January 11, 2014

Chinese Chicken Salad


Chinese Chicken Salad Resize
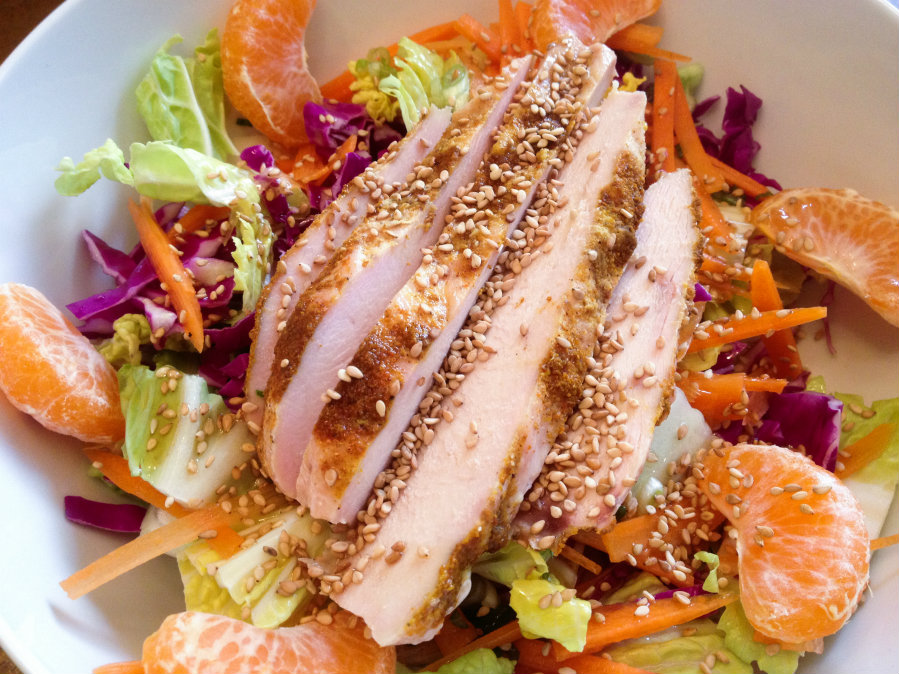
Did you know that January is National Soup Month?  Sounds perfect to me - a big bowl of soup and a salad makes one of the best lunches imaginable.  One of my favorite salads is Chinese Chicken Salad!
This is perfect for winter, because all of the ingredients are in season now.  Instead of canned mandarin oranges, you can probably find fresh ones now – I’ve got Clementines and Satsumas left and right at my grocery store.  Red cabbage and carrots are always around, as are green onions.  For the base, I used Napa cabbage, but if you don’t have that, you can use any kind of lettuce you like, or really finely chopped green cabbage.  I cooked some extra chicken breasts last night so I could chop them up cold and throw them over the salad, but you can use whatever chicken you like – roasted, store-bought rotisserie, or even breaded chicken nuggets!
This recipe serves two as part of a lunch or dinner menu.  Try this salad with any soup you like, or paired up with a sandwich, wrap, or pasta dish.  Filling, nutritious and delicious – and it won’t break any of your New Year’s resolutions!
Chinese Chicken Salad
Ingredients:
  • 1 small head Napa cabbage, or romaine lettuce
  • 1/2 head small red cabbage
  • 2 carrots
  • 2 or 3 green onions
  • 2 mandarin oranges
  • 2 cooked chicken breasts, or 3 cups chopped cooked chicken
  • 2 tablespoons sesame oil
  • 2 tablespoons rice vinegar
  • 1 tablespoon sesame seeds
  • salt and pepper to taste
Directions:
  1. Chop the Napa cabbage into inch-wide strips.  Finely slice the red cabbage.  Place both in a salad spinner and rinse under cold water, then spin dry.
  2. Cut the carrots into matchsticks.  Finely slice the green onions.  Peel the oranges and remove as much of the white pith as possible.  Separate into segments.  Dice or thinly slice the chicken breasts.
  3. To assemble:  In two very large bowls, mix together the cabbages, carrots, and onions.  Arrange the oranges and chicken breasts on top.  Drizzle each salad with one tablespoon each of sesame oil and rice vinegar, and sprinkle the sesame seeds, salt, and pepper on top.

Friday, January 3, 2014

Pa Muchim - Korean Green Onion Salad


Korean Green Onion Salad, or Pa Muchim (pronounced “pah moo cheem”) is a staple at Korean BBQ restaurants and homes alike.  It is frequently paired with pork belly or other fatty meats, as a counterbalance to all the rich flavors and textures.  I find it spicy and weirdly refreshing!
Yes, this salad has a lot of green onion in it.  So much so that you should probably share it with whoever you’re going to be hanging out with that day.  I wouldn’t eat a big plate of this and then go out on a first date!  Cutting the green onions into long strips can be a little tricky.  If it’s not working out for you or you get frustrated, you can just turn the onion on a bias and cut long diagonal slices – they don’t have to be strips cut lengthwise.  Red leaf lettuce is most commonly used, but you can try green leaf or romaine too.  As for the dried red pepper, just use one of those little packets of crushed red pepper that always comes with a pizza delivery!
Next time you grill or fry something rich and delicious, pair it with this spicy and cleansing salad.  (And for more motivation, check out how healthy green onions are for you!)

Korean Green Onion Salad (Pa Muchim)

Ingredients:
  • 1 bunch green onions (anywhere from 4 to 8 onions)
  • 1 head red leaf lettuce
  • 2 teaspoons soy sauce
  • 1 teaspoon sugar
  • 2 teaspoons rice vinegar (or you can substitute apple cider vinegar)
  • 2 teaspoons sesame oil
  • 1/2 teaspoon crushed red pepper flakes (optional, but try it if you have them!)
  • 2 tablespoons toasted sesame seeds
Directions:
  1. Slice onions lengthwise into thin strips, or you can cut them on a very severe bias into long ovals.  Put the onions into a bowl of ice water and let soak for fifteen minutes.  This crisps them, and also removes some of the sliminess from the insides.
  2. While the onions are soaking, wash the lettuce and cut it into bite-sized strips.  If your lettuce is a little limp, soak it in ice water too!
  3. Make the dressing:  combine soy sauce, sugar and rice vinegar in a small Tupperware cup with a lid.  Shake well to combine.  Add sesame oil and red pepper flakes and shake again.
  4. Drain the lettuce and onions, dry them if you can:  Either roll up in a dish towel, or spin in a salad spinner.  Combine lettuce and onions in a large bowl, toss with dressing, and sprinkle with sesame seeds.  Serve immediately.

Friday, December 27, 2013

Zoe's Crockpot Chicken


Zoe's Crockpot Chicken resize
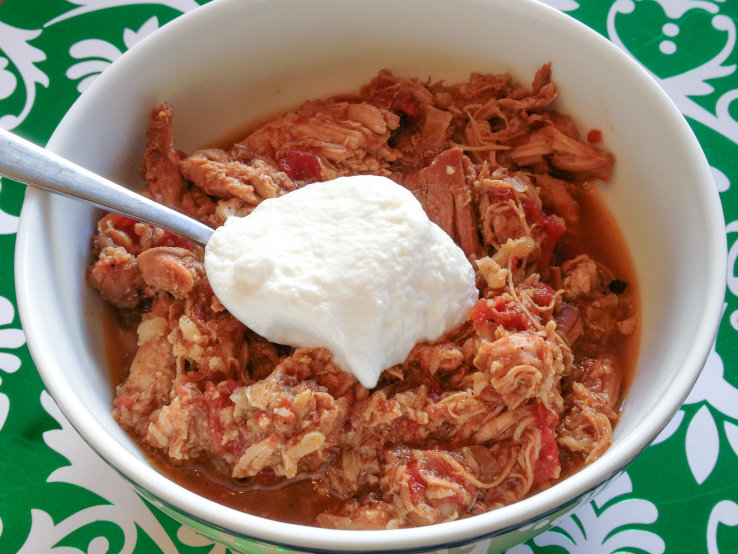
This past weekend, I invited my best friend and her family up to our house for dinner.  Instead of trying to make a meatloaf large enough to feed eight people, I decided to use my two crockpots to save time and effort in my prep.  In the one, a mushroom pot roast.  In the other, I made a lightly curried pot of chicken thighs.  I wasn’t sure if my friends’ kids would like it – they’re eight and ten years old, and I didn’t know if it would be a hit.  Ten year-old Zoe took one bite and her face lit up.  ”Mama,” she excitedly told my friend, “you have to ask Dana for this recipe so you can make it at home!”  I have to tell you, I’ve never been so proud of a recipe in all my life!  This, then, will be called Zoe’s Crockpot Chicken.
You can use one or two pounds of boneless, skinless chicken thighs.  If you use one pound, you’ll have more sauce, and will probably want to serve this over rice or noodles.  If you use two pounds, like I did this time, it’s a thicker stew and doesn’t need anything under it – but jasmine rice would certainly be delicious.  Use any store-bought curry powder you like.  I have two, and the one I used this time was just a $4 jar from Trader Joe’s – nothing fancy.  I also used half a head of cauliflower, diced.  It doesn’t add much to the flavor, but it adds nutrition and body to the sauce.  I like to garnish with a big dollop of plain yogurt, and if you have cilantro, sprinkle some of that on top.  If you need a quick chicken dish that promises to please grown-ups and kids alike, check this one out.
Zoe’s Crockpot Chicken
Ingredients:
  • 1 large onion, sliced fine
  • 1 or 2 pounds chicken thighs
  • 2 tablespoons curry powder
  • 1/2 teaspoon salt
  • 15 ounce can of diced tomatoes (I like fire-roasted)
  • plain yogurt and cilantro to garnish, optional
  • rice or noodles, optional
Directions:
  1. Place the sliced onions on the bottom of the crock pot.  Layer the chicken thighs on top.  Season well with curry powder and salt.  Open the can of tomatoes and dump on top.
  2. Cover and cook on high for 4 hours or low for 6 hours.  When ready to serve, shred the chicken with a fork and mix all the ingredients.  Serve on top of optional rice, garnish with optional yogurt and cilantro, and enjoy!

Saturday, December 21, 2013

Chocolate Cranberry Quinoa Biscotti


If you’ve ever paid $2 for a biscotti at your local coffee shop and thought, “It can’t be that hard to make these,” you are right!  This recipe for Chocolate Cranberry Quinoa Biscotti takes a few extra steps, but if you are looking for a gluten-free, nut-free treat for your afternoon coffee break, read on!
I was looking for nut-free biscotti recipes online, and I found one using quinoa flour, which I’d never heard of or used.  Time to experiment!  It turns out that quinoa flour is incredibly easy to make, and exceeds wheat flour in fiber, protein, and nutrients.  If you don’t want to make your own at home, I understand – you can find it in health food stores and online, and Bob’s Red Mill makes it (I really like and trust their products.)  I used red quinoa, so the biscotti has a darker color, but feel free to use the regular white kind.  To make quinoa flour at home, pour one cup of quinoa on a baking sheet and bake for 12-15 minutes at 300*F.   When cool, grind in a spice grinder, grain mill, or superpowerful blender.  I have a hand-crank grain mill that made short work of the job!  One cup of dry quinoa will yield one and a quarter to one and a third cups of flour.  If you don’t want to go through the trouble, you can use regular or whole wheat flour instead.
Everything else in this recipe is pretty customizable.  Don’t like chocolate chips?  Leave them out or use white chocolate or even butterscotch chips.  Add in any kind of nut, like almonds, pecans or pistachios.  Replace the dried cranberries with cherries, apricots, or just lemon zest.  Drizzle with white or dark chocolate.  These make great gifts, too, because they are pretty hearty and don’t get stale too quickly.  After rigorous and exhaustive testing, I can report that these stand up well to dunking in coffee.  The things I do for you people! 
If you have a friend who loves coffee, give these as a gift (and keep a few for yourself!)

CCQ Biscotti Close up Resize
Chocolate Cranberry Quinoa Biscotti
Ingredients:
  • 1+ 1/3 cups quinoa flour (you can use whole wheat flour instead)
  • 2 tablespoons coconut flour
  • 1 teaspoon baking powder
  • 1/4 teaspoon salt
  • 2 eggs
  • 1/4 cup melted coconut oil (or use butter)
  • 2 teaspoons vanilla extract
  • 3/4 cup coconut sugar (or use brown sugar)
  • 3/4 cup dried cranberries (or cherries or diced apricots)
  • 3/4 cup chocolate chips
  • White chocolate for drizzling (Confession:  I was out of white chocolate, but I found a cookies and cream white chocolate bar that fit the bill.)
Directions:
  1. Preheat oven to 300*F.  Line a baking sheet with parchment paper.
  2. Combine quinoa flour, coconut flour, baking powder, and salt in a bowl.
  3. In a large bowl, combine the eggs, coconut oil, vanilla, and coconut sugar together.  Mix well, then stir in chocolate chips and cranberries.  Stir in the flour mixture a little at a time until thoroughly combined.
  4. Turn the dough out onto the parchment, and using damp hands, mold into a log that measures about 4 or 5 inches wide, one inch high, and about 15 inches long.  Bake until firm, about 25 minutes.
  5. Remove pan from oven, then pick up the parchment with the biscotti log on it, and let it cool on a rack.  You want this cooled to room temperature, so it won’t crumble too much.  With a serrated knife, slice the log into 1/2 inch biscotti.
  6. Place the biscotti back on the baking sheet and bake for about 15 minutes until dry and crunchy.  Let cool completely, then drizzle with white chocolate.  Store in an airtight container to keep them crisp.

Friday, December 6, 2013

Roasted Red Pepper Aioli


… or as it’s known at my house—Magic Sauce!  This recipe for Roasted Red Pepper Aioli is easy to whip up at a moment’s notice, and is infinitely customizable.  Like it spicy?  Add some hot sauce of your choice, or a spoonful of adobo sauce from a jar of chipotle peppers.   Depending on my mood and what else I have laying around, this aioli also gets a few shakes of smoked paprika, or a half a teaspoon of ground cumin.  Mix it up in your blender, taste it, and then see where you want to take it.
We eat this on roasted asparagus.  My husband dips steamed broccoli in it.  I love it on oven-roasted sweet potato fries.  And it’s the best sandwich spread in the world!  Try it in place of regular mayonnaise on your next turkey sandwich or veggie wrap and you’ll ditch that jar of Miracle Whip for good!
Roasted Red Pepper Aioli
Ingredients:
  • 2 cloves garlic
  • 1/2 cup roasted red peppers from a jar, drained and patted dry (or roast your own!)
  • juice of half a lemon
  • 1/4 teaspoon salt or more to taste
  • 1/3 cup mayonnaise (make your own!  Or use store-bought, but not low-fat mayo)
  • optional:  paprika, cumin, hot sauce
Directions:
  1. In a blender or small food processor, blend together the garlic, red pepper, lemon juice and salt until almost smooth.  Add the mayonnaise and optional ingredients and blend again.  Keep refrigerated.

Monday, December 2, 2013

Chicken with Fennel and Olives


Chicken with Fennel and Olives resize

I hope everyone had a lovely Thanksgiving!  If you have leftovers, by all means, eat those first.  Once you finish off your turkey, ham, or whatever else you had, try this recipe for Chicken with Fennel and Olives.
Fennel is in season now and has a delicious anise flavor.  When you are shopping for the olives, buy the biggest green olives in a jar you can find – sometimes they’re called Queen olives – and make sure they’re pitted.  You can find them plain, but I used a jar of large green olives stuffed with cloves of garlic.  Amazing!  You can also find them stuffed with almonds (but for this recipe, I would avoid the ones stuffed with blue cheese or hot peppers!)  This recipe also calls for a cup of white wine.  Use a chardonnay, sauvignon blanc, or pinot grigio – these are dry white wines that will pair perfectly with the chicken.  If you prefer, you can substitute chicken broth.
This is a healthy, light recipe that will warm your house and keep you from feeling like a slug after all the Thanksgiving feasting is over.  (But feel free to have that last piece of pie for dessert!)
Chicken with Fennel and Olives
Ingredients:
  • 1 whole chicken, or a package of skin-on chicken thighs, or skin-on chicken breasts
  • 2 tablespoons olive oil or bacon fat for cooking
  • 1 large fennel bulb
  • 1 large onion
  • 1 jar large green pitted olives
  • 1 cup dry white wine (or substitute chicken broth)
  • salt and pepper to taste
Directions:
  1. Preheat oven to 375F.  If you are using a whole chicken, remove the legs and breasts – you should have 4 pieces.  Reserve the rest of the chicken for soup or another use.  Season the skin with salt.
  2. In a very large oven-proof pan, heat the olive oil or bacon fat.  When very hot, add the chicken pieces skin-side down and cook over medium heat for about ten minutes.  When chicken skin is crisp, remove the chicken pieces from the pan and place skin-side up on a platter and set aside.  Set the pan aside – do not drain!
  3. While the chicken is cooking, slice the onion into thin strings.  Cut off the stalks of the fennel, but keep a few green fronds for garnish.  Cut the fennel into very thin rings or slices, about the same size as the onion.  Drain the jar of olives and slice the olives in half.
  4. Heat the pan again and add the wine, stirring to scrap up any stuck-on bits of chicken.  Add the onion, fennel and olives and stir to combine.  Remove from heat.  Place the chicken pieces skin-side up (so it stays crispy) on top of the bed of vegetables and place in the oven.
  5. Cook for 30 minutes.  Use a meat thermometer to check for doneness.  To serve, make a bed of vegetables, place a chicken piece on top, and add a sprig of fennel frond.  Season with salt and pepper.

Friday, November 15, 2013

Layered Greek Dip


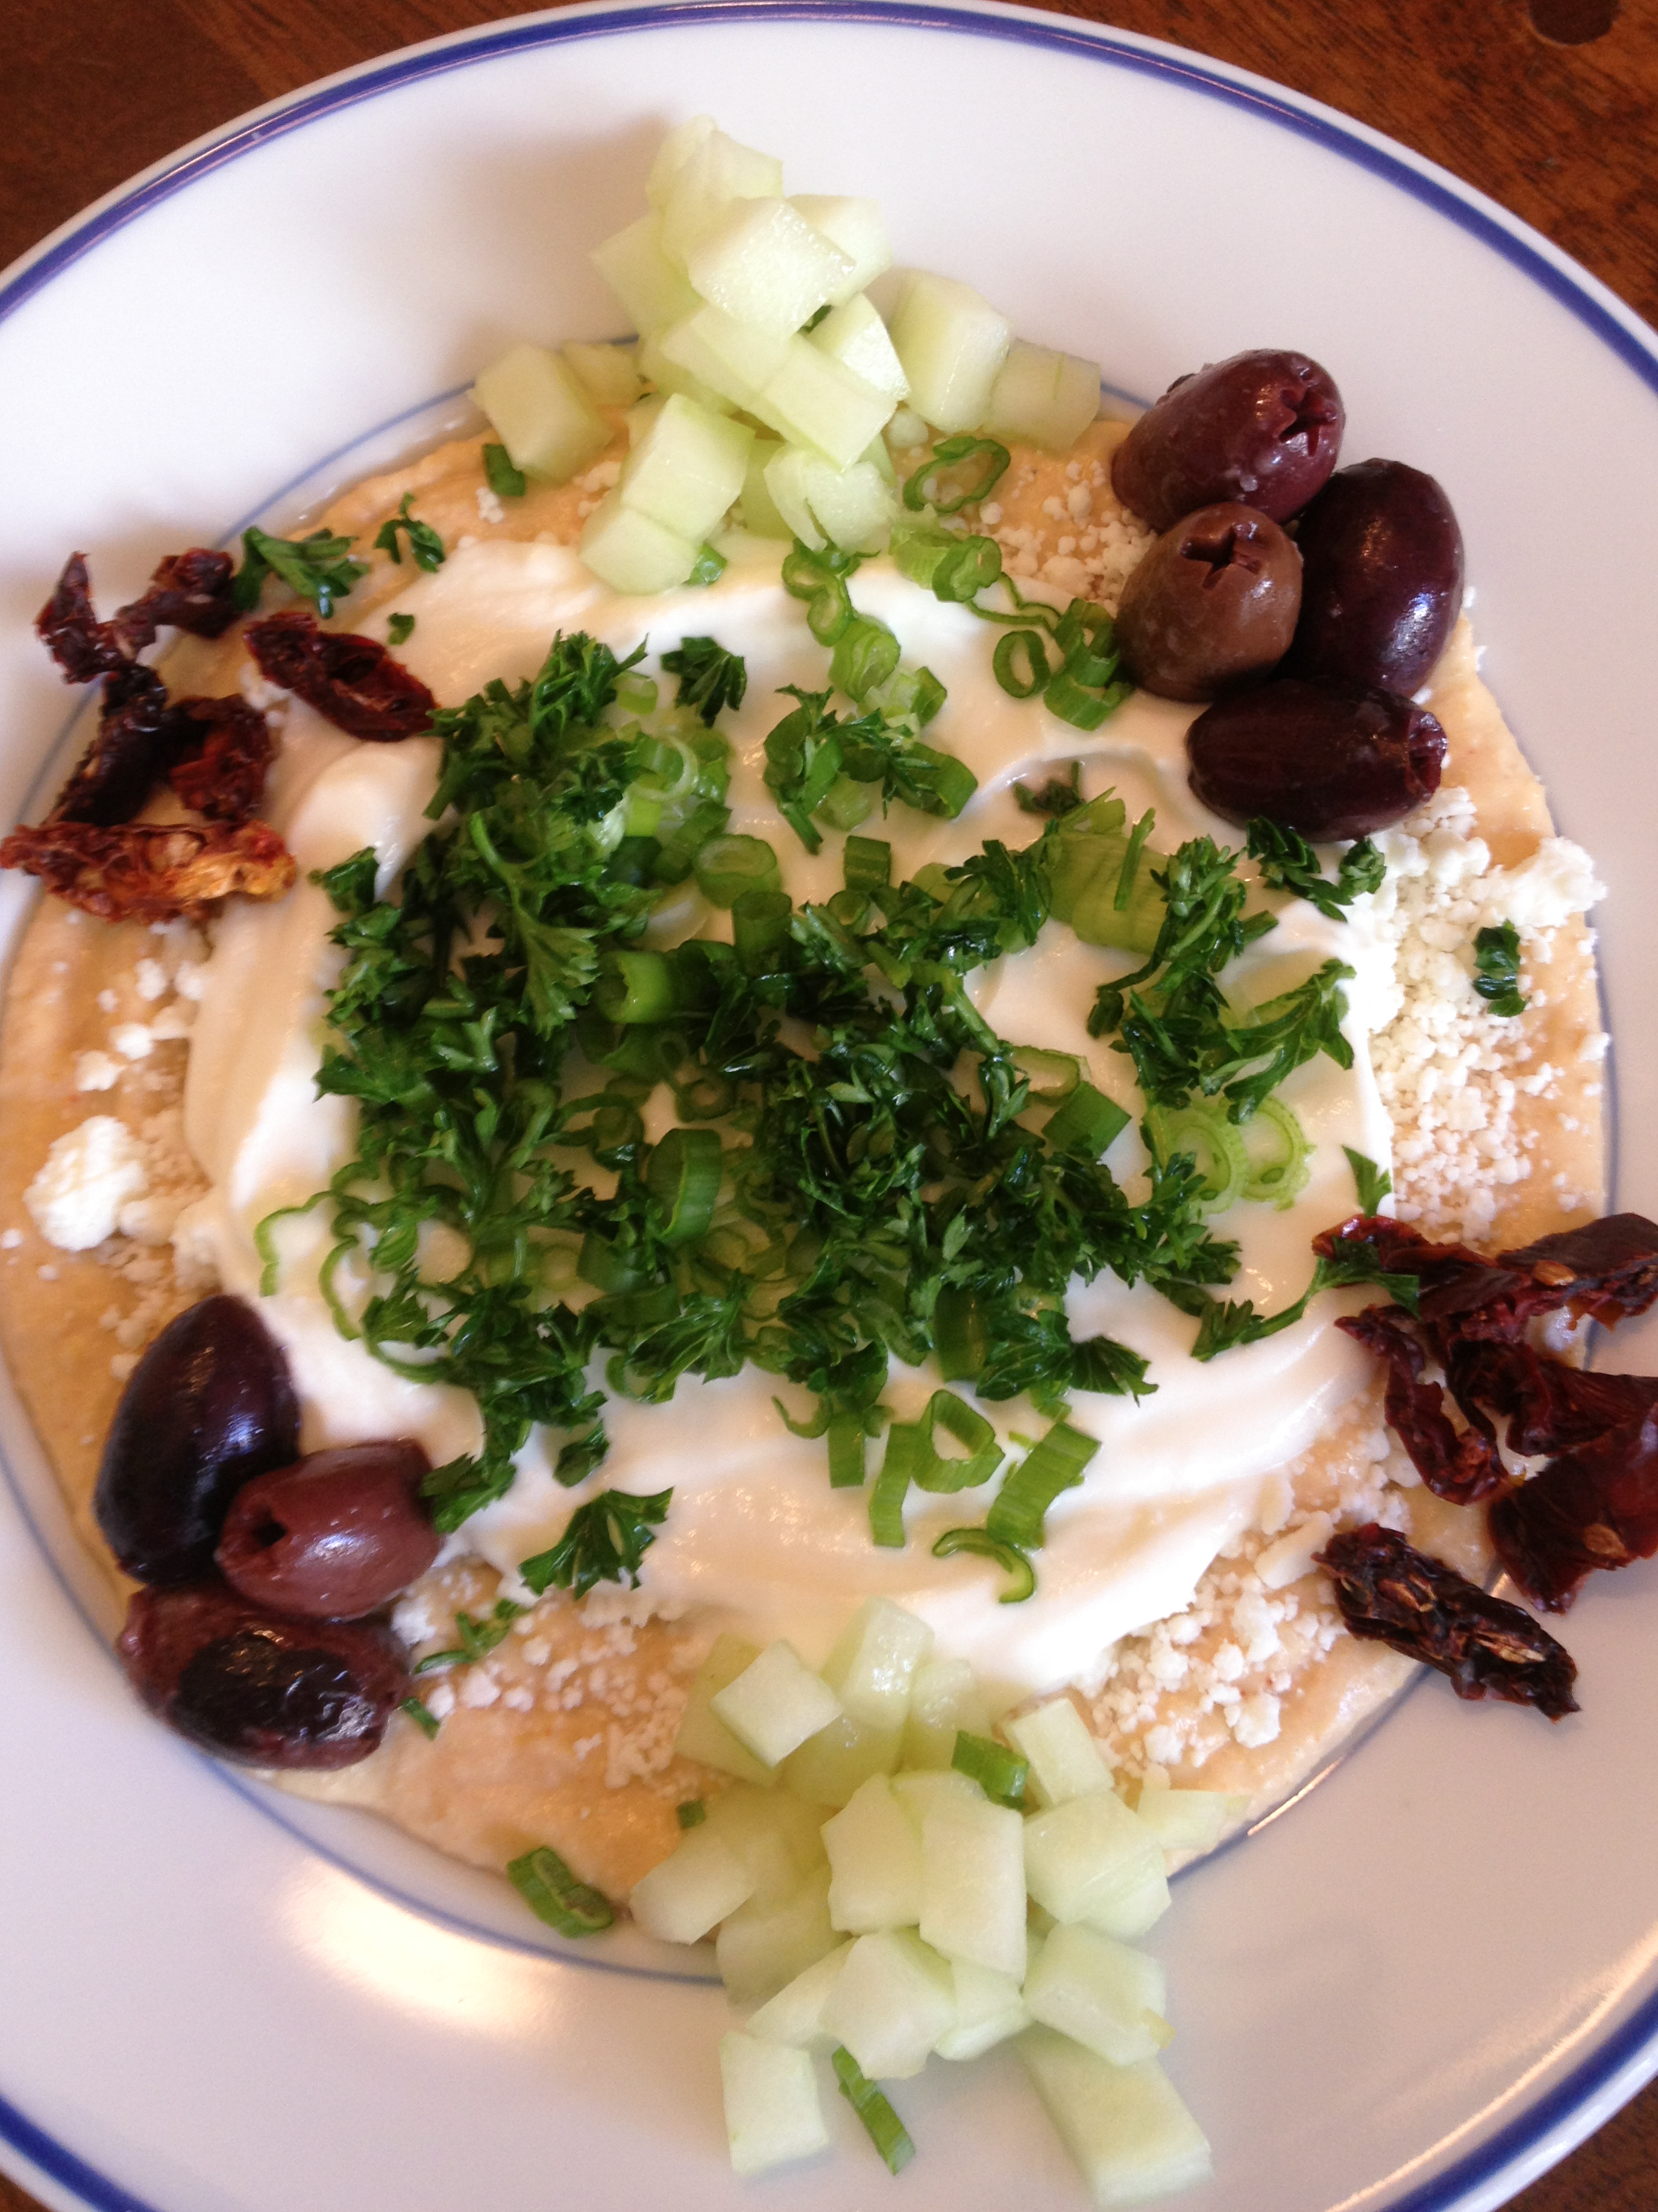
Layered Greek DipThis month I am focusing on side dishes and things you can bring to your Thanksgiving table.  When my family gets together, we all commit to bringing a piece of the dinner puzzle:  whichever family member is hosting usually makes the main dish, and the other family members decide on who is going to make dessert, salad, vegetable, and appetizer.  My sister brought an appetizer called Layered Greek Dip – and I was hooked!
This dish is easy to put together and is healthy to boot!  Assemble it right before your guests come, or make ahead and covered in the fridge until you are ready to serve.  Offer a variety of dippers:  I like pita chips, tortilla chips, Triscuits (my favorite cracker of all time!) and veggies like carrot sticks and red pepper slices.  This will take the edge off people’s hunger long enough for you to finish up your last-minute dinner duties.  Offer some white wine with this appetizer and your guests may forget all about the main course!
I should have taken a photo of my sister’s dish when she  made it, but it slipped my mind, and before I remembered, we had all smeared it all over the plate and eaten half of it!  I made it again this morning, so the photo is of a “personal-sized” serving.  And you know what?  It makes a yummy, unusual breakfast too!  I used sundried tomatoes because I didn’t have any cherry tomatoes (and I don’t care for them anyway.)  Try it and let me know if you love it like I do!

Layered Greek Dip

Serves 8 as an appetizer
Ingredients:
  • 8 ounce container of hummus (or make your own!)
  • 4 ounces crumbled Feta cheese
  • 6 ounce container of plain Greek yogurt
  • 1 small cucumber, peeled, seeded and chopped
  • 4 ounces cherry tomatoes, cut in half
  • 4 ounces Kalamata olives (or other black olives)
  • 2 green onions, diced
  • handful of parsley, minced
Directions:
  1. On a large plate, spread out the hummus.  Cover with a layer of Feta, then cover that with the Greek yogurt.  Arrange the cucumber, tomatoes, and olives over the top in any way you find aesthetically pleasing.  Sprinkle with green onion and parsley.  Serve with chips or veggie sticks.  Keep refrigerated until ready to eat.