Showing posts with label Paleo. Show all posts

Monday, September 15, 2014

Sriracha Butter


Are you a griller?  Admittedly, I am not.  The two things I avoid, as far as cooking goes, are baking with yeast (it hates me and refuses to cooperate) and the grill.  I love it when my husband or my Dad grill up something, and I will prepare everything for the fire—as long as I am not the one doing it.  Why?  I don’t know.  I’ve never done it and I guess I’m intimidated.  So even though we live in sunny Southern California, we eat pan-fried steaks much more often than grilled.  Sound boring?  Not when you serve them with Sriracha Butter!
This is a Martha Stewart recipe I found in the back of her magazine this summer.  If you haven’t tried it yet, Sriracha is a brand of hot sauce that is beloved for it’s spicy, fruity bite.  If you don’t have Sriracha handy, try another hot sauce – just not something that’s got too much fire!  The other ingredient that makes this butter special is the anchovies.  I didn’t have any, but I always have a tube of anchovy paste in my fridge (for this Caesar salad recipe and this Green Goddess dressing).  HINT: Any time you see an anchovy fillet in a recipe, you can substitute one inch of anchovy paste.
We ate this on sirloin steaks that were very lean, so the added flavor and fat from the butter were a welcome addition.  My spice-shy daughter loved it and even put some on her steamed cauliflower!  Ready to try it?  Let’s go!
Sriracha Butter
Ingredients:
  • 1 stick butter, softened
  • 2 anchovy fillets, minced (or use a 2-inch squeeze of anchovy paste)
  • 1 tablespoon Sriracha or other chili sauce
  • 1 clove garlic, minced
  • salt to taste (I didn’t add any extra salt to mine)
Directions:
  1. Mash the softened butter together with the anchovies, Sriracha, and garlic.  Taste to see if you want any more salt.  Refrigerate until ready to use.  Melt on steaks, cooked vegetables, or potatoes.

Friday, June 20, 2014

Shrimp with Cilantro Pesto


One thing that will bum me out, without fail, is seeing a wilted, mushy bunch of herbs that I didn’t get to in time.  Just makes me feel terrible.  So I had this nearly full bunch of cilantro in my produce drawer and no clue what to make with it.  Aha!  How about try it in pesto?  This recipe forShrimp with Cilantro Pesto was a big hit at dinner last night!
You can cook the shrimp however you like.  Here, we just pan-fried them quickly with salt and pepper, and let the pesto do the heavy lifting in the flavor category.  This comes together so quick it’s laughable.  Make the pesto whenever you like – even the day before – and keep in the fridge until you are ready to eat.  We ate this with roasted baby potatoes and roasted broccoli.  The pesto was especially delicious on the potatoes.  Try it and see!
Shrimp with Cilantro Pesto
Ingredients:
  • 1 large bunch cilantro
  • 1/3 cup toasted pepitas
  • 1 teaspoon minced garlic
  • juice of 1 lemon or lime
  • 1/3 cup olive oil
  • salt and pepper
  • 1 pound shrimp, peeled
  • 1 tablespoon olive oil
Directions:
  1. Wash and shake the cilantro and trim about half an inch off the bottom of the stems.  Place them in the bowl of a food processor.  Blend with the pepitas, garlic, lemon juice, and olive oil.  Taste and add salt and pepper to your liking.  Pour into a bowl and store in the fridge until ready to use.
  2. Prepare the shrimp: peel the shell off, remove the tail, and de-vein.  Season with salt and pepper and drizzle with olive oil.  Heat a pan on medium-high, and quickly sauté the shrimp.  They will only take about 2 minutes per side – don’t let them get tough and overdone!  Remove shrimp from pan to a plate and serve with the cilantro pesto (and a squeeze of lemon if you like.)

Grilled Caesar Salad


Before we go any further:  Yes, you grill the lettuce.  Say what?!  I first encountered this recipe at an Italian restaurant in our neighborhood a few years back.  It was a revelation—you can grill lettuce! And  instead of making it nasty and squishy, just a tiny bit of char adds so much flavor and texture as to change the whole dish!  Then I saw the idea again in a magazine last week and, that was it, I had to try it at home.  (Okay – I made my husband do the actual grilling.  But I supervised, I promise!)
The dressing comes together in a snap in the food processor (or you can do it old-school in a wooden salad bowl with a fork, but I find it is hard on my forearms!)  The only ingredient you may not have is anchovy paste.  It’s pretty cheap and lasts forever in your fridge, and it adds that “umami” flavor you can’t get anywhere else.  It’s also great in spaghetti sauce, if you’re worried you won’t make a lot of Caesar salad.  This dressing also calls for a raw egg yolk.  I would highly recommend buying the highest quality eggs you can find – check your local farmer’s market – or at least getting organic, free-range, or both.  (If you are immunosuppressed you could substitute a spoonful of store-bought mayonnaise, but it’s just not the same.)  Also, you’ll notice there are no croutons on my plate.  We almost never eat bread, but if croutons are your thing, go ahead and pile them on!
This salad was a side dish to a dinner of grilled steaks and grilled veggies.  Feel free to chop up some grilled chicken and make it a whole meal!  For a side dish, plan on one half of a head of lettuce per person.  If you are making it the main dish, serve a whole head of lettuce per person.  Curious?  Let’s go!
Grilled Caesar Salad
Ingredients:
  • 2 cloves garlic, peeled
  • 1 teaspoon Dijon mustard
  • 1/2 teaspoon Worcestershire sauce
  • 1 egg yolk
  • 1 teaspoon anchovy paste
  • juice of one lemon
  • 1/4 – 1/3 cup olive oil
  • 1 head romaine lettuce
  • croutons and grated parmesan cheese to serve
Directions:
  1. Prepare the dressing:  In a food processor, blend together the garlic, mustard, Worcestershire sauce, egg yolk, anchovy paste,  and lemon juice.  Blend in 1/4 cup of oil.  Taste to see if you like the consistency.  If you want it more diluted, add more oil.  Refrigerate until ready to serve.
  2. Prepare the lettuce:  Slice it vertically down through the core.  You have two long halves now.  Wipe with a dry paper towel.  The lettuce needs to be completely dry or else it will stick and wilt.  No washing it, no oiling it!  Place the lettuce on the grill, cut side down, for 2 minutes without moving it.  With tongs, take it off the grill and lay it grilled-side up on a plate.  Don’t cover it or it will get soggy.  Drizzle with dressing, and add croutons or grated cheese to serve.  Eat it now!

Crunchy Chopped Salad


I think this was originally a recipe from a South Beach Diet cookbook.  But I started making it so long ago, and have added and deleted ingredients over the years…so that I am not sure it’s the same one in the book.  That’s okay – it’s not about exact ingredients.  You can add or subtract as you like.  It’s about CRUNCH!  And that’s what you get in this Crunchy Chopped Salad!
I know that chips aren’t great for me.  I usually don’t crave them, and I make sure I don’t keep them in the house (because as a stay-at-home mom, you DO eat whatever is in the pantry!)  But sometimes you just get that urge for something kind of salty and crunchy.  I make this salad instead.  Is it the same?  Of course not!  (Otherwise I’d call it Doritos Salad!)  But this satisfying, fun-to-eat dish  scratches that itch for me, and maybe it will for you too.
If you need a break from lettuce, try this.  If you have lots of singleton vegetables in your crisper drawer, try this.  If you want something fresh and different for your next cookout, try this!
Crunchy Chopped Salad
(Serves four as a side dish)
Ingredients:
  • 6 baby carrots
  • 1 bunch radishes, trimmed
  • 3 stalks celery, trimmed
  • 2 Persian cucumbers, or one large cucumber
  • 1/2 red bell pepper
  • 1/2 yellow bell pepper
  • 2 green onions
  • 2 cloves garlic
  • juice of 1 lemon or lime
  • 2 or 3 drops of honey
  • salt and pepper
  • 1/4 to 1/3 cup olive oil
  • 2 avocados
Directions:
  1. Wash and trim all your veggies.  Cut them all into medium-small pieces.  This is up to you, but for example, I cut the peppers into 1/2″ square pieces.  The radishes, cucumbers, carrots, and celery all get sliced vertically, then cut into 1/4″ slices.  If you dice everything too small, you won’t get the crunchiness.  If you cut everything too large, you’ll only get one or two veggies on your spoon at a time.  Experiment and see what size you like best.  If you are using a large cucumber, you may want to peel off the waxy skin and scoop out the seeds.  I like Persians because they are thin-skinned and have very little squishy gel around the seeds.  Pile all your chopped veggies into a big bowl and toss.  Beautiful, right?
  2. In a little food processor, blend up your garlic, lemon juice, honey, salt and pepper, and 1/4 cup olive oil.  Taste and dilute with more oil if you like.
  3. To serve, dish the salad into a bowl and drizzle liberally with dressing.  For each serving, dice half of an avocado and place it on top (otherwise it gets smushed.)  Eat this salad with a big soup spoon so you get a little of each vegetable in every bite!
If you have leftovers, you can mix in a can of tuna the next day.  It’s wonderful!

Saturday, June 7, 2014

Crockpot Chicken Curry and Curry Chicken Stew


Two for the price of one!  That’s what you get when you start this recipe in the crockpot.  It’s not very glamorous, but oh boy! does it smell and taste divine!  A simple list of ingredients  and a crockpot are all you need to make two delicious meals: Crockpot Curry Chicken and Curry Chicken Stew!
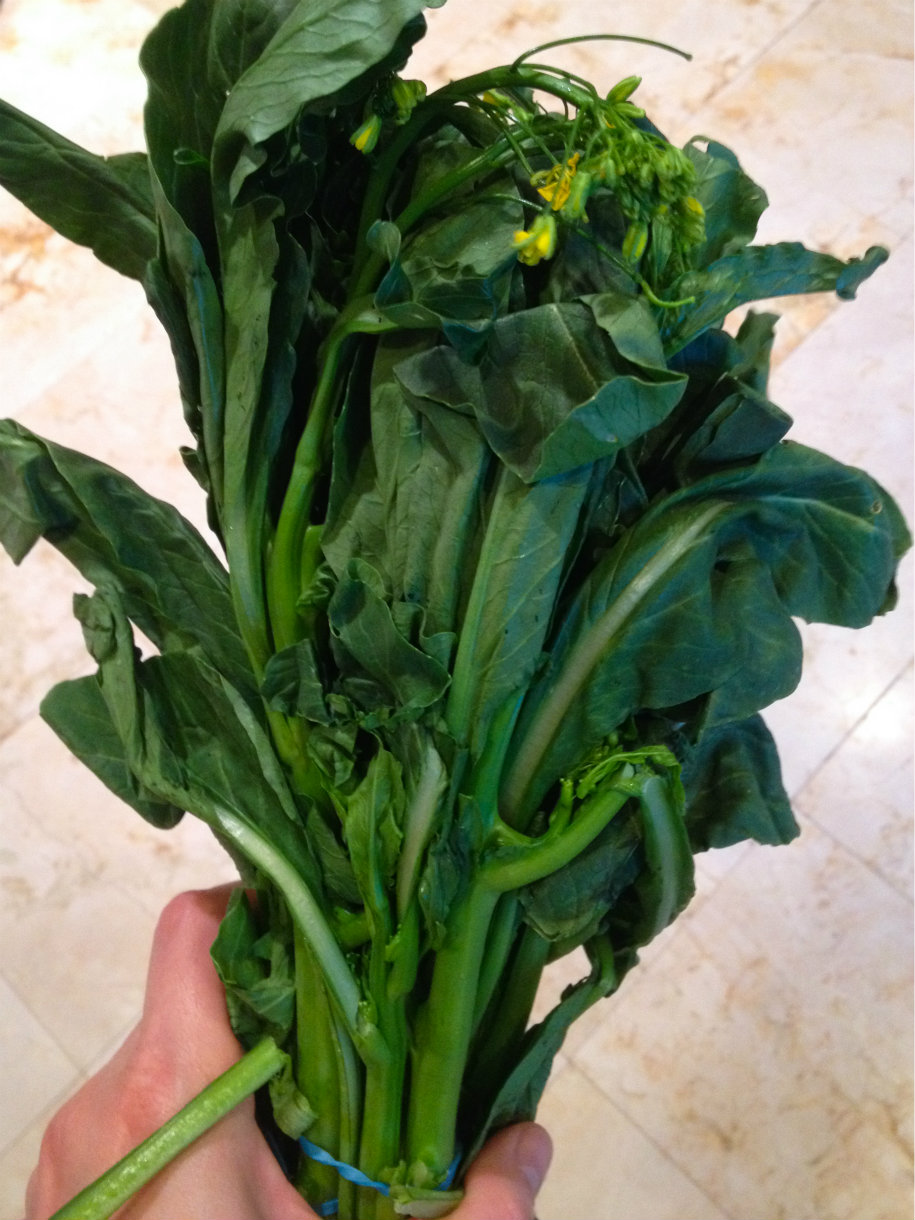
First you need a can of coconut milk or coconut cream.  It needs to be a can, because the coconut milk “beverage” they put in cartons is all watery, and you need the high fat content of the canned stuff.  Trader Joe’s has both canned coconut milk and coconut cream, or you can try an Asian market or online.  Next thing you need is curry.  You can use curry paste; I just used curry powder and it was lovely.  You’ll need an 8-ounce package of mushrooms, any kind – I used regular button mushrooms, but shiitakes or creminis would be nice too, and give it a stronger flavor.  And last is this beauty:
Chinese Broccoli resize
I buy it at the farmer’s market from a Vietnamese lady who tells me it’s called “Chinese broccoli”.  A little online research shows its real name is kai lan.  Its leaves are like spinach, and its cooked stems have the consistency of asparagus.  If you can’t find it, use spinach instead…although the Chinese broccoli has a stronger, more bitter flavor.
I made this with whole chicken legs – skin, bones and all – but I think next time I’ll try it with just boneless, skinless thighs.  Chicken skin in the crockpot is not a nice thing – we actually peeled it off before we ate the Curry Chicken the first night because it just seemed kind of rubbery.  But I think the skin and bones do add to the stock for the stew the next day, so it’s up to you.  Either way, you get two healthy, delicious meals out of one crockpot – you can’t beat that!
Crockpot Curry Chicken
Ingredients:
  • 3 pounds whole chicken legs
  • 1 can of coconut cream, or use coconut milk (not low-fat)
  • 3 tablespoons curry powder or curry paste of your choice
  • juice of 1 lemon or lime
  • 1 tablespoon salt
Directions:
  1. In a large crockpot, set the time for 8 hours on low or 4-6 on high.  Put the chicken legs on the bottom.
  2. Mix together the coconut cream, curry, lemon juice and salt.  Pour over the chicken and stir to combine.
  3. Cook until a thermometer reads 180*F.  Remove chicken legs from the pot and cover them with foil.  Pour the coconut broth into a large pan and simmer for about 15 minutes.  It will reduce a little.  Serve chicken legs with coconut broth.
Now, at this point, I had 2 very large legs leftover and about a cup of coconut broth.  I put them together in a Tupperware container.  Then the next day, I made…
Curry Chicken Stew
Ingredients:
  • 1 tablespoon butter, coconut oil or olive oil
  • 8 ounces mushrooms, quartered
  • 1 pound Chinese broccoli, cut into 2-inch pieces  (or use fresh spinach)
  • 2 large cooked chicken legs (or use 1 pound of chicken thighs)
  • leftover coconut broth – as much as you have
  • optional chicken broth
  • optional jasmine rice to serve
Directions:
  1. In a large pan, saute the mushrooms in 1 tablespoon butter, coconut oil, or olive oil.  Stir, and after five minutes, add the Chinese broccoli and cover.
  2. While the mushrooms are cooking, prepare the chicken:  peel off the skin and any subcutaneous fat you find from the cooked chicken legs.  Remove the meat from the bones and roughly chop.
  3. Add the chopped chicken and remaining coconut broth to the mushrooms and Chinese broccoli.  If you want it to be soupier, add some chicken broth.  Cook until the chicken is hot, about ten minutes.
This would be lovely with some steamed jasmine rice!  I ate this for lunch, and liked it so much I ate it again for breakfast.

Saturday, April 26, 2014

Crustless Kale Quiche


Talk about a tongue twister!  It’s worth the effort to say, and the little bit to make, because this Crustless Kale Quiche hits the spot.
I’ve only made this once … and I’ve already eaten almost half of it.  The kale adds a little bitterness and chew to what would otherwise be a run-of-the-mill spinach pie.  Nutmeg, currants, and pepitas add an almost sweet, Middle Eastern flavor profile.  The three eggs are just enough to combine the ingredients without becoming heavy or custardy like a regular spinach quiche.  Don’t get me wrong – a traditional spinach and swiss cheese quiche is wonderful, but this one is lighter, with an unexpected combination of flavors that will have you craving it again.
I ate this hot, and I ate it cold, cut right out of the fridge.  I ate this with a big slab of goat cheese on top and I ate it plain.  I’m going to eat more of it with dinner tonight and see if I can’t discover some new way to enjoy it.  If you want your greens, with a little extra zing, try this instead of a salad tonight!
Crustless Kale Quiche
Ingredients:
  • 1 pound bag of frozen chopped spinach
  • 1 large bunch of kale
  • 3/4 cup pepitas (or try pine nuts or sunflower seeds)
  • 1 tablespoon coconut oil (or butter) plus more for greasing the pie plate
  • 1 teaspoon chopped garlic (about 2 cloves)
  • 1/2 cup currants or raisins (next time I’m trying golden raisins!)
  • 1/8 teaspoon ground nutmeg
  • 1/2 teaspoon salt
  • 3 eggs
  • Goat cheese, to serve, if desired
Directions:
  1. Wash the kale and remove from the stem, tearing it into smaller-than-bite-sized pieces.  Saute on medium heat in a large pot with a lid.  Don’t add any extra water or oil – just the damp kale by itself.  Stir occasionally until it gets soft, about 15 minutes.  When it appears soft and has reduced in volume, pour in the bag of frozen spinach.  Stir to combine and replace the lid.  Cook on medium-low for another five minutes until the spinach is thawed.  Remove from the heat and let cool.
  2. Preheat the oven to 350*F.  While the spinach and kale are cooling, heat the coconut oil over medium and add the pepitas.  Stir frequently for 5 minutes, then add the garlic and currants.  Stir for another 3 minutes.
  3. Squeeze out as much water from the kale mixture as possible, then dump it into a large bowl.  Pour over the pepita mixture and combine.  Add nutmeg and salt.
  4. Beat 3 eggs well and mix into kale mixture.  Grease a pie plate, then fill with the kale mixture.  Smooth it down so you have a flat top.  Bake for 35 minutes or until not wet in the middle.  Serve warm or cold, with goat cheese or without.

Dijon Dill Green Beans


If I remember correctly, this is a recipe from the South Beach Diet book.   In any case, regardless of origin, these Dijon Dill Green Beans are delicious and healthy…and sure to please!
The Dijon dill dressing is very light and won’t hide the sweetness of the green beans.  I’ve used both dried dill and fresh, and they both taste great, so don’t fret or make a trip to the store if you only have dried.  Low-carb, low-cal, and tasty for sure, this veggie side will taste great with whatever main dish you’re making tonight!
Dijon Dill Green Beans
Ingredients:
  • 1 pound green beans, fresh or frozen
  • 2 tablespoons butter
  • 1 tablespoon Dijon mustard
  • 2 tablespoons chopped fresh dill (or one scant teaspoon dried dill)
  • salt and pepper to taste
  • squeeze of lemon, optional
Directions:
  1. Prepare the green beans:  (If using fresh, take off the ends and cut into 2-inch lengths.)  Steam or microwave the beans until they are still a little firm.
  2. While the beans are cooking, heat a large pan over medium and add the butter and dill.  Stir to keep the dill from burning and cook for a few minutes until the butter is bubbly and starting to brown.  Add the Dijon mustard and salt and pepper.
  3. Drain away any excess water from the beans, then add to the dill mixture.  Stir to coat the beans, then serve hot with a squeeze of lemon or another pinch of salt.
Leftovers?  I ate mine cold, with a can of tuna mixed in and (surprise!) a little more lemon juice squeezed over the top.  Yum!

Friday, March 7, 2014

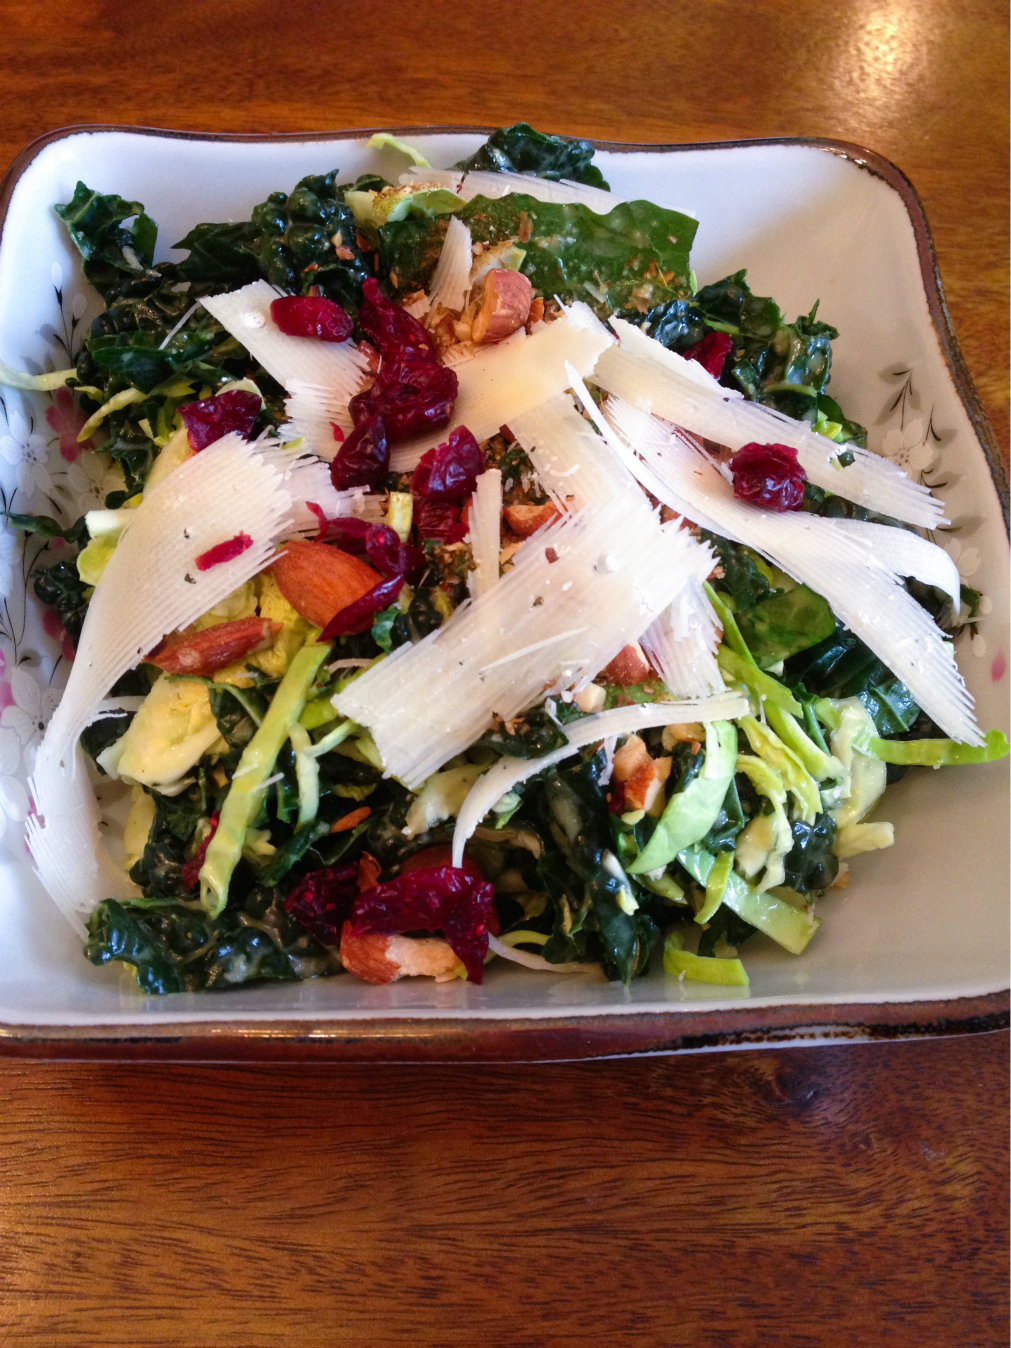
Brussels Sprout and Kale Salad


Kale and Brussels Sprouts Salad Resize
Now you all know I love a good salad.  I will eat a salad for breakfast – in fact, I’m finishing this big bowl of Brussels Sprouts and Kale Salad right now, with my morning coffee!  Raw Brussels sprouts—for breakfast?!  Yes indeed!
I found this recipe on the Bon Appetit website, which I tweaked to my liking.  The best thing about this salad, aside from the fact that it tastes good, is that it is so hearty.  I made it last night, had some for dinner, and it’s still good this morning!  But because it’s so sturdy, you’ll want to keep the nuts, fruit, and cheese separate until you’re ready to eat it.  You can sub any dried fruit you like for the cranberries:  cherries, blueberries, golden raisins, and diced dried apricot would be delicious too.  And if you don’t have toasted almonds, substitute pecans, walnuts, or hazelnuts.  Check it out, and report back with your chosen combination of flavors!
Brussels Sprouts and Kale Salad
Ingredients:
  • 1 bunch Tuscan kale (also called dinosaur or lacinato kale)
  • 1/2 pound large Brussels sprouts
  • 1 shallot (or 1/4 red onion)
  • juice of one large lemon
  • 1/3 cup olive oil
  • 1/2 teaspoon honey
  • to serve:  almonds, dried cranberries, and Parmesan cheese
  • salt and pepper
Directions:
  1. Prepare kale:  Strip the leaf off the thick stem, then soak the leaves in cold water to remove any dirt.
  2. While the kale is soaking, prepare the Brussels sprouts:  cut off the stem end and any brown or wilted leaves.  Slice in half lengthwise, and lay down flat on the cut side.  Thinly slice each sprout half to create shreds.  Place shredded sprouts in a very large bowl.
  3. Dry the kale.  Grab a handful and sort of wad it up, then run your knife through the kale to shred it.  Add to the sprouts in the  bowl.
  4. In a small food processor, blend together the shallot, lemon juice, olive oil, and honey.
  5. Pour over the kale and mix with your hands.  I mean get in there!  Massage the dressing into the kale, squeezing it to soften everything up and get the dressing into all the sprouts and kale.
  6. To serve:  Dish salad into a bowl.  Take a handful of almonds and crush with a knife or in a mortar and pestle – just crack them lightly, you don’t need to pulverize them.  Add the cracked nuts and cranberries to the salad, then shred some Parmesan to go on top.  I shaved the block of Parmesan with my vegetable peeler, but you don’t have to do that if you don’t want.  Season with salt and pepper and serve.

Saturday, February 15, 2014

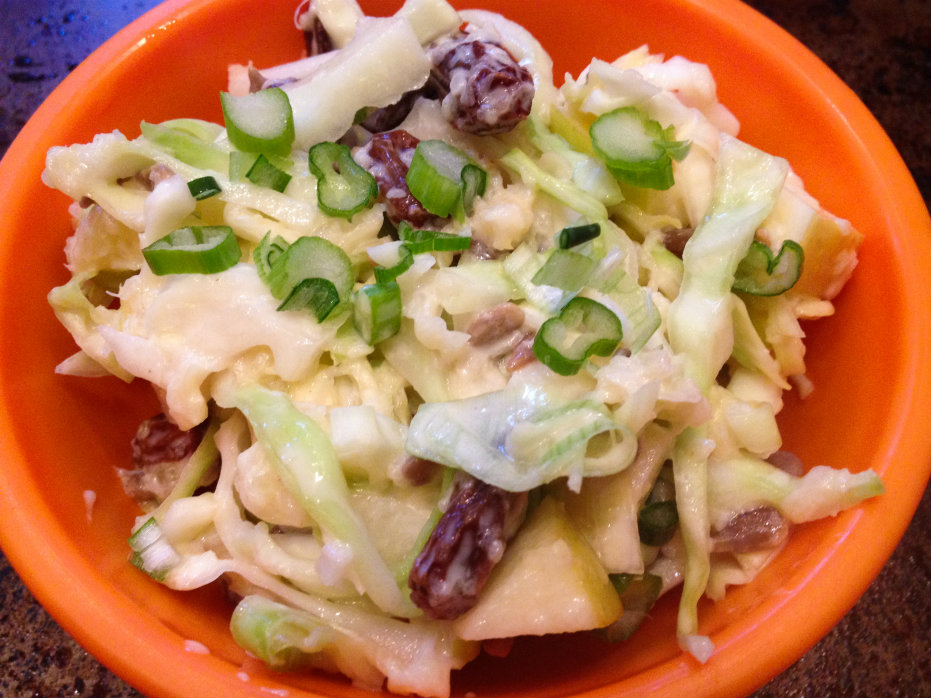
Cabbage and Pineapple Slaw


Cabbage and Pineapple Slaw Resize
Don’t let the monochromatic appearance fool you – this salad packs a tasty punch!  Winter veggies come together with fruit, nuts, and a light yogurt dressing in this recipe for Cabbage and Pineapple Slaw.
Cabbage is not a glamorous vegetable.  In fact you can probably buy a giant head of it today for less than a dollar.  Nutritionally it’s a powerhouse, though, and you probably could stand to eat more of what it’s offering!  Sliced very fine (or grated if you prefer), it’s a perfect foil for crunchy apples, chewy raisins, and whatever nuts you like.  I used sunflower seeds, but try almonds, hazelnuts, pecans or walnuts.  I think walnuts would make it taste even more like a healthier version of Waldorf Salad (a childhood favorite of mine.)  The star of the show, and what lifts this recipe above other coleslaws, is pineapple.  Fresh pineapple, minced, would be glorious, but I used a half a can of crushed pineapple and it was delicious.  Save the rest of the pineapple for smoothies, or to dress up cottage cheese.
Since we’re still knee-deep in winter, and Soup Month is going strong, try this salad paired with a spicy soup.  I think it would be great with Chinese Hot and Sour Soup, or any chili recipe, to quell the heat.  Let me know how you like it!

Cabbage and Pineapple Slaw

Ingredients:
  • 1/2 head green cabbage, sliced very fine or grated
  • 1 small apple, diced
  • 1 green onion, minced
  • about 1 cup crushed or minced pineapple
  • 1/2 cup raisins or other dried fruit (cranberries or cherries would be yummy!)
  • 1/2 cup nuts or sunflower seeds
  • 1 heaping tablespoon mayonnaise
  • 2 heaping tablespoons plain yogurt
  • juice of 1 lemon
  • juice of 1 clementine orange
  • 1/4 teaspoon salt, or to taste
Directions:
  1. In a very large mixing bowl (or a very large Tupperware container with a lid, my preferred method), mix together the cabbage, apple, onion, pineapple, raisins, and nuts.
  2. In a small container with a lid, shake together the mayo, yogurt, lemon and orange juices, and salt.  Taste to see if you want any more salt or lemon.
  3. Pour dressing over cabbage mixture and shake or toss to combine.  Refrigerate until ready to serve.

Chocolate-Covered Strawberries


Chocolate-Covered Strawberries Resize
Nothing says Valentine’s Day like Chocolate-Covered Strawberries!  Surprise your sweetie – or sweeties, because my kids went cuckoo for these!  If you can get your hands on some nice strawberries (and I know it’s still very much winter in some places, but go with me on this), you can make these for dessert and watch their eyes light up!
My trick here is to use a teaspoon of coconut oil in the chocolate.  It keeps the chocolate from becoming brittle and adds the lightest hint of tropical flavor.  Instead of shattering when you bite into it, this chocolate holds tight to the strawberry so you can eat every last bite.  No worries if you don’t have coconut oil.  You can go without and just use the chocolate, but you will definitely want to make sure your berries are blemish-free and thoroughly dried.
Ready to make your loved ones’ hearts go pitter-pat?  Bring out these healthy and gorgeous treats tonight!
Chocolate-Covered Strawberries
Ingredients:
  • 18 strawberries
  • 1 cup semisweet chocolate chips
  • 1 teaspoon coconut oil
Directions:
  1. Wash the strawberries and dry very carefully.  Pull up the stem leaves so they point up; otherwise you’ll get them covered in chocolate!  Make sure you don’t have any open, weepy spots on the berries, or the chocolate won’t stick.
  2. In a small but deep bowl, microwave the chocolate chips and coconut oil for 30 seconds at a time, and stir after each 30 seconds.  It took three 30-second bursts to get everything melted and smooth.
  3. Line a baking sheet or tray with parchment paper.  Holding onto the stem of the berry, dip in chocolate and place on the parchment paper.  When all berries are dipped, place the tray in the fridge (or freezer if you are short on time!)  Serve cold.
I had a little leftover chocolate in my bowl.  I dipped cashews and banana pieces in there to get every last drop.  My 2 year-old’s chocolate mustache was a sight to behold!

Sunday, February 9, 2014

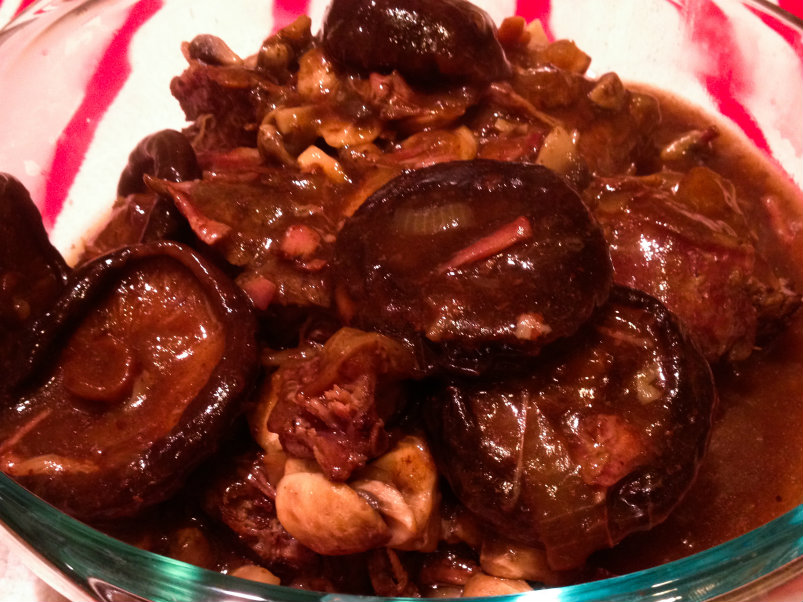
Double Mushroom Pot Roast (Crock Pot)


Double Mushroom Pot Roast resize
I feel like I should apologize for the photo. It’s very…brown.  There’s really no good way to photograph this recipe.  It’s not glamorous.  But it is the easiest and most delicious thing that has ever come out of my Crock Pot!  I present to you:  Double Mushroom Pot Roast!
The secret ingredient is dried mushrooms.  I use dried shiitake mushrooms, because they’re cheap and plentiful at my Korean market.  You can try this with whatever dried mushrooms you can find.  I use a big handful, about 6 or 7 big mushrooms.  For the second dose of mushrooms, regular button mushrooms or creminis will do the trick.  Use whatever large beef roast you like.  Chuck roast is always a favorite, and for this one, I used something called a “seven bone roast” that was also flavorful.
If you want your house to smell amazing when you walk in the door after work or errands, make this in the morning and revel at how easy and delicious it is that night.
Double Mushroom Pot Roast (Crock Pot)
Ingredients:
  • 1 large beef roast, preferably chuck, about 3 pounds
  • 1 onion, sliced
  • handful of dried mushrooms
  • 8 ounces fresh button or cremini mushrooms, sliced
  • 2 tablespoons cornstarch
  • salt and pepper
Directions:
  1. In a very large Crock Pot, drop in the sliced onions and dried mushrooms.  Set to LOW and the timer for 8-10 hours.
  2. In a large pan, brown the roast on each side.  When browned, place on top of mushrooms and onion, season with salt and pepper, and cover.
  3. After 8 hours, remove the roast from the Crock Pot to a large serving platter or bowl.  In  a large pan, cook the button (or cremini) mushrooms and spoon a bit of the juice from the Crock Pot over them to keep them from sticking.
  4. When the mushrooms are done, pour them over the roast.  In the same pan, pour in the contents of the Crock Pot – the juice, onions and mushrooms.  Cook for 5 minutes on medium to reduce a bit.
  5. Mix the cornstarch with 1/4 cup of water and mix to blend.  Pour this mixture into the pan and stir into the onion mixture.  Stir frequently to prevent the gravy from sticking to the pan.  When thickened, about 5 to 10 minutes, pour over the roast and serve.  Season heavily with salt and pepper.

Saturday, February 1, 2014

Broccoli Stalk Soup


Broccoli Stalk Soup Resize
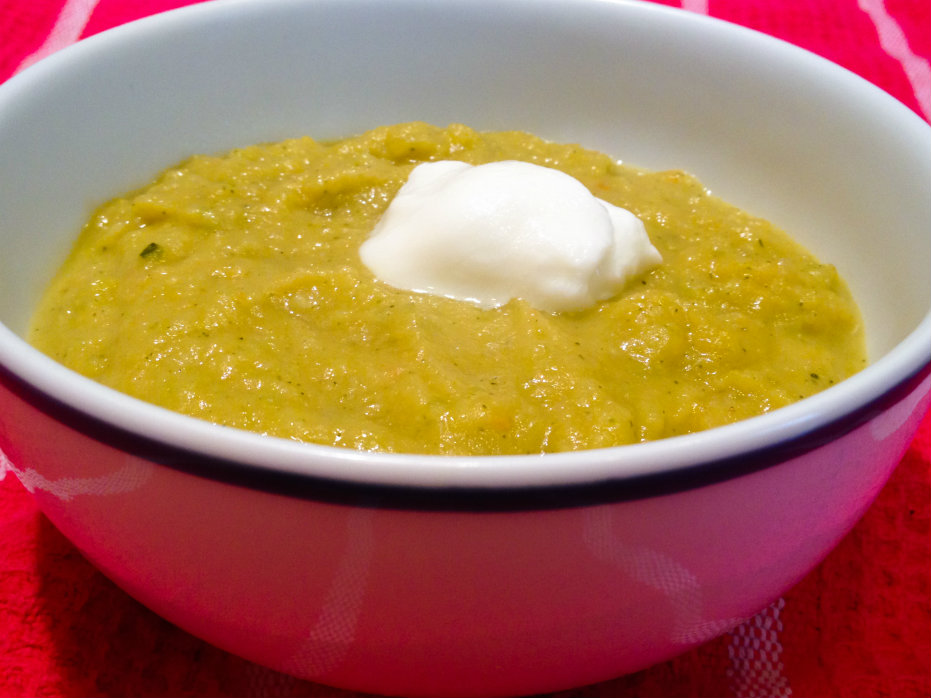
I’m coming in, just under the wire, with a soup recipe to round out January as National Soup Month!  It’s creamy, it’s Paleo, it’s as frugal as can be:  Broccoli Stalk Soup!
I seriously buy about ten pounds of broccoli a week, and I’m ashamed to admit how many stalks have gone to waste over the years.  My girls didn’t want to eat the tougher stalk and will only eat the florets, and to be honest, they do take a little more work to prepare if you want to serve the stalk together with the floret, since you have to peel off the tough outer layer.  But I couldn’t accept throwing all those healthy green vegetables into the compost bin, so I made a broccoli soup out of them.  Hooray – it is delicious and uses up nearly all the stalk.  So much less to compost!
If you don’t follow the Paleo diet, feel free to use one large or two small potatoes in place of the rutabaga.  But I really liked the rutabaga – I think it adds a sweetness, and contributes a creamy texture to the soup when you blend it.  And because you are blending it up, you don’t have to worry about mincing and dicing carefully – just chop up your veggies and cook them til tender.  You can serve this with some shredded cheese on top, or like I did, with a dollop of plain yogurt.  You can also add a little more chicken stock than I did if you want a thinner soup.  But I like it this way:  thick, warm, and truly satisfying!
Broccoli Stalk Soup
Ingredients:
  • 3 tablespoons olive oil or bacon fat
  • 1 large rutabaga, peeled and cubed
  • 3 cloves garlic, minced
  • 1 onion, sliced
  • 2 carrots, peeled and chopped
  • 6 broccoli stalks, plus one head of broccoli
  • 4 cups (or more) chicken or vegetable stock
Directions:
  1. In a very large pot, heat the oil and add the rutabaga, garlic, onion and carrots.  Cook on medium, stirring to keep the garlic from burning, for about ten minutes.
  2. While the other vegetables are cooking, prepare the broccoli.  With a paring knife or vegetable peeler, peel the broccoli stalks.  Cut off the bottom half inch of stalk, and then cut the stalks into smaller pieces.  Chop the head of broccoli and separate the florets.  Add the broccoli to the pot and cook another five minutes.
  3. Add the chicken stock and cover the pot with a lid.  Simmer over medium-low heat for about 20 minutes, or until the vegetables are tender.  Transfer soup to a blender – CAREFULLY! – in batches and blend until mostly smooth.  You can leave a few chunks if you like.  I used an immersion blender and it worked very well.  You can add a little more stock here if you want a thinner soup.
  4. Serve soup hot, garnished with grated cheese or yogurt.

Saturday, January 11, 2014

Chinese Chicken Salad


Chinese Chicken Salad Resize
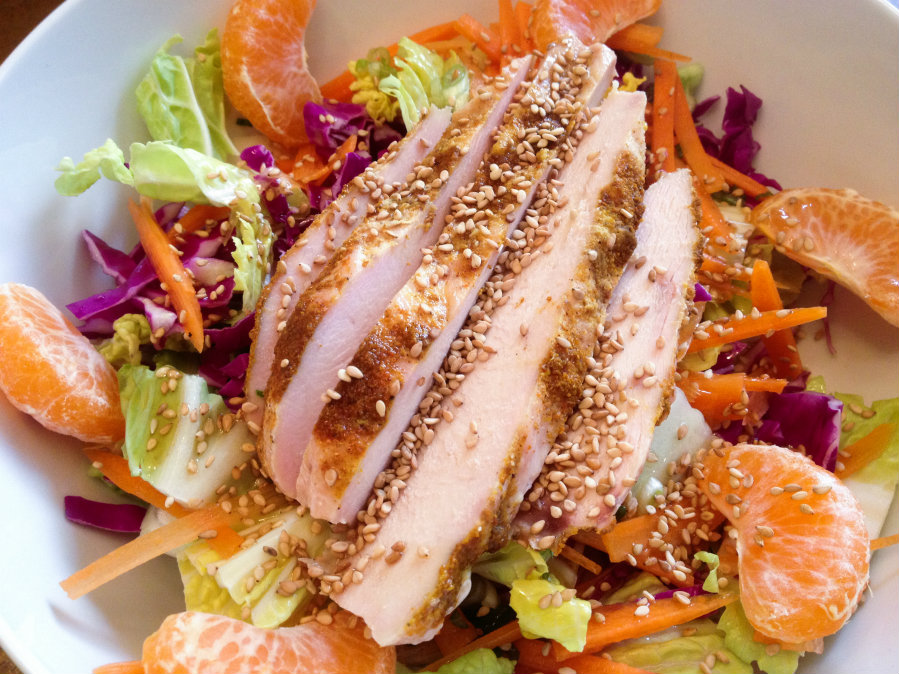
Did you know that January is National Soup Month?  Sounds perfect to me - a big bowl of soup and a salad makes one of the best lunches imaginable.  One of my favorite salads is Chinese Chicken Salad!
This is perfect for winter, because all of the ingredients are in season now.  Instead of canned mandarin oranges, you can probably find fresh ones now – I’ve got Clementines and Satsumas left and right at my grocery store.  Red cabbage and carrots are always around, as are green onions.  For the base, I used Napa cabbage, but if you don’t have that, you can use any kind of lettuce you like, or really finely chopped green cabbage.  I cooked some extra chicken breasts last night so I could chop them up cold and throw them over the salad, but you can use whatever chicken you like – roasted, store-bought rotisserie, or even breaded chicken nuggets!
This recipe serves two as part of a lunch or dinner menu.  Try this salad with any soup you like, or paired up with a sandwich, wrap, or pasta dish.  Filling, nutritious and delicious – and it won’t break any of your New Year’s resolutions!
Chinese Chicken Salad
Ingredients:
  • 1 small head Napa cabbage, or romaine lettuce
  • 1/2 head small red cabbage
  • 2 carrots
  • 2 or 3 green onions
  • 2 mandarin oranges
  • 2 cooked chicken breasts, or 3 cups chopped cooked chicken
  • 2 tablespoons sesame oil
  • 2 tablespoons rice vinegar
  • 1 tablespoon sesame seeds
  • salt and pepper to taste
Directions:
  1. Chop the Napa cabbage into inch-wide strips.  Finely slice the red cabbage.  Place both in a salad spinner and rinse under cold water, then spin dry.
  2. Cut the carrots into matchsticks.  Finely slice the green onions.  Peel the oranges and remove as much of the white pith as possible.  Separate into segments.  Dice or thinly slice the chicken breasts.
  3. To assemble:  In two very large bowls, mix together the cabbages, carrots, and onions.  Arrange the oranges and chicken breasts on top.  Drizzle each salad with one tablespoon each of sesame oil and rice vinegar, and sprinkle the sesame seeds, salt, and pepper on top.

Friday, January 3, 2014

Pa Muchim - Korean Green Onion Salad


Korean Green Onion Salad, or Pa Muchim (pronounced “pah moo cheem”) is a staple at Korean BBQ restaurants and homes alike.  It is frequently paired with pork belly or other fatty meats, as a counterbalance to all the rich flavors and textures.  I find it spicy and weirdly refreshing!
Yes, this salad has a lot of green onion in it.  So much so that you should probably share it with whoever you’re going to be hanging out with that day.  I wouldn’t eat a big plate of this and then go out on a first date!  Cutting the green onions into long strips can be a little tricky.  If it’s not working out for you or you get frustrated, you can just turn the onion on a bias and cut long diagonal slices – they don’t have to be strips cut lengthwise.  Red leaf lettuce is most commonly used, but you can try green leaf or romaine too.  As for the dried red pepper, just use one of those little packets of crushed red pepper that always comes with a pizza delivery!
Next time you grill or fry something rich and delicious, pair it with this spicy and cleansing salad.  (And for more motivation, check out how healthy green onions are for you!)

Korean Green Onion Salad (Pa Muchim)

Ingredients:
  • 1 bunch green onions (anywhere from 4 to 8 onions)
  • 1 head red leaf lettuce
  • 2 teaspoons soy sauce
  • 1 teaspoon sugar
  • 2 teaspoons rice vinegar (or you can substitute apple cider vinegar)
  • 2 teaspoons sesame oil
  • 1/2 teaspoon crushed red pepper flakes (optional, but try it if you have them!)
  • 2 tablespoons toasted sesame seeds
Directions:
  1. Slice onions lengthwise into thin strips, or you can cut them on a very severe bias into long ovals.  Put the onions into a bowl of ice water and let soak for fifteen minutes.  This crisps them, and also removes some of the sliminess from the insides.
  2. While the onions are soaking, wash the lettuce and cut it into bite-sized strips.  If your lettuce is a little limp, soak it in ice water too!
  3. Make the dressing:  combine soy sauce, sugar and rice vinegar in a small Tupperware cup with a lid.  Shake well to combine.  Add sesame oil and red pepper flakes and shake again.
  4. Drain the lettuce and onions, dry them if you can:  Either roll up in a dish towel, or spin in a salad spinner.  Combine lettuce and onions in a large bowl, toss with dressing, and sprinkle with sesame seeds.  Serve immediately.

Friday, December 27, 2013

Zoe's Crockpot Chicken


Zoe's Crockpot Chicken resize
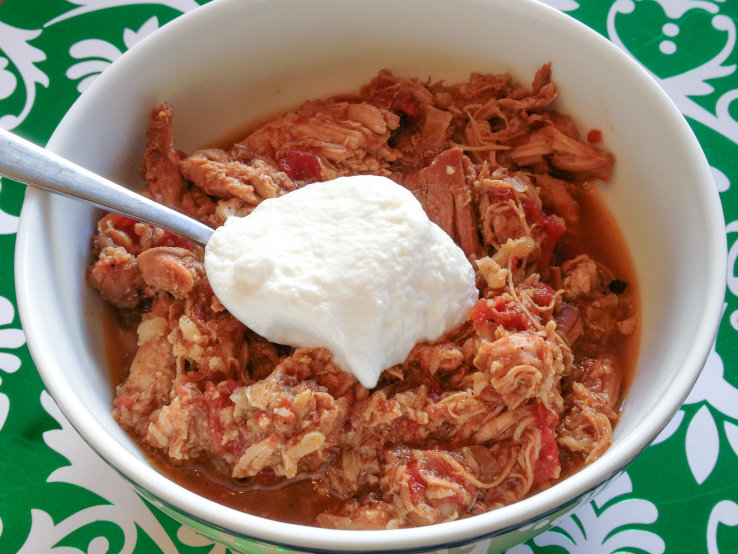
This past weekend, I invited my best friend and her family up to our house for dinner.  Instead of trying to make a meatloaf large enough to feed eight people, I decided to use my two crockpots to save time and effort in my prep.  In the one, a mushroom pot roast.  In the other, I made a lightly curried pot of chicken thighs.  I wasn’t sure if my friends’ kids would like it – they’re eight and ten years old, and I didn’t know if it would be a hit.  Ten year-old Zoe took one bite and her face lit up.  ”Mama,” she excitedly told my friend, “you have to ask Dana for this recipe so you can make it at home!”  I have to tell you, I’ve never been so proud of a recipe in all my life!  This, then, will be called Zoe’s Crockpot Chicken.
You can use one or two pounds of boneless, skinless chicken thighs.  If you use one pound, you’ll have more sauce, and will probably want to serve this over rice or noodles.  If you use two pounds, like I did this time, it’s a thicker stew and doesn’t need anything under it – but jasmine rice would certainly be delicious.  Use any store-bought curry powder you like.  I have two, and the one I used this time was just a $4 jar from Trader Joe’s – nothing fancy.  I also used half a head of cauliflower, diced.  It doesn’t add much to the flavor, but it adds nutrition and body to the sauce.  I like to garnish with a big dollop of plain yogurt, and if you have cilantro, sprinkle some of that on top.  If you need a quick chicken dish that promises to please grown-ups and kids alike, check this one out.
Zoe’s Crockpot Chicken
Ingredients:
  • 1 large onion, sliced fine
  • 1 or 2 pounds chicken thighs
  • 2 tablespoons curry powder
  • 1/2 teaspoon salt
  • 15 ounce can of diced tomatoes (I like fire-roasted)
  • plain yogurt and cilantro to garnish, optional
  • rice or noodles, optional
Directions:
  1. Place the sliced onions on the bottom of the crock pot.  Layer the chicken thighs on top.  Season well with curry powder and salt.  Open the can of tomatoes and dump on top.
  2. Cover and cook on high for 4 hours or low for 6 hours.  When ready to serve, shred the chicken with a fork and mix all the ingredients.  Serve on top of optional rice, garnish with optional yogurt and cilantro, and enjoy!

Friday, December 6, 2013

Roasted Red Pepper Aioli


… or as it’s known at my house—Magic Sauce!  This recipe for Roasted Red Pepper Aioli is easy to whip up at a moment’s notice, and is infinitely customizable.  Like it spicy?  Add some hot sauce of your choice, or a spoonful of adobo sauce from a jar of chipotle peppers.   Depending on my mood and what else I have laying around, this aioli also gets a few shakes of smoked paprika, or a half a teaspoon of ground cumin.  Mix it up in your blender, taste it, and then see where you want to take it.
We eat this on roasted asparagus.  My husband dips steamed broccoli in it.  I love it on oven-roasted sweet potato fries.  And it’s the best sandwich spread in the world!  Try it in place of regular mayonnaise on your next turkey sandwich or veggie wrap and you’ll ditch that jar of Miracle Whip for good!
Roasted Red Pepper Aioli
Ingredients:
  • 2 cloves garlic
  • 1/2 cup roasted red peppers from a jar, drained and patted dry (or roast your own!)
  • juice of half a lemon
  • 1/4 teaspoon salt or more to taste
  • 1/3 cup mayonnaise (make your own!  Or use store-bought, but not low-fat mayo)
  • optional:  paprika, cumin, hot sauce
Directions:
  1. In a blender or small food processor, blend together the garlic, red pepper, lemon juice and salt until almost smooth.  Add the mayonnaise and optional ingredients and blend again.  Keep refrigerated.