Showing posts with label Appetizers. Show all posts

Wednesday, February 1, 2017

Spinach Pakoras with Royal Dip


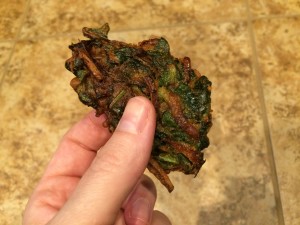
I first had these delicious veggie fritters at a stand at the farmer’s market.  I’d never seen them before, but it was love at first bite!  I swore I’d have to find a way to make them at home – and I did!  Spinach Pakoras with Royal Dip are healthy, tasty, vegetarian and gluten-free too!  These Indian snacks are eaten with a minty yogurt dip and are a popular street food.

The only ingredient that may be a bit tough to find is chickpea flour.  Also called gram flour or besan flour, it’s just dried garbanzo beans ground powder-fine.  I made it at home, and while it took a bit of time because my food processor is wimpy, it worked very well!  If you do grind your own, you will need to sift it through a fine sieve, and return any pebbles to the food processor for a finer grind.  After that, it’s smooth sailing.  Bob's Red Mill has a really good packaged chickpea flour, and is available at most grocery stores.  If you’re lucky enough to have an Indian grocery store nearby, stop in and buy some chickpea flour – and whatever else catches your eye and tempts your nose!
Spinach Pakoras with Royal Dip

Ingredients:
  • 1 cup Greek yogurt
  • 1 clove garlic, finely minced
  • 1 tablespoon cilantro, finely minced
  • 1 tablespoon mint, finely minced
  • 1 cup chickpea flour
  • 1 teaspoon curry powder
  • 1/2 teaspoon  ground fennel seeds
  • 2 tablespoons rice flour (or use more chickpea flour, or use regular flour)
  • 2 cups fresh spinach or other hearty greens (mustard, collard, kale), chopped
  • 1/2 onion, cut into very thin strings
  • 1/4 teaspoon salt
  • 1/4 cup water (may use more or less)
  • oil for frying:  grapeseed, coconut, peanut, or vegetable oil
Directions:
  1. Make the Royal Dip:  stir together the yogurt, garlic, cilantro, and mint.  Cover and refrigerate.
  2. Mix together the chickpea flour, curry powder, fennel, and rice flour in a large bowl.
  3. Mix in the spinach and onion. Stir to combine.
  4. Add about 3 tablespoons of water and stir.  Mix it all very well.  You don’t want a thin batter – you just want the flour to be wet and coating the veggies.  Add a bit of water until you make a thick batter.
  5. Heat the oil over a medium burner and drop the pakora batter in by the tablespoonful.  Try to flatten them out a bit so they are pancake-shaped as opposed to spherical.  Cook for about 3 minutes until crispy, then flip and cook the other side.
  6. Remove pakoras to a paper towel-lined plate and sprinkle with a bit of salt.  Serve hot with the Royal Dip.


Friday, June 20, 2014

Grilled Caesar Salad


Before we go any further:  Yes, you grill the lettuce.  Say what?!  I first encountered this recipe at an Italian restaurant in our neighborhood a few years back.  It was a revelation—you can grill lettuce! And  instead of making it nasty and squishy, just a tiny bit of char adds so much flavor and texture as to change the whole dish!  Then I saw the idea again in a magazine last week and, that was it, I had to try it at home.  (Okay – I made my husband do the actual grilling.  But I supervised, I promise!)
The dressing comes together in a snap in the food processor (or you can do it old-school in a wooden salad bowl with a fork, but I find it is hard on my forearms!)  The only ingredient you may not have is anchovy paste.  It’s pretty cheap and lasts forever in your fridge, and it adds that “umami” flavor you can’t get anywhere else.  It’s also great in spaghetti sauce, if you’re worried you won’t make a lot of Caesar salad.  This dressing also calls for a raw egg yolk.  I would highly recommend buying the highest quality eggs you can find – check your local farmer’s market – or at least getting organic, free-range, or both.  (If you are immunosuppressed you could substitute a spoonful of store-bought mayonnaise, but it’s just not the same.)  Also, you’ll notice there are no croutons on my plate.  We almost never eat bread, but if croutons are your thing, go ahead and pile them on!
This salad was a side dish to a dinner of grilled steaks and grilled veggies.  Feel free to chop up some grilled chicken and make it a whole meal!  For a side dish, plan on one half of a head of lettuce per person.  If you are making it the main dish, serve a whole head of lettuce per person.  Curious?  Let’s go!
Grilled Caesar Salad
Ingredients:
  • 2 cloves garlic, peeled
  • 1 teaspoon Dijon mustard
  • 1/2 teaspoon Worcestershire sauce
  • 1 egg yolk
  • 1 teaspoon anchovy paste
  • juice of one lemon
  • 1/4 – 1/3 cup olive oil
  • 1 head romaine lettuce
  • croutons and grated parmesan cheese to serve
Directions:
  1. Prepare the dressing:  In a food processor, blend together the garlic, mustard, Worcestershire sauce, egg yolk, anchovy paste,  and lemon juice.  Blend in 1/4 cup of oil.  Taste to see if you like the consistency.  If you want it more diluted, add more oil.  Refrigerate until ready to serve.
  2. Prepare the lettuce:  Slice it vertically down through the core.  You have two long halves now.  Wipe with a dry paper towel.  The lettuce needs to be completely dry or else it will stick and wilt.  No washing it, no oiling it!  Place the lettuce on the grill, cut side down, for 2 minutes without moving it.  With tongs, take it off the grill and lay it grilled-side up on a plate.  Don’t cover it or it will get soggy.  Drizzle with dressing, and add croutons or grated cheese to serve.  Eat it now!

Saturday, April 26, 2014

Crustless Kale Quiche


Talk about a tongue twister!  It’s worth the effort to say, and the little bit to make, because this Crustless Kale Quiche hits the spot.
I’ve only made this once … and I’ve already eaten almost half of it.  The kale adds a little bitterness and chew to what would otherwise be a run-of-the-mill spinach pie.  Nutmeg, currants, and pepitas add an almost sweet, Middle Eastern flavor profile.  The three eggs are just enough to combine the ingredients without becoming heavy or custardy like a regular spinach quiche.  Don’t get me wrong – a traditional spinach and swiss cheese quiche is wonderful, but this one is lighter, with an unexpected combination of flavors that will have you craving it again.
I ate this hot, and I ate it cold, cut right out of the fridge.  I ate this with a big slab of goat cheese on top and I ate it plain.  I’m going to eat more of it with dinner tonight and see if I can’t discover some new way to enjoy it.  If you want your greens, with a little extra zing, try this instead of a salad tonight!
Crustless Kale Quiche
Ingredients:
  • 1 pound bag of frozen chopped spinach
  • 1 large bunch of kale
  • 3/4 cup pepitas (or try pine nuts or sunflower seeds)
  • 1 tablespoon coconut oil (or butter) plus more for greasing the pie plate
  • 1 teaspoon chopped garlic (about 2 cloves)
  • 1/2 cup currants or raisins (next time I’m trying golden raisins!)
  • 1/8 teaspoon ground nutmeg
  • 1/2 teaspoon salt
  • 3 eggs
  • Goat cheese, to serve, if desired
Directions:
  1. Wash the kale and remove from the stem, tearing it into smaller-than-bite-sized pieces.  Saute on medium heat in a large pot with a lid.  Don’t add any extra water or oil – just the damp kale by itself.  Stir occasionally until it gets soft, about 15 minutes.  When it appears soft and has reduced in volume, pour in the bag of frozen spinach.  Stir to combine and replace the lid.  Cook on medium-low for another five minutes until the spinach is thawed.  Remove from the heat and let cool.
  2. Preheat the oven to 350*F.  While the spinach and kale are cooling, heat the coconut oil over medium and add the pepitas.  Stir frequently for 5 minutes, then add the garlic and currants.  Stir for another 3 minutes.
  3. Squeeze out as much water from the kale mixture as possible, then dump it into a large bowl.  Pour over the pepita mixture and combine.  Add nutmeg and salt.
  4. Beat 3 eggs well and mix into kale mixture.  Grease a pie plate, then fill with the kale mixture.  Smooth it down so you have a flat top.  Bake for 35 minutes or until not wet in the middle.  Serve warm or cold, with goat cheese or without.

Pickled Red Beet Eggs


I remember as a kid being very sad one Easter Sunday.  It was because, when I peeled one of the eggs I worked so hard to paint and dye and sticker-ize and bedazzle—all that work—the inside looked just like a plain, un-dyed egg!  (I hope my Mom told me that beauty is only skin deep.)  But later on in the day, I was delighted when my Mom took the big container of Pickled Red Beet Eggs out of the refrigerator! When you cut into one of these purple beauties – surprise! – the color went all the way through to the yolk!
This recipe is a great way to use up those hardboiled eggs.  I’ve found my kids like dyeing them way more than they like eating them, so I am usually guaranteed half a dozen eggs to use in this dish.  This is an old Pennsylvania Dutch recipe that came from my Mom and her mother, in Lancaster County, Pennsylvania.  You can adjust the ratio of vinegar to sugar, but I like how these are sweet-tart and firm.  Some people add very thinly sliced onions to the beet brine, and others add whole cloves.  I like them with just these 4 ingredients.
You’ll want to let these soak for at least 2 days.  I wouldn’t let them sit more than a week, but I really doubt they’ll last that long!  Make sure the eggs and beets are in a deep and narrow container so everything is submerged – if you go shallow and wide, your eggs won’t color evenly and you’ll have to rotate them at least 2 times a day.  So raid the kids’ Easter baskets and start pickling!


Pickled Red Beet Eggs
Ingredients:
  • 6 eggs
  • 2 cans sliced beets (not pickled beets)
  • 1/3 cup sugar
  • 1/2 cup vinegar (you can use white or apple cider)
Directions:
  1. In a sauce pan, place eggs in one layer.  Fill pan, covering the eggs with an inch of water.  Cook on high until a boil is just reached, then immediately remove from heat and cover with a lid.  Set a timer for 13 minutes.  When the time is up, drain the eggs and fill the pan with ice and water.  Let cool.
  2. Peel the cooled eggs and put them in a deep container with a lid.  Dump the two cans of beets and their juice into the container, followed by the sugar and vinegar.  Swirl around to dissolve.  Store in the refrigerator for at least 2 days, making sure the eggs are submerged (or turning them if they are not.)  Cut eggs in half and serve with beets.

Friday, February 28, 2014

Mondo Coconut Shrimp


Yes, MONDO!  With four, count ‘em, FOUR different coconut products, you too can make your favorite appetizer from that restaurant you go to with your girlfriends!  Mondo Coconut Shrimp are really quite easy to make, and, a fun and tasty appetizer for a party.
You’ll want to use BIG shrimp for this recipe—the larger the better.  I found  some 13-15 count shrimp on sale, and they worked really well.  If you are using smaller shrimp, decrease your cooking time so you don’t make these guys all tough and rubbery.  I coated these in both sweetened AND unsweetened coconut.  Feel free to use one or the other if you don’t have both.  I was going to make this recipe just with the unsweetened kind, but I found a cup of sweetened coconut in my freezer and decided to use it up – and I’m glad I did!
To be  honest, these are fantastic with just some salt sprinkled on top when they come off the stove.  I took a photo of them with a lemon slice, and found out they didn’t even need that to be delicious!  So make these for friends, or as part of a funky dinner, and go MONDO!
MONDO Coconut Shrimp
Ingredients:
  • 1 pound large shrimp, shelled and deveined
  • 3 eggs
  • 1 cup coconut flour
  • 1 cup sweetened shredded coconut
  • 1 cup unsweetened shredded coconut
  • 1 teaspoon curry powder
  • coconut oil, for frying
  • salt for serving
Directions:
  1. Set up a breading station.  In the first bowl, beat the 3 eggs with a tablespoon of water.  In the second bowl, pour in the coconut flour.  In the third bowl, mix together the two coconut shreds and the curry powder.
  2. Start breading:  Dip a shrimp into the egg, then the coconut flour, then back into the egg, and then the coconut shreds.  Place on a plate while you complete the breading.
  3. In a large non-stick frying pan, heat one heaping teaspoon of coconut oil over medium heat.  When  hot, carefully add the breaded shrimp.  You’ll probably have to do this in at least two batches.  Let them cook for about six minutes, then flip and cook again for another five minutes.  Watch your heat here – you want it medium to medium-low, so that the shrimp cooks evenly and the breading doesn’t burn before the shrimp are done.
  4. Remove cooked shrimp to a plate and immediately sprinkle with kosher or sea salt.  Add another teaspoon of coconut oil  to the pan, if necessary, and cook the next batch.  Serve hot!
I texted my husband a photo of the shrimp and he said, “Oooh, looks yummy!” so I saved him some.  Unfortunately, they aren’t as nice the second time around.  They still taste great, but you can’t get them crispy on the outside a second time.  That means Carpe Diem – Gather ye rosebuds while ye may – and eat your shrimp while they’re hot.

Friday, November 15, 2013

Layered Greek Dip


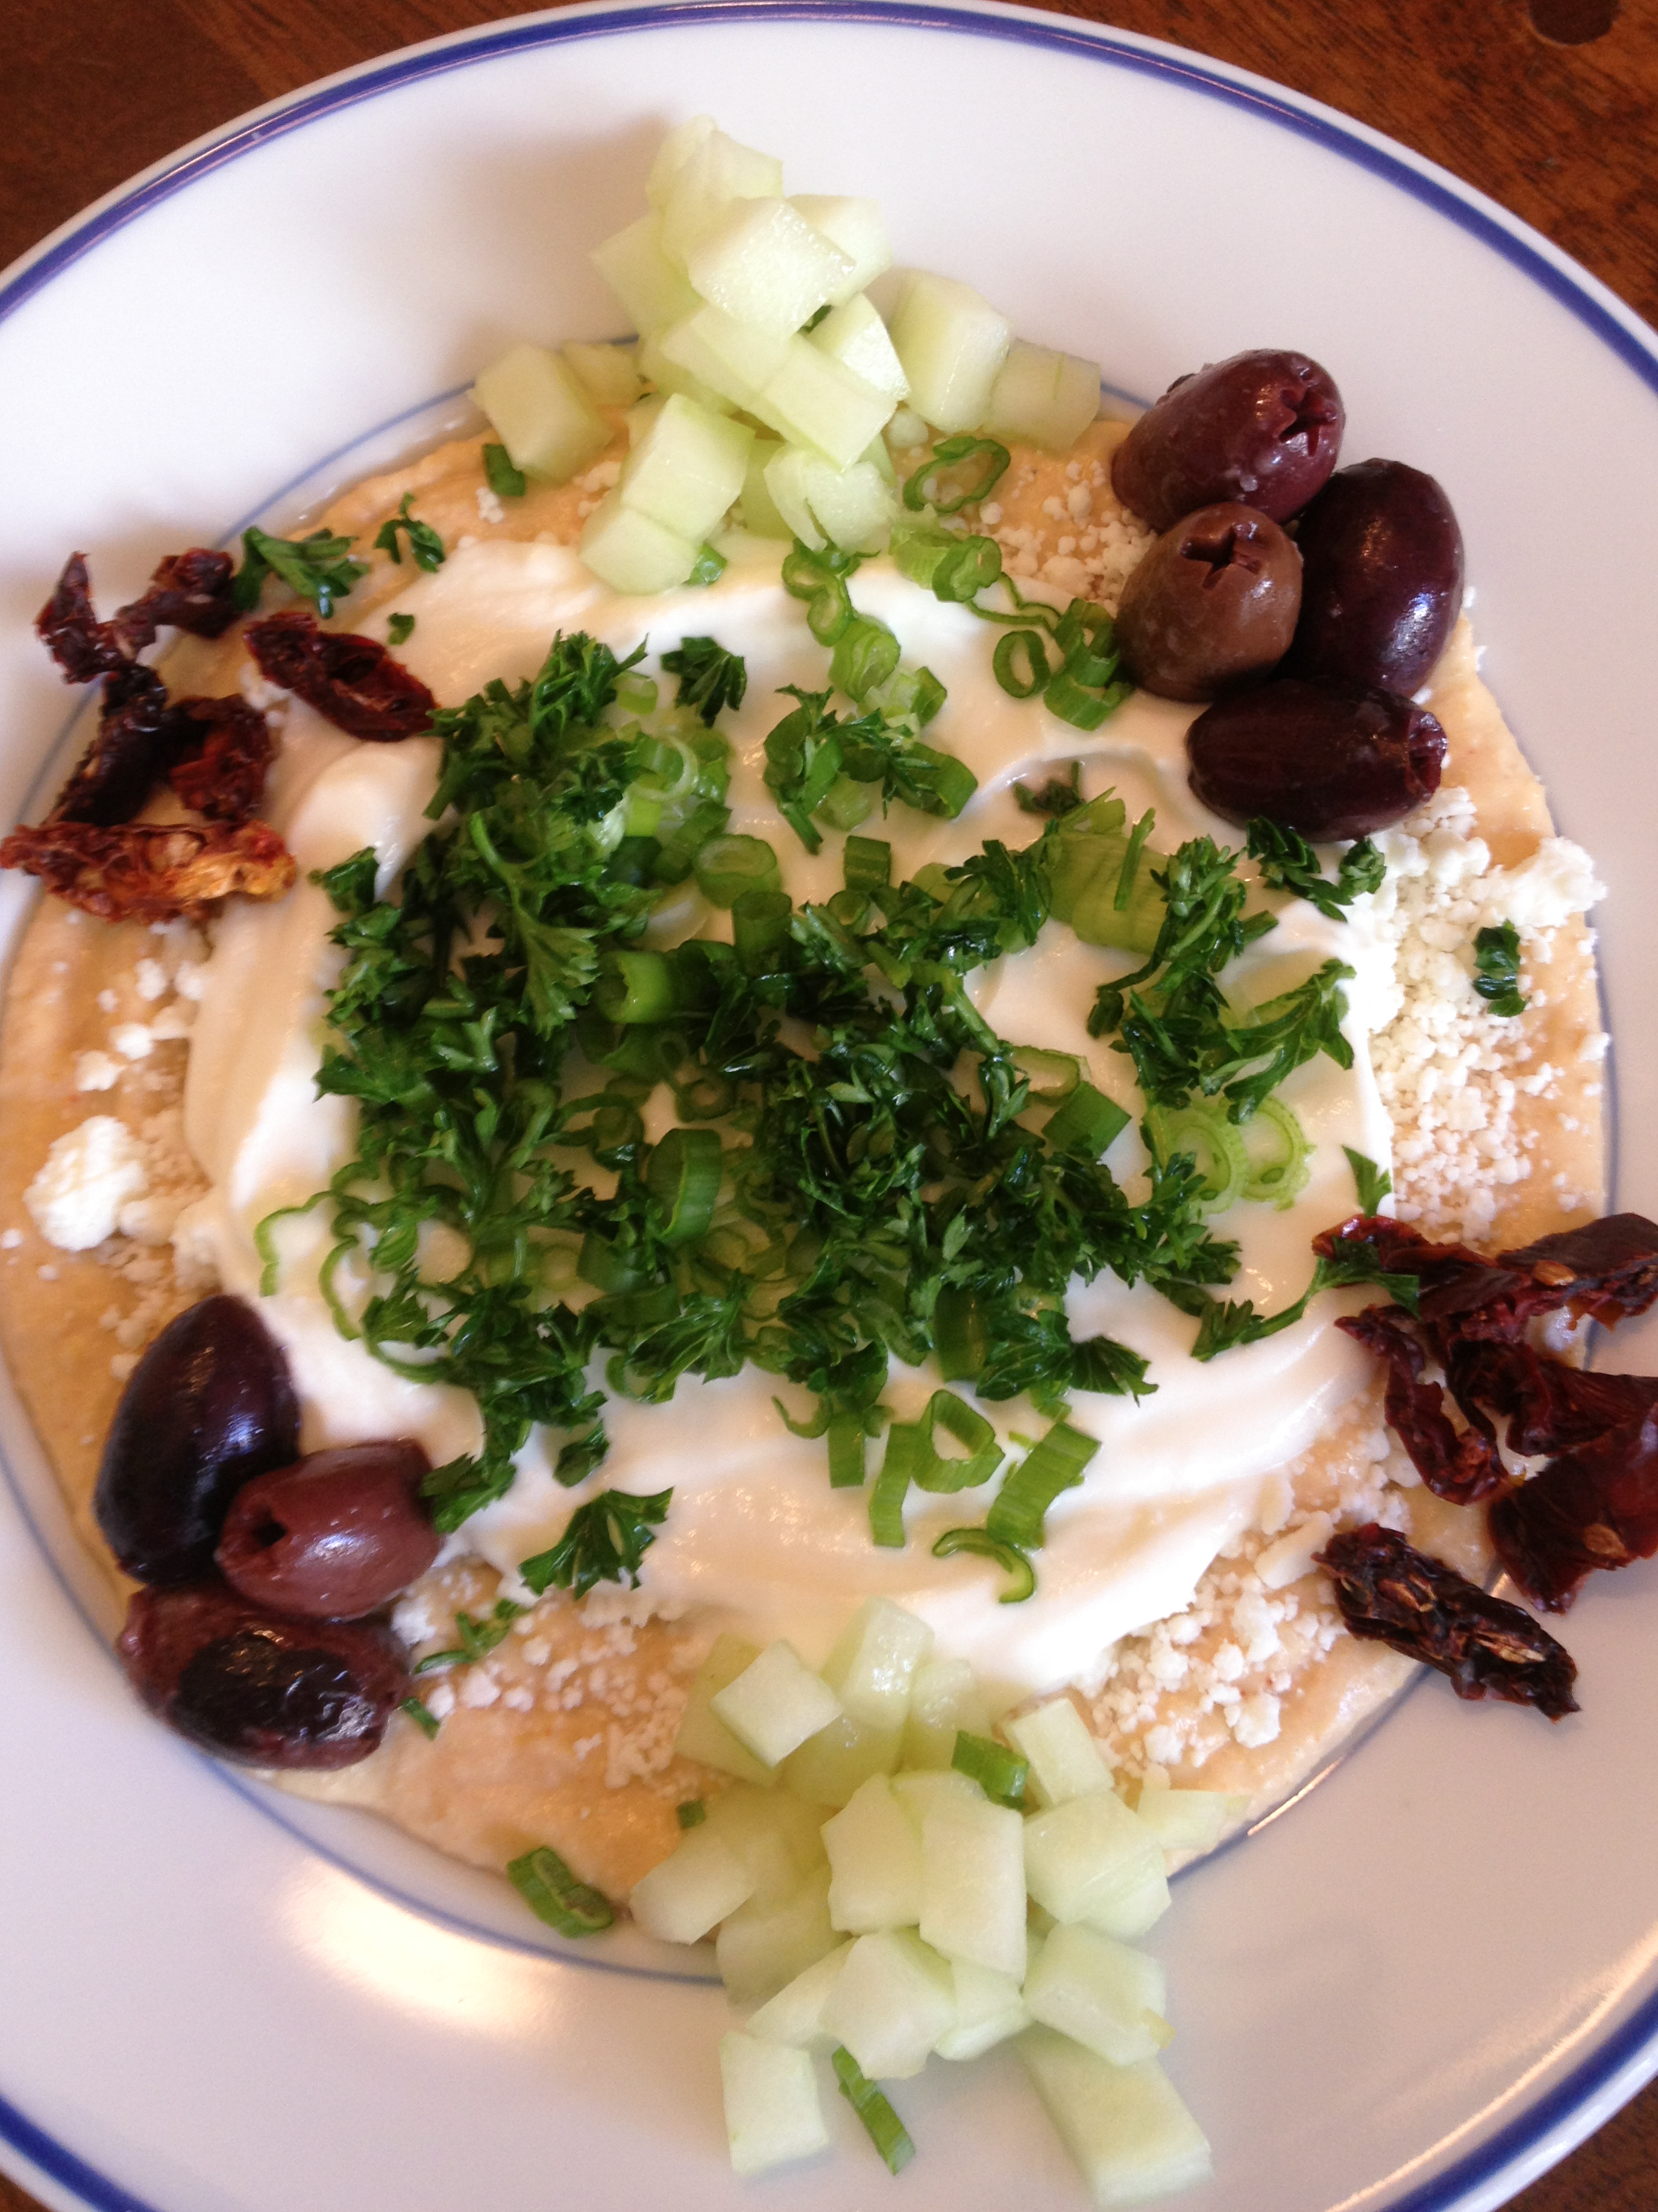
Layered Greek DipThis month I am focusing on side dishes and things you can bring to your Thanksgiving table.  When my family gets together, we all commit to bringing a piece of the dinner puzzle:  whichever family member is hosting usually makes the main dish, and the other family members decide on who is going to make dessert, salad, vegetable, and appetizer.  My sister brought an appetizer called Layered Greek Dip – and I was hooked!
This dish is easy to put together and is healthy to boot!  Assemble it right before your guests come, or make ahead and covered in the fridge until you are ready to serve.  Offer a variety of dippers:  I like pita chips, tortilla chips, Triscuits (my favorite cracker of all time!) and veggies like carrot sticks and red pepper slices.  This will take the edge off people’s hunger long enough for you to finish up your last-minute dinner duties.  Offer some white wine with this appetizer and your guests may forget all about the main course!
I should have taken a photo of my sister’s dish when she  made it, but it slipped my mind, and before I remembered, we had all smeared it all over the plate and eaten half of it!  I made it again this morning, so the photo is of a “personal-sized” serving.  And you know what?  It makes a yummy, unusual breakfast too!  I used sundried tomatoes because I didn’t have any cherry tomatoes (and I don’t care for them anyway.)  Try it and let me know if you love it like I do!

Layered Greek Dip

Serves 8 as an appetizer
Ingredients:
  • 8 ounce container of hummus (or make your own!)
  • 4 ounces crumbled Feta cheese
  • 6 ounce container of plain Greek yogurt
  • 1 small cucumber, peeled, seeded and chopped
  • 4 ounces cherry tomatoes, cut in half
  • 4 ounces Kalamata olives (or other black olives)
  • 2 green onions, diced
  • handful of parsley, minced
Directions:
  1. On a large plate, spread out the hummus.  Cover with a layer of Feta, then cover that with the Greek yogurt.  Arrange the cucumber, tomatoes, and olives over the top in any way you find aesthetically pleasing.  Sprinkle with green onion and parsley.  Serve with chips or veggie sticks.  Keep refrigerated until ready to eat.

Friday, August 23, 2013

Homemade Ricotta


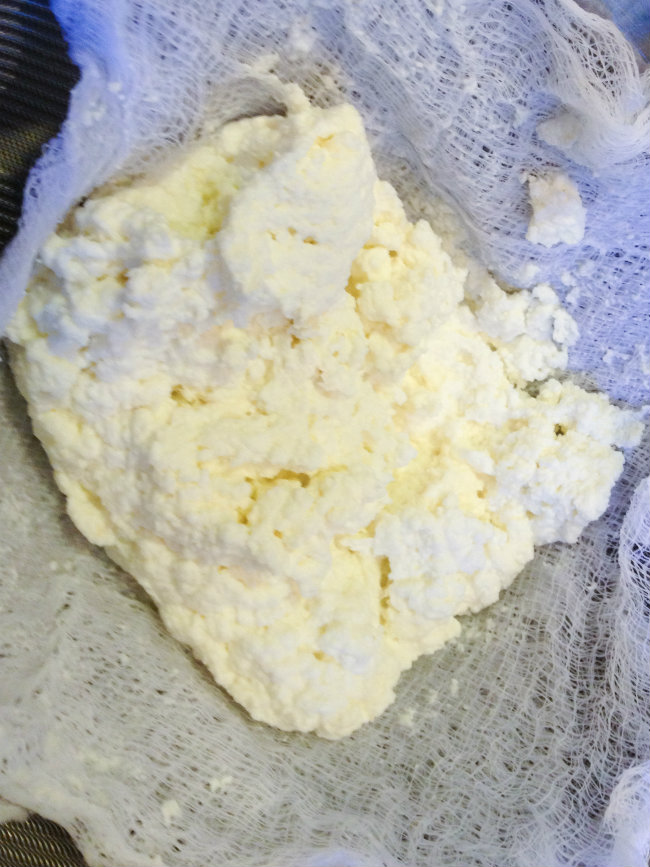
Homemade Ricotta Resized
When I was in high school, 25 years ago, I thought the funniest movies in the world were Monty Python movies.  Yes, I was one of those nerds who could rattle off quotes from all the movies (in the intervening years, my skills have gotten rusty, but I still have a few).  One of my favorite scenes in the movie “The Life of Brian” was when a group of people are listening to the Sermon on the Mount.  Unfortunately, they are way, way at the back of the crowd and can’t hear well. When Jesus says, “Blessed are the peacemakers,” the crowd in back misinterpret it as “Blessed are the cheese makers.”  So when I came across this recipe for Homemade Ricotta, I immediately started giggling.  I want to be a blessed cheese maker, and you can be too!
You already have the ingredients you need.  Use whole milk, or else the ricotta won’t set up.  One lemon, a little salt, and a tablespoon of white vinegar – what could be easier?  You’ll also need a thermometer.  I have a candy thermometer that clips to the side of the pan, but you could use a meat thermometer, or one of those fancy infrared ones too!  The only equipment you might need to buy is cheesecloth.  I found it at my regular grocery store, and have used it before in making Homemade Coconut Milk.
Ricotta is one of those amazing ingredients that can be used in either sweet or savory recipes.  In the following two weeks, I’ll have recipes that use fresh ricotta in a zucchini “lasagna” (with no noodles!), and in a dessert with fresh summer fruit.  Until then, you can serve fresh ricotta as an appetizer, spread on thin slices of bread, with either cracked pepper and minced herbs, or with a light drizzle of honey and crushed walnuts.  Ready?  Let’s make some cheese!
Homemade Ricotta  
(Makes one cup of ricotta)
Ingredients:
  • 4 cups whole milk
  • 1/2 teaspoon salt
  • 1 tablespoon lemon juice
  • 1 tablespoon white vinegar (you may need more, but I didn’t)
Directions:
  1. In a pot, heat milk and salt over medium-high heat.  Stir occasionally to make sure it’s not burning on the bottom.
  2. Prepare your utensils:  Line a mesh sieve with a double-layer of cheesecloth.  If you want to save the whey, place the sieve over a large bowl.  (I saved my whey – next week I’ll show you how I used it.)
  3. When the temperature of the milk reaches 185*F, turn off the heat and pour in the lemon juice and vinegar.  Stir gently.  You just made what Little Bo Peep was eating – curds and whey!  Let it sit for about ten minutes, and stir again.  If you see any milk in your pot that hasn’t curdled, you can add another teaspoon of vinegar, stir, and let sit another ten minutes.  Mine didn’t need any extra and separated easily.
  4. Pour the curds and whey into the cheesecloth-lined sieve.  The whey, the yellowish liquid, will end up in the bowl.  Let cool and refrigerate for later use.  Let the cheese curds, aka your lovely homemade ricotta, drain in the cheesecloth.  If you want it soft and moist, let it drain for about ten minutes.  This is good for spreading on bread, or in dessert applications.  I let mine drain for much longer – about half an hour – because I was baking it in a “lasagna” and didn’t want extra water in the casserole.
  5. This keeps for about 5 days, refrigerated.  I challenge you to make it last more than a few hours!

Monday, August 12, 2013

Bacon-Wrapped Figs


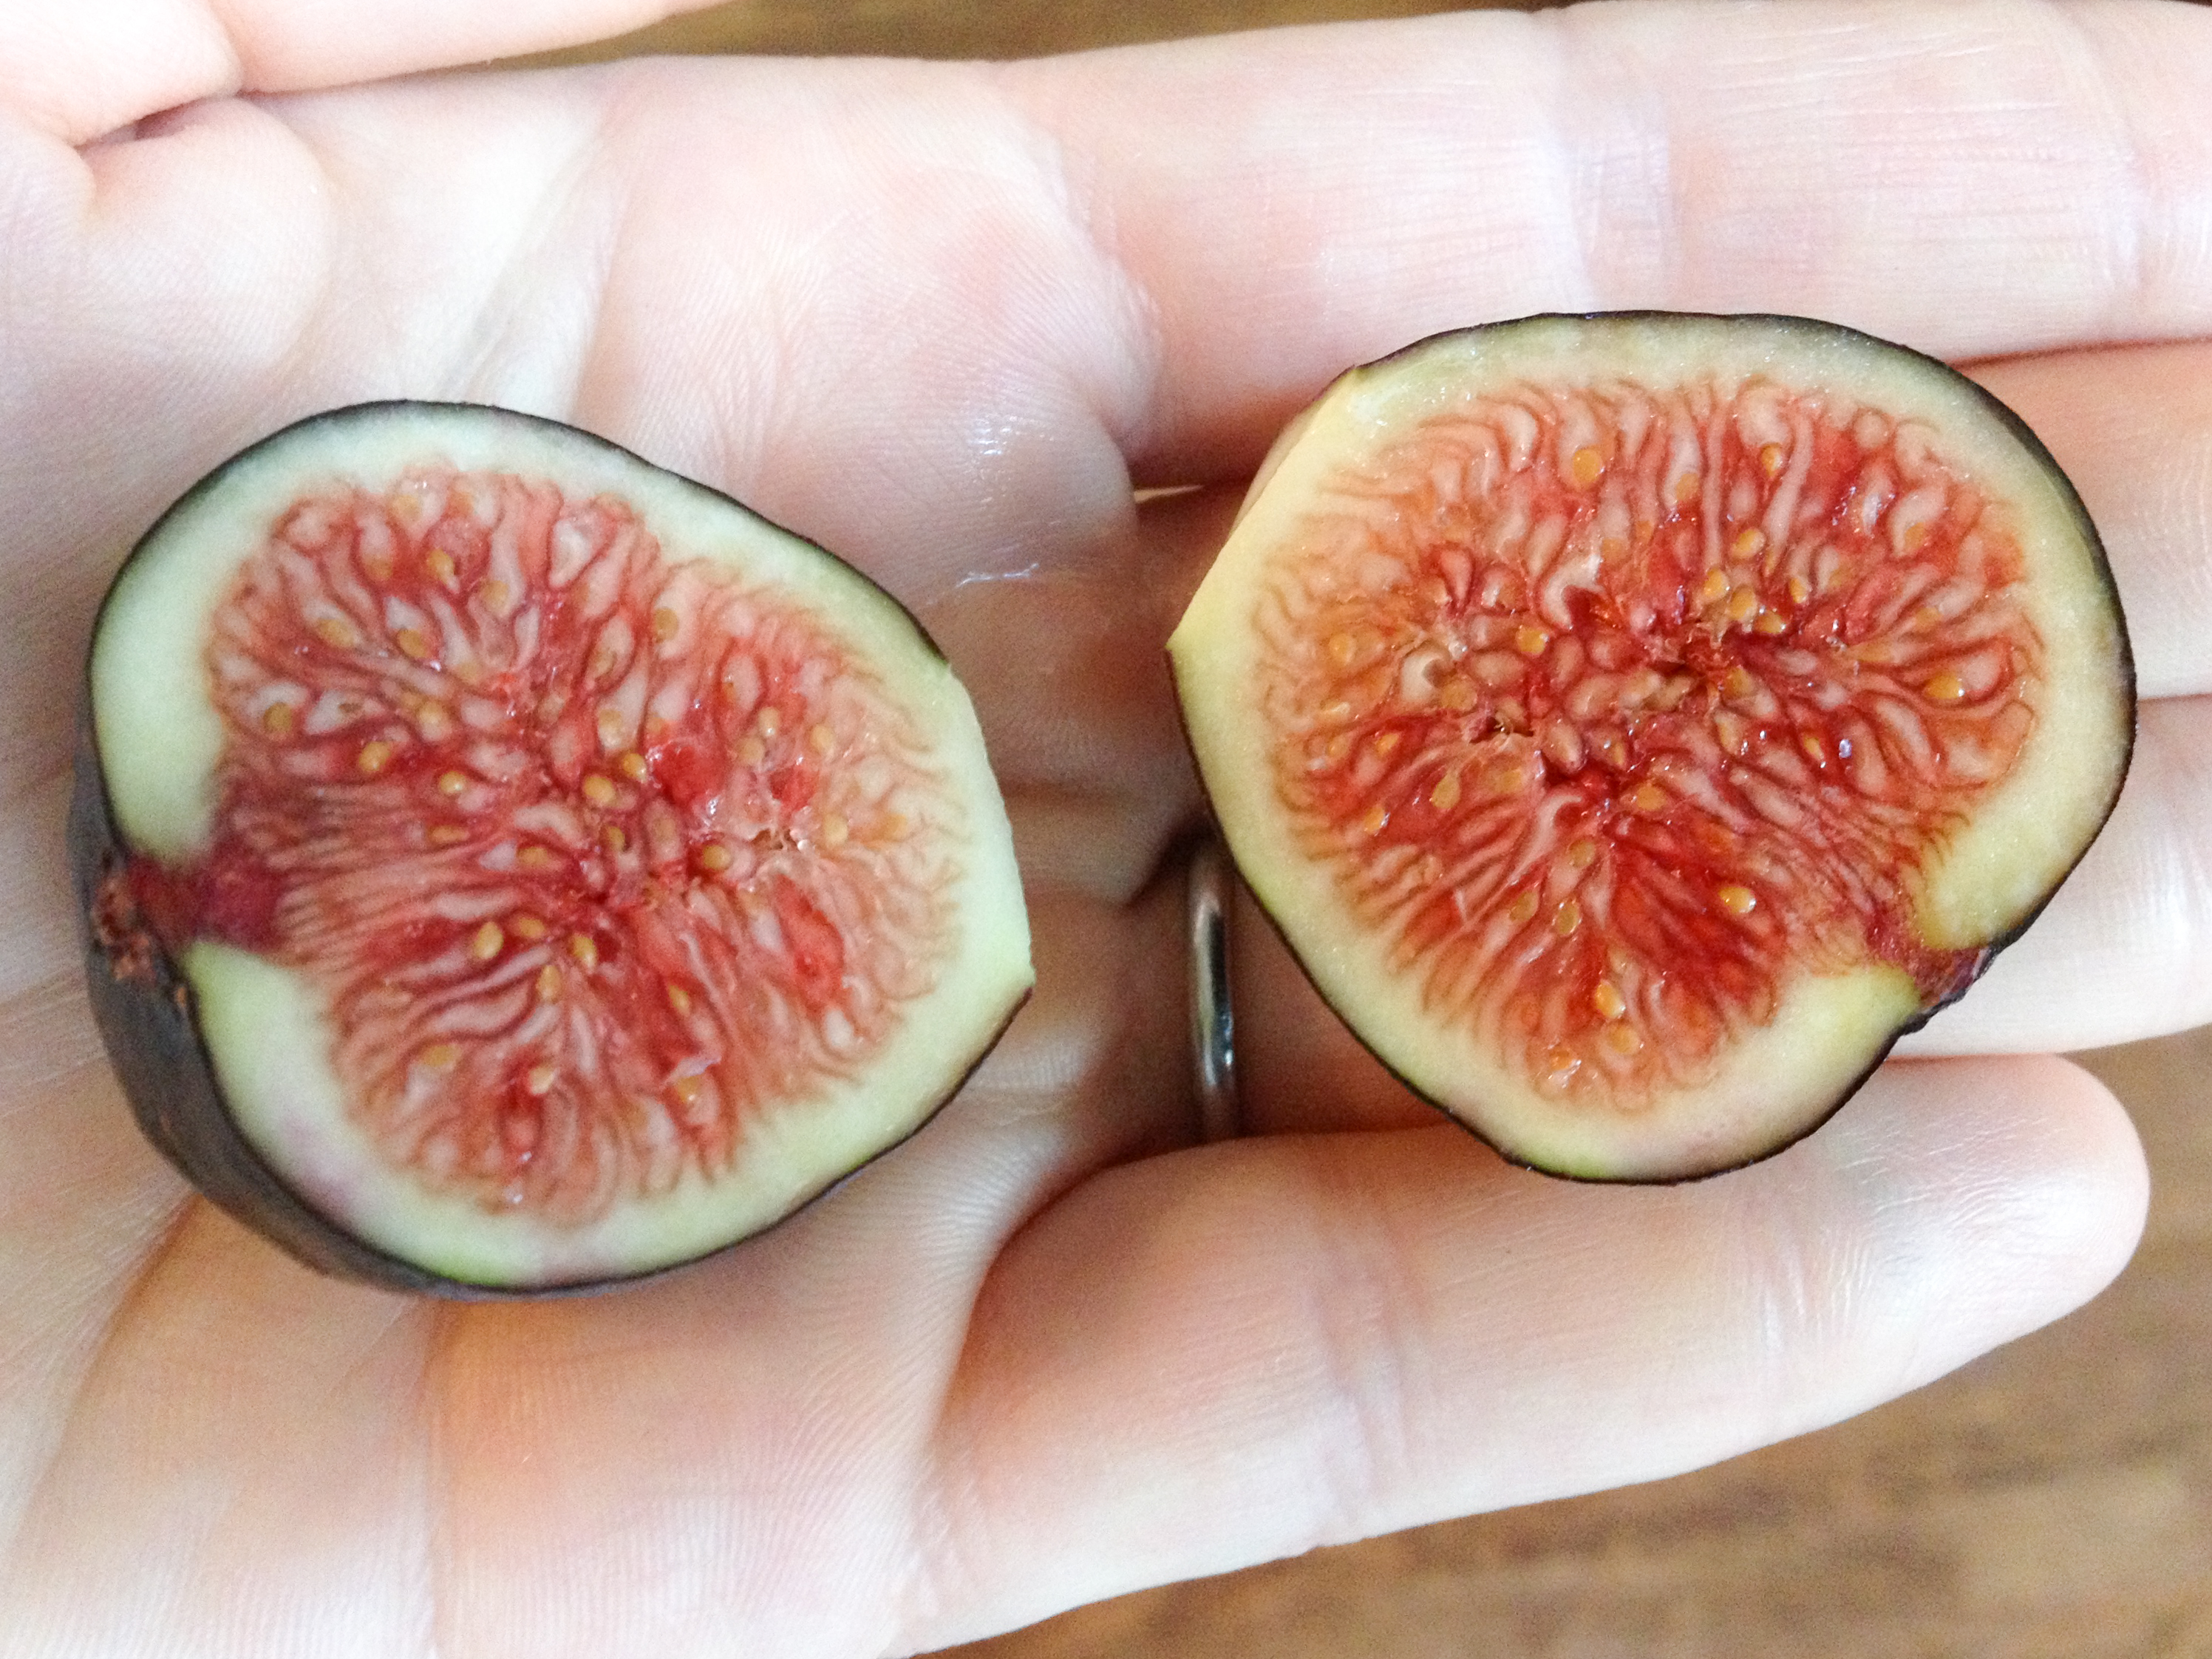
Fresh Figs
Ah summer!  You bring us such a variety of delectable little fruits and veggies, some that are only in season and available for a few weeks!  Figs are one of those little gifts from God.  I saw them at my farmer’s market two weeks ago, and Sunday I bought a basket.  Tender little nuggets of sweet pink flesh, hidden under an unassuming brown skin, figs are a sweet treat!  If you’ve only ever had them in Fig Newton form, try this recipe for Bacon-Wrapped Figs!
Simple ingredients, simple preparation – so easy!  Look for figs that are a little soft, but not squishy.  These little bites are sweet and salty and kind of rich, so you don’t need to eat a dozen to feel satisfied.  Try them with a green salad for a light lunch, or with some sparkling wine as an appetizer.

Bite-sized bacon goodness!

Bacon-Wrapped Figs

Ingredients:
  • 6 ripe figs
  • 6 slices bacon
  • 6 teaspoons cream cheese
  • fresh-ground black pepper
  • optional: honey
Directions:
  1. Preheat oven to 400*F.  Line a baking sheet with aluminum foil.  
  2. Rinse off figs and pat dry.  With a knife, trim off the little stem nub at the top and slice in half lengthwise, so you have 12 halves.  Cut the bacon in half so you have 12 short pieces.
  3. To assemble:  Place half a teaspoon of cream cheese on top of each fig half.  Season with a grind or two of black pepper.  If you want them sweeter, add a drop of honey on top of the cream cheese.  I didn’t use honey and mine were delicious, but it’s up to you how sweet you want them.  Wrap each cream cheese-topped fig in bacon.  I wrapped them so the open end is underneath the fig, but some had the open end on top and it didn’t unravel.  You could use toothpicks if you are worried they won’t stay wrapped in the oven, but mine were fine without.  Lay the bacon-fig bundles on the baking sheet.
  4. Bake for 20 minutes.  Turn off the oven and let them figs rest for 5 more minutes in the oven.  Take them out and serve hot.  Watch your fingers!

Friday, March 22, 2013

Baba Ghanouj (Eggplant Dip)


So ... the Paleo Challenge starts tomorrow.  D-Day for being photographed in my bikini and then performing a serious, muscle-shaking, face-reddening workout.  But I think I'm getting my Paleo diet dialed in and I will just have to be strong and face this challenge.  I doubt I'll get much sleep tonight, due to nerves, but I will carry on just the same.  Wish me luck!

It is a small comfort knowing I have some good snack options at the ready.  One is this recipe for baba ghanouj.  You've probably had it alongside hummus and pita at Middle Eastern restaurants.  It's surprisingly easy to make at home.  If you are grilling, I highly recommend you roast the eggplants on the grill - this will add another layer of smoky depth.  But I made mine in the oven and it is certainly snack-worthy!  And since, like the Paleo hummus, it's made entirely of healthy olive oil, sesame seed paste, and vegetables, you can nibble without fear of wrecking your weight loss efforts!  Ready?  Find it at GCH, and let me know what you think!

Crackers, pita, and pretzels are all very tasty dippers ... but not Paleo.

Wednesday, March 20, 2013

Paleo Hummus (Plus an Admission, a Competition, and a Challenge)


Anyone who has known me for a long time knows certain things about me:  a)  Public embarrassment is to be avoided like the plague.  I will do nearly anything to spare my ego in front of strangers or people I'm not totally comfortable around.  b)  Hand-in-hand with fearing public shame, I steer clear of competition.  I hate to lose, and I would rather not play most games or sports so I don't have to feel the agony of defeat.  Do I need some therapy?  Perhaps!  But these are personality traits I've always had and I don't see them going away any time soon.

So it is with much trepidation that I even make this announcement -- I have entered a Paleo Challenge through my gym!  The Paleo lifestyle can best be described as eating as our caveman ancestors did, focusing on vegetables, meat, fruits, and nuts, and eliminating dairy, sugar, grains, and legumes.  For thirty days, I am going to be eating a strict Paleo diet, eschewing alcohol and the above verboten food  groups, and exercising like a crazy person.  There are, I am estimating, another 50 people in the competition, so I will be going up against a lot of people of unknown stamina, diet preferences, and cooking skill.  The challenge starts Saturday, with a visit to the dunk tank (to measure my body fat percentage) -- and a photo of me in my bathing suit.  (Insert screams of horror here!)  Then I complete a specific workout (to be determined) for time.  In a month, everyone comes back and repeats the process to see who has lost the most body fat, the most inches from their waist or thighs or whatever problem areas exist, and who has improved the most in their performance of that same workout.  We are also to keep a food log, so points will be docked for cheating on the diet.

I'm terrified of people seeing me in my bathing suit.  This is Hollywood, after all, and although I'm not obese, I do have some jiggles and bulges, and I'm creeping up on 40.  I'm terrified of performing the workout, period, because they're really hard, and I JUST joined the gym last week.  And of course, I'm terrified of losing, of putting myself out there and being found wanting, or a target for ridicule.  But I figure, since I'm new to the gym, perhaps my performance will ramp up quicker than others who are already used to the workouts.  And I have been cooking Paleo meals for a while, thanks to my husband's adoption of the diet a few years ago.

All of this is to say:  for the next month, you'll be getting Paleo recipes from me.  You are welcome to join me at home in the Paleo challenge!  Just weigh yourself at the beginning and again at the end of 30 days.  Who knows, you may drop a few pounds, find a new food you like, or decide you are ready to kick the soda habit once and for all!

Okay, on with the recipes.  This one is for Paleo hummus.  Since beans are off-limits, this one uses cauliflower.  This makes a great appetizer with veggie sticks as dippers, and is really satisfying when you want something snacky.  Curious?  Check it out!

Paleo Hummus

Ingredients:

  • 1 large head of cauliflower
  • 5 tablespoons olive oil, divided
  • 1 teaspoon cumin seeds (or ground cumin)
  • salt and pepper
  • 1/4 cup tahini
  • 2 cloves garlic
  • 1 lemon
  • stuff to dip with - I like carrots, but celery, peppers, or even pork rinds are Paleo!
Directions:
  1. Heat oven to 500*F.  Cut cauliflower into bite-sized chunks.  In a large bowl, mix the cauliflower with 3 tablespoons olive oil, the cumin, salt, and pepper.  Line a baking sheet with foil and spread out the cauliflower.  Bake for 30 minutes, stirring every ten minutes so nothing burns.  Let cool for 30 minutes.
  2. Add cauliflower to the bowl of a food processor.  Add remaining 2 tablespoons of olive oil, tahini, garlic, and the juice of one lemon.  Blend and taste.  If it's too thick you can add a little water or some more oil.  Too thin?  Add more tahini.
  3. To serve, drizzle with oil and sprinkle with paprika, if desired.  Go nuts on this stuff - it's good for you!

Tuesday, February 19, 2013

Stuffed Mushrooms


My friend Christi issued a challenge to her Facebook friends:  Take stock of what's in your freezer, and use only ingredients you find in there to make your dinners - for a month!  Wow, I would be impressed if someone could do that!  My freezer is mostly filled with bread and chicken breasts.  But I did move things around, look in the back for items that needs to be used soon - and I found a tube of faux sausage meat.  You know what I mean - the soy stuff vegetarians eat instead of animal flesh.  I do try to eat lower on the food chain and will occasionally give a new brand of meat substitute a try.  I guess this one didn't inspire me right away so I tossed it in the freezer.  Time to use my resources!

I ate half of it - sautéed with onions and butter - in breakfast burritos.  Not bad!  Now I had another 6 or so ounces to use.  Inspiration struck - stuffed mushrooms!  I love one-bite appetizers, so I decided to take this recipe for a spin.I imagine it would be better with real sausage meat, removed from its casing and browned, but for non-animal-based protein, this was a keeper.  Next time you have a vegetarian coming over for dinner, whip some of these babies up!

Cute, neat, and tasty - the best kind of appetizer!

Stuffed Mushrooms

Ingredients:

  • 8 ounces button (white) or cremini (brown) mushrooms
  • 1 teaspoon butter or oil
  • 4 - 6 ounces vegetarian sausage "meat", or use real sausage, removed from its casing
  • 4 ounces cream cheese
  • 4 green onions, minced
  • salt and pepper
Directions:
  1. Preheat oven to 375F.  Line a baking sheet with tin foil and spray or brush lightly with oil.
  2. In a saute pan over medium heat, cook the sausage in the butter, breaking it up into small chunks.  Cook for 5 to 8 minutes until hot and brown.  Let cool for a few minutes.
  3. In a bowl, mix together the cream cheese and green onion, and season with salt and pepper.  Add the sausage and stir well to combine.
  4. Clean the mushrooms by brushing off any dirt with a damp paper towel.  Remove the stems.  Spoon a teaspoon or more of the sausage mix into the mushroom cavity, mounding it up as necessary.  Place stuffed mushrooms on baking tray and bake for 15-20 minutes, until the mushrooms are hot and cooked through and the stuffing is browned.
That's it!  These little bites went fast (even the kids liked them) and would fare well at a buffet or cocktail party.