Showing posts with label Snacks. Show all posts

Wednesday, February 1, 2017

Spinach Pakoras with Royal Dip


I first had these delicious veggie fritters at a stand at the farmer’s market.  I’d never seen them before, but it was love at first bite!  I swore I’d have to find a way to make them at home – and I did!  Spinach Pakoras with Royal Dip are healthy, tasty, vegetarian and gluten-free too!  These Indian snacks are eaten with a minty yogurt dip and are a popular street food.

The only ingredient that may be a bit tough to find is chickpea flour.  Also called gram flour or besan flour, it’s just dried garbanzo beans ground powder-fine.  I made it at home, and while it took a bit of time because my food processor is wimpy, it worked very well!  If you do grind your own, you will need to sift it through a fine sieve, and return any pebbles to the food processor for a finer grind.  After that, it’s smooth sailing.  Bob's Red Mill has a really good packaged chickpea flour, and is available at most grocery stores.  If you’re lucky enough to have an Indian grocery store nearby, stop in and buy some chickpea flour – and whatever else catches your eye and tempts your nose!
Spinach Pakoras with Royal Dip

Ingredients:
  • 1 cup Greek yogurt
  • 1 clove garlic, finely minced
  • 1 tablespoon cilantro, finely minced
  • 1 tablespoon mint, finely minced
  • 1 cup chickpea flour
  • 1 teaspoon curry powder
  • 1/2 teaspoon  ground fennel seeds
  • 2 tablespoons rice flour (or use more chickpea flour, or use regular flour)
  • 2 cups fresh spinach or other hearty greens (mustard, collard, kale), chopped
  • 1/2 onion, cut into very thin strings
  • 1/4 teaspoon salt
  • 1/4 cup water (may use more or less)
  • oil for frying:  grapeseed, coconut, peanut, or vegetable oil
Directions:
  1. Make the Royal Dip:  stir together the yogurt, garlic, cilantro, and mint.  Cover and refrigerate.
  2. Mix together the chickpea flour, curry powder, fennel, and rice flour in a large bowl.
  3. Mix in the spinach and onion. Stir to combine.
  4. Add about 3 tablespoons of water and stir.  Mix it all very well.  You don’t want a thin batter – you just want the flour to be wet and coating the veggies.  Add a bit of water until you make a thick batter.
  5. Heat the oil over a medium burner and drop the pakora batter in by the tablespoonful.  Try to flatten them out a bit so they are pancake-shaped as opposed to spherical.  Cook for about 3 minutes until crispy, then flip and cook the other side.
  6. Remove pakoras to a paper towel-lined plate and sprinkle with a bit of salt.  Serve hot with the Royal Dip.


Friday, August 15, 2014

Fruity Energy Bars


I’ve got a lot of hoops to jump through when it comes to making snacks for my girls.  I try to eat Paleo myself, and while I do serve my girls grains and legumes, I am always searching for recipes that rely on Paleo ingredients first.  Next, my older daughter is allergic to peanuts and tree nuts.  That eliminates a giant swath of choices in the Paleo category, which excludes grains in favor of nuts.  So for baking, that leaves me either coconut products (which we love and use often), or seeds, like pepitas or sunflower seeds.  I found a recipe that sounded good, reconfigured it for our needs, and now I proudly present:  Fruity Energy Bars!
In the grocery store, you’ll find half an aisle dedicated to energy and granola bars.  I love them and I love that, for the most part, they’re healthy and nutritious.  They are, however, kind of pricy – sometimes two or three dollars a bar!  And it seems like the ones with the fewer ingredients are even more expensive!  (I’m looking at you, Larabar!)  Now, these Fruity Energy Bars couldn’t be quicker – just three minutes in the food processor, and about half an hour to chill and firm up.  I think you could easily exchange the dried cranberries for another dried fruit – apples, apricots, raisins, prunes, or cherries would all work.  If you want to use nuts instead of sunflower seeds, try almonds or walnuts.  They do warm up very quickly and get soft, so keep them in the fridge until ready to eat.  Ready?  Get energized!

Fruity Energy Bars

Ingredients:
  • 1 cup pitted dates
  • 1 cup dried cranberries
  • 1 cup sunflower seeds (I used roasted and salted)
  • 1/4 cup unsweetened flaked coconut
  • 1/4 cup chocolate chips
Directions:
  1. Pour all the ingredients into the bowl of  your food processor.  Pulse to blend, then mix for about 3 minutes.  You can blend it all the way together and it will form a ball, but I took mine out before that so I could still have a little texture to the bars – kind of like the consistency of sticky sand.
  2. Line an 8×8 pan with plastic wrap, or grease with a little coconut oil.  Press the mixture into the pan and press down with the back of a big spoon.  Refrigerate for at least half an hour.  Cut into 1″x4″ bars.  Get energized and go be productive!

Sunday, May 4, 2014

Samson's Carrot Cookies


For Christmas, I got my kindergartner The Disney Princess Cookbook, and I’m so happy I did!  With pretty princesses on every page, it features real recipes (and not just cake mix plus applesauce-type concoctions) that are great for parents and kids to make together.  I have her read the recipes, and she’s learning about following directions, measurements, and even fractions!  We’ve made a few things from her cookbook, but the one we like best is Samson’s Carrot Cookies.
Samson, if you don’t know, is the name of Prince Phillip’s horse in “Sleeping Beauty.”  These cookies are soft and cake-like, with carrots, apples, and cranberries.  (We omitted the walnuts since my girl is allergic, but I know they’d be delicious!)   These make great bribes for little girls who stay in their beds all night, too.  (Yep… guilty!)   Try them this weekend with your favorite little prince or princess.
Disney Princess Cookbook resize
Samson’s Carrot Cookies
(from The Disney Princess Cookbook)
Ingredients:
  • 1 cup flour
  • 1 teaspoon baking powder
  • 1/2 teaspoon salt
  • 1/2 teaspoon cinnamon
  • 1/2 teaspoon nutmeg
  • (we added 1/2 teaspoon ground ginger.  It’s not in the recipe but it was a lovely addition)
  • 1/2 cup brown sugar
  • 1/4 cup melted butter
  • 1 egg, lightly beaten
  • 1 cup rolled oats
  • 1 cup shredded carrot
  • 1/2 cup shredded apple
  • 1/2 cup chopped walnuts
  • 1/3 cup dried cranberries (raisins would work too)
Directions:
  1. Heat the oven to 375*F.  Line a cookie sheet with parchment paper.
  2. In a small bowl, whisk together the flour, baking powder, salt, cinnamon,  nutmeg, and ground ginger.
  3. In a large bowl, whisk together the brown sugar and melted butter.  Then beat in the egg with a fork.
  4. Stir the flour mixture into the sugar mixture until the batter is smooth.  Then stir in the oats, shredded carrot and apple, walnuts, and dried cranberries.
  5. Drop rounded tablespoons of batter onto the cookie sheet, spacing them about 1/2 inch apart.
  6. Bake the cookies until they just begin to turn golden brown on top, about 8 minutes.  (NOTE: The recipe says ’8 minutes’, but I found 12 minutes was more like it in my oven.  Let’s say check at 8 minutes, but be prepared for 4-5 more!)  Leave them on the baking sheet for 2 minutes before moving them to a wire rack to cool.

Laurie Samson's Carrot Cookie resize
Hey Mom, I stole another cookie off the counter while you were writing your blog! Want a bite?

Tuesday, April 8, 2014

Irish Soda Bread


For last week’s recipe, I needed a carton of buttermilk.  I still had quite a bit left, and I knew I wanted to use it all up, so I found a few recipes that fit the bill.  None, however, sounded as tasty as this one for Irish Soda Bread!
A “soda bread” is simply a quick bread that uses baking soda and /or baking powder to rise, as opposed to yeast.  That means you don’t need to wait for it to rise, or worry about the yeast being old and feeble (or killing it with water that is too hot … or not hot enough to wake it up … Have I mentioned lately I hate baking with yeast?!?!)  This recipe comes together in a food processor, but if yours isn’t big enough to fit all the ingredients, or you just like using a pastry cutter, you can certainly put some elbow grease into it and do it the old-fashioned way.
This recipe is based on a Martha Stewart recipe, but I made a few changes.  The biggest change is that, unlike regular soda bread that is kind of bland and dotted with raisins, this one has chopped currants throughout, so it is more of a currant-flavored bread.  Also, the original recipe called for caraway seeds, but I used anise seeds instead.  This bread keeps on the counter, wrapped tightly in plastic wrap and foil, for a few days.  Cut a big slice, cover it with butter, and match it up with your favorite coffee or tea.
Irish Soda Bread
Ingredients:
  • 4 cups flour
  • 1/4 cup sugar
  • 1 teaspoon salt
  • 2 teaspoons baking powder
  • 2 tablespoons anise seed
  • 4 tablespoon cold butter, cubed
  • 1 10-ounce box currants (or use 2 cups of raisins)
  • 1 1/2 cups buttermilk
  • 1 egg
  • 1 teaspoon baking soda
  • 3 tablespoons buttermilk
Directions:
  1. Preheat oven to 350*F.  Butter a large round Pyrex baking dish, all the way to the top.
  2. In the bowl of a large food processor, blend together the flour, sugar, salt, baking powder, and anise seed.  Add the cold butter cubes and pulse to blend.  Add in the currants and blend again.
  3. In a large bowl, beat together the buttermilk, egg, and baking soda.  Add this to the food processor and blend again until thoroughly mixed.  It will be wet and sticky!
  4. Scoop the bread dough into the buttered Pyrex dish and smooth into a mound.  With a brush or the back of a spoon, brush the top with the 3 tablespoons of buttermilk.  Bake for 70-80 minutes, or until a toothpick comes out clean.

Saturday, December 21, 2013

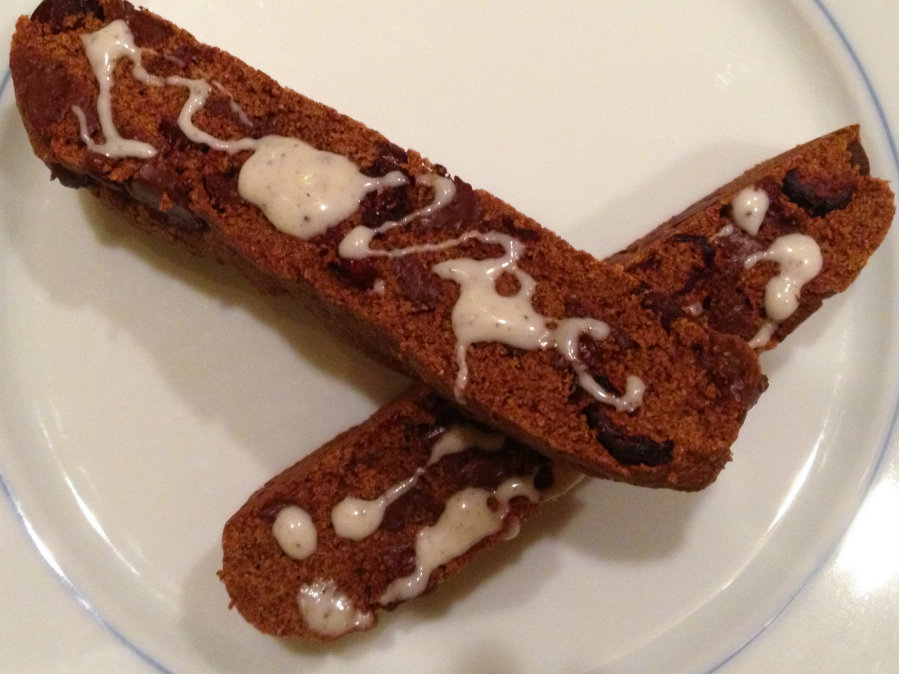
Chocolate Cranberry Quinoa Biscotti


If you’ve ever paid $2 for a biscotti at your local coffee shop and thought, “It can’t be that hard to make these,” you are right!  This recipe for Chocolate Cranberry Quinoa Biscotti takes a few extra steps, but if you are looking for a gluten-free, nut-free treat for your afternoon coffee break, read on!
I was looking for nut-free biscotti recipes online, and I found one using quinoa flour, which I’d never heard of or used.  Time to experiment!  It turns out that quinoa flour is incredibly easy to make, and exceeds wheat flour in fiber, protein, and nutrients.  If you don’t want to make your own at home, I understand – you can find it in health food stores and online, and Bob’s Red Mill makes it (I really like and trust their products.)  I used red quinoa, so the biscotti has a darker color, but feel free to use the regular white kind.  To make quinoa flour at home, pour one cup of quinoa on a baking sheet and bake for 12-15 minutes at 300*F.   When cool, grind in a spice grinder, grain mill, or superpowerful blender.  I have a hand-crank grain mill that made short work of the job!  One cup of dry quinoa will yield one and a quarter to one and a third cups of flour.  If you don’t want to go through the trouble, you can use regular or whole wheat flour instead.
Everything else in this recipe is pretty customizable.  Don’t like chocolate chips?  Leave them out or use white chocolate or even butterscotch chips.  Add in any kind of nut, like almonds, pecans or pistachios.  Replace the dried cranberries with cherries, apricots, or just lemon zest.  Drizzle with white or dark chocolate.  These make great gifts, too, because they are pretty hearty and don’t get stale too quickly.  After rigorous and exhaustive testing, I can report that these stand up well to dunking in coffee.  The things I do for you people! 
If you have a friend who loves coffee, give these as a gift (and keep a few for yourself!)

CCQ Biscotti Close up Resize
Chocolate Cranberry Quinoa Biscotti
Ingredients:
  • 1+ 1/3 cups quinoa flour (you can use whole wheat flour instead)
  • 2 tablespoons coconut flour
  • 1 teaspoon baking powder
  • 1/4 teaspoon salt
  • 2 eggs
  • 1/4 cup melted coconut oil (or use butter)
  • 2 teaspoons vanilla extract
  • 3/4 cup coconut sugar (or use brown sugar)
  • 3/4 cup dried cranberries (or cherries or diced apricots)
  • 3/4 cup chocolate chips
  • White chocolate for drizzling (Confession:  I was out of white chocolate, but I found a cookies and cream white chocolate bar that fit the bill.)
Directions:
  1. Preheat oven to 300*F.  Line a baking sheet with parchment paper.
  2. Combine quinoa flour, coconut flour, baking powder, and salt in a bowl.
  3. In a large bowl, combine the eggs, coconut oil, vanilla, and coconut sugar together.  Mix well, then stir in chocolate chips and cranberries.  Stir in the flour mixture a little at a time until thoroughly combined.
  4. Turn the dough out onto the parchment, and using damp hands, mold into a log that measures about 4 or 5 inches wide, one inch high, and about 15 inches long.  Bake until firm, about 25 minutes.
  5. Remove pan from oven, then pick up the parchment with the biscotti log on it, and let it cool on a rack.  You want this cooled to room temperature, so it won’t crumble too much.  With a serrated knife, slice the log into 1/2 inch biscotti.
  6. Place the biscotti back on the baking sheet and bake for about 15 minutes until dry and crunchy.  Let cool completely, then drizzle with white chocolate.  Store in an airtight container to keep them crisp.

Friday, November 15, 2013

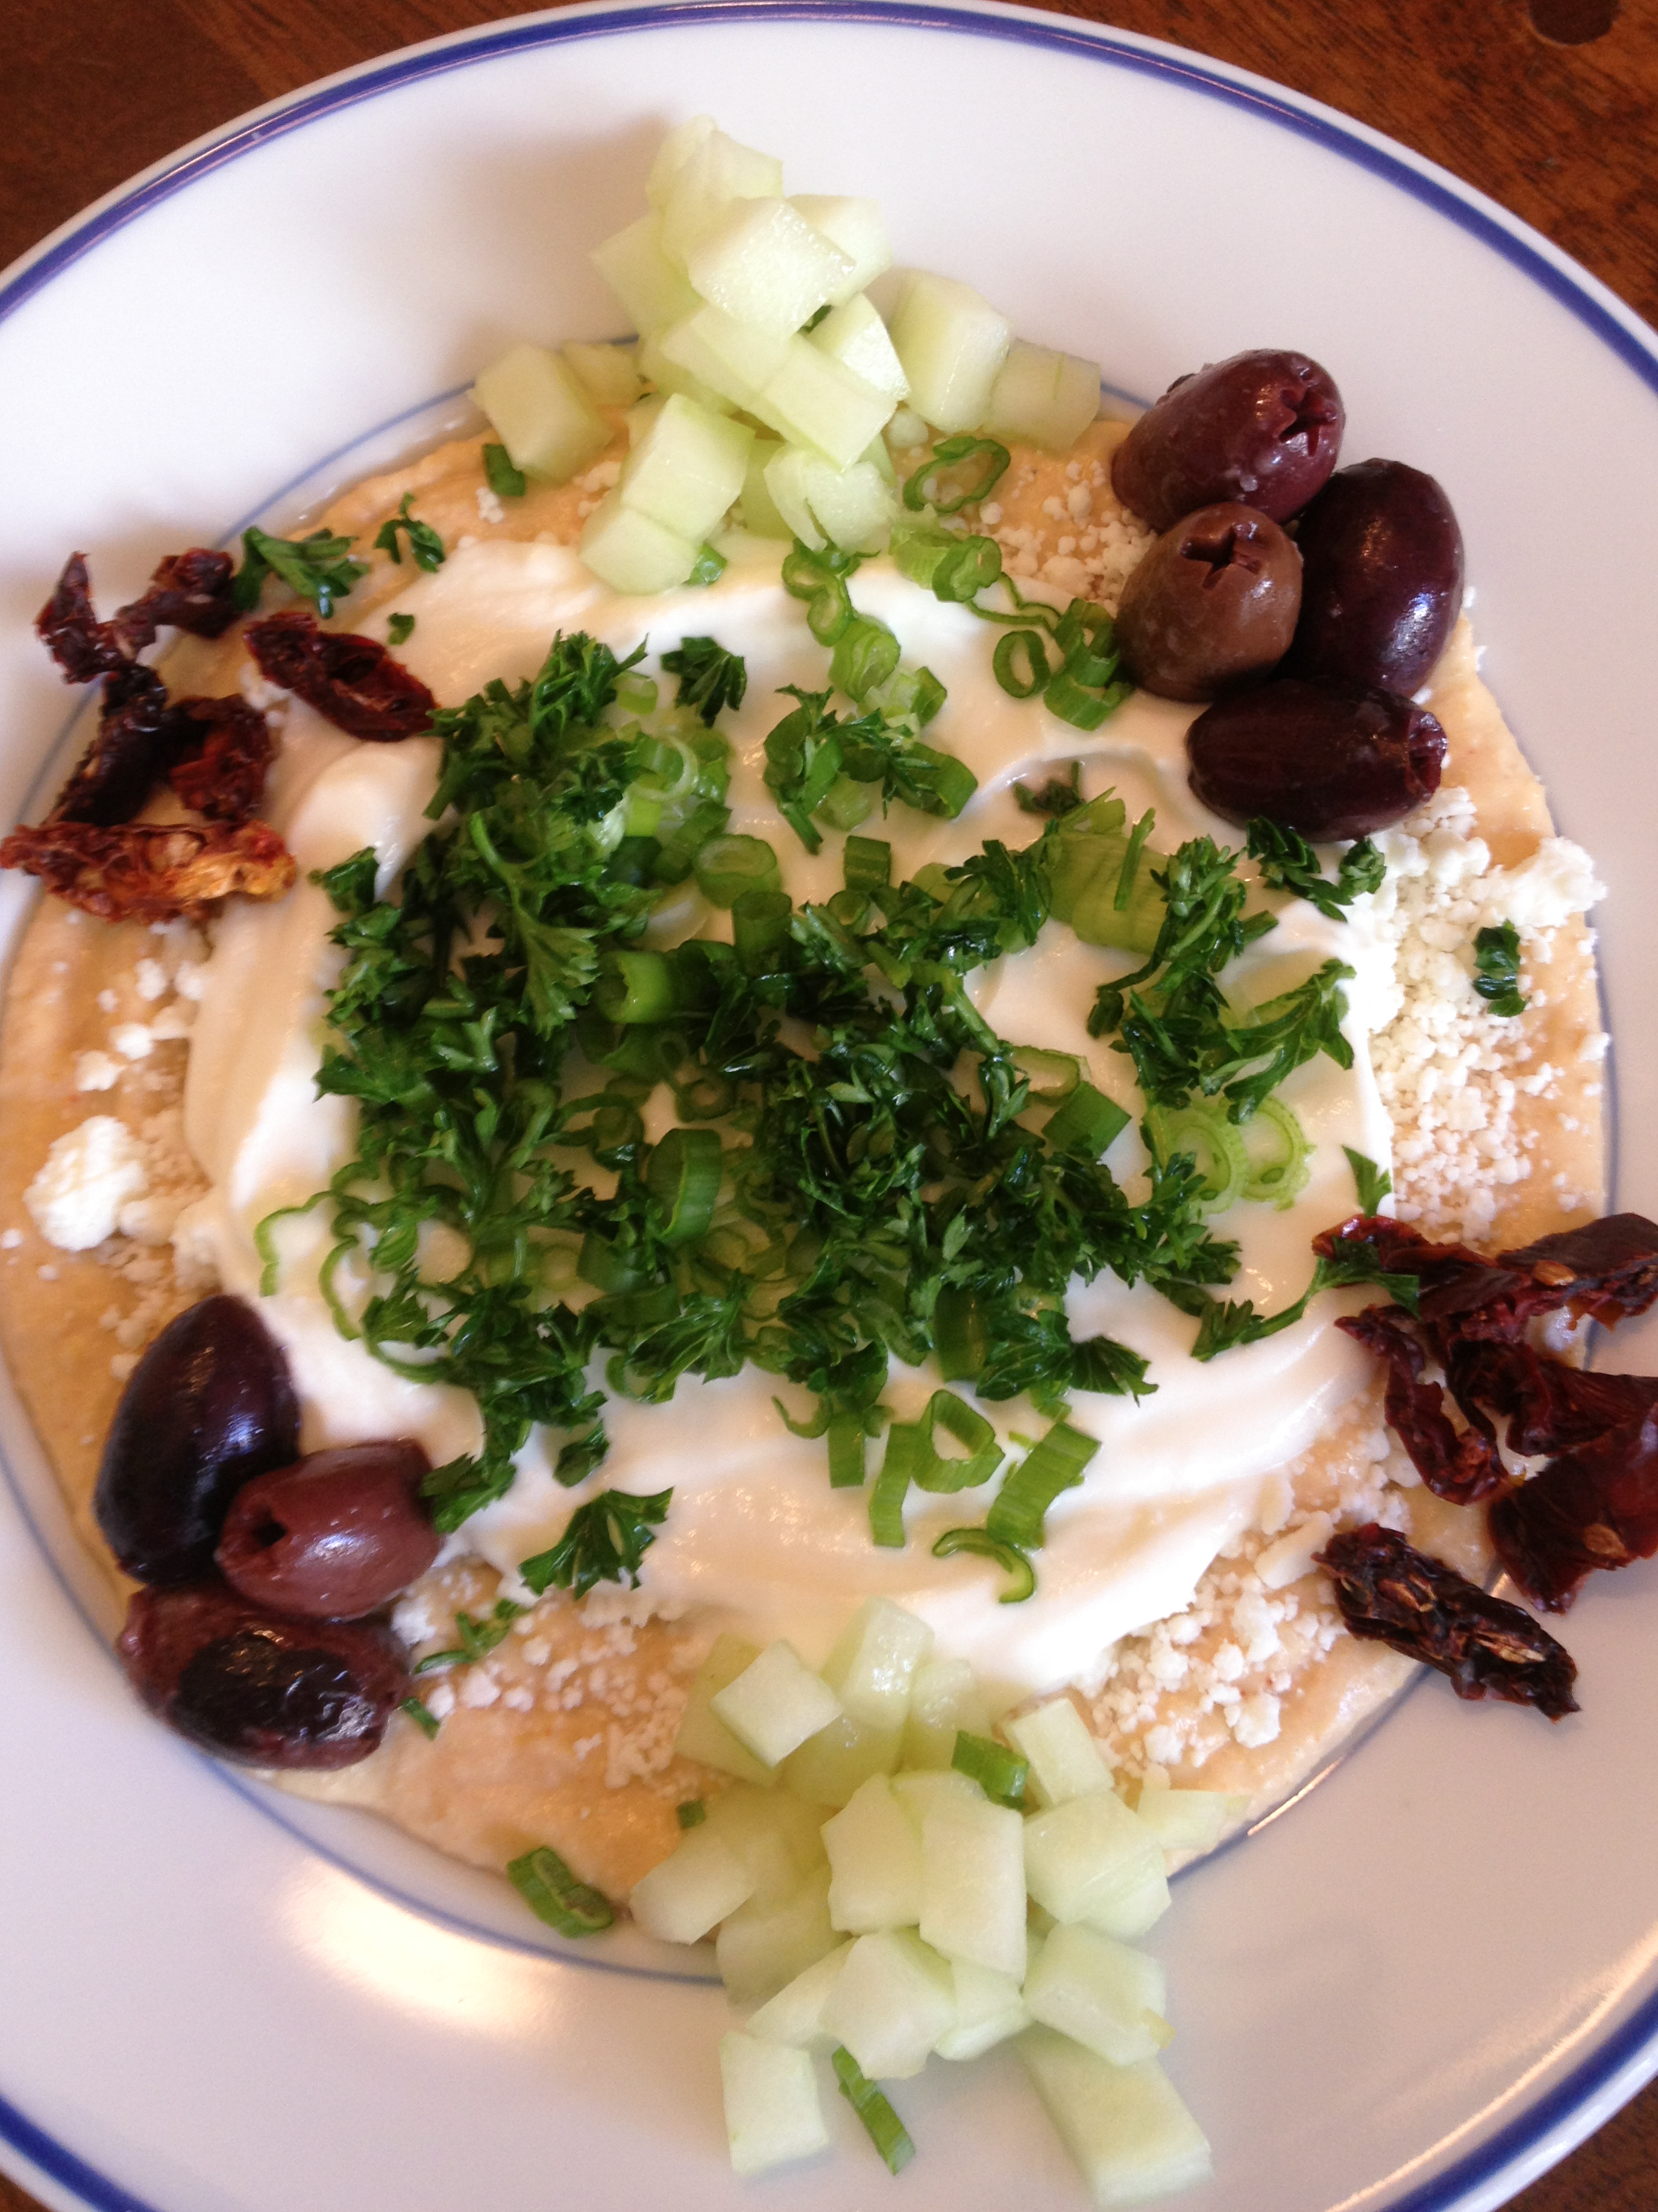
Layered Greek Dip


Layered Greek DipThis month I am focusing on side dishes and things you can bring to your Thanksgiving table.  When my family gets together, we all commit to bringing a piece of the dinner puzzle:  whichever family member is hosting usually makes the main dish, and the other family members decide on who is going to make dessert, salad, vegetable, and appetizer.  My sister brought an appetizer called Layered Greek Dip – and I was hooked!
This dish is easy to put together and is healthy to boot!  Assemble it right before your guests come, or make ahead and covered in the fridge until you are ready to serve.  Offer a variety of dippers:  I like pita chips, tortilla chips, Triscuits (my favorite cracker of all time!) and veggies like carrot sticks and red pepper slices.  This will take the edge off people’s hunger long enough for you to finish up your last-minute dinner duties.  Offer some white wine with this appetizer and your guests may forget all about the main course!
I should have taken a photo of my sister’s dish when she  made it, but it slipped my mind, and before I remembered, we had all smeared it all over the plate and eaten half of it!  I made it again this morning, so the photo is of a “personal-sized” serving.  And you know what?  It makes a yummy, unusual breakfast too!  I used sundried tomatoes because I didn’t have any cherry tomatoes (and I don’t care for them anyway.)  Try it and let me know if you love it like I do!

Layered Greek Dip

Serves 8 as an appetizer
Ingredients:
  • 8 ounce container of hummus (or make your own!)
  • 4 ounces crumbled Feta cheese
  • 6 ounce container of plain Greek yogurt
  • 1 small cucumber, peeled, seeded and chopped
  • 4 ounces cherry tomatoes, cut in half
  • 4 ounces Kalamata olives (or other black olives)
  • 2 green onions, diced
  • handful of parsley, minced
Directions:
  1. On a large plate, spread out the hummus.  Cover with a layer of Feta, then cover that with the Greek yogurt.  Arrange the cucumber, tomatoes, and olives over the top in any way you find aesthetically pleasing.  Sprinkle with green onion and parsley.  Serve with chips or veggie sticks.  Keep refrigerated until ready to eat.

Friday, September 13, 2013

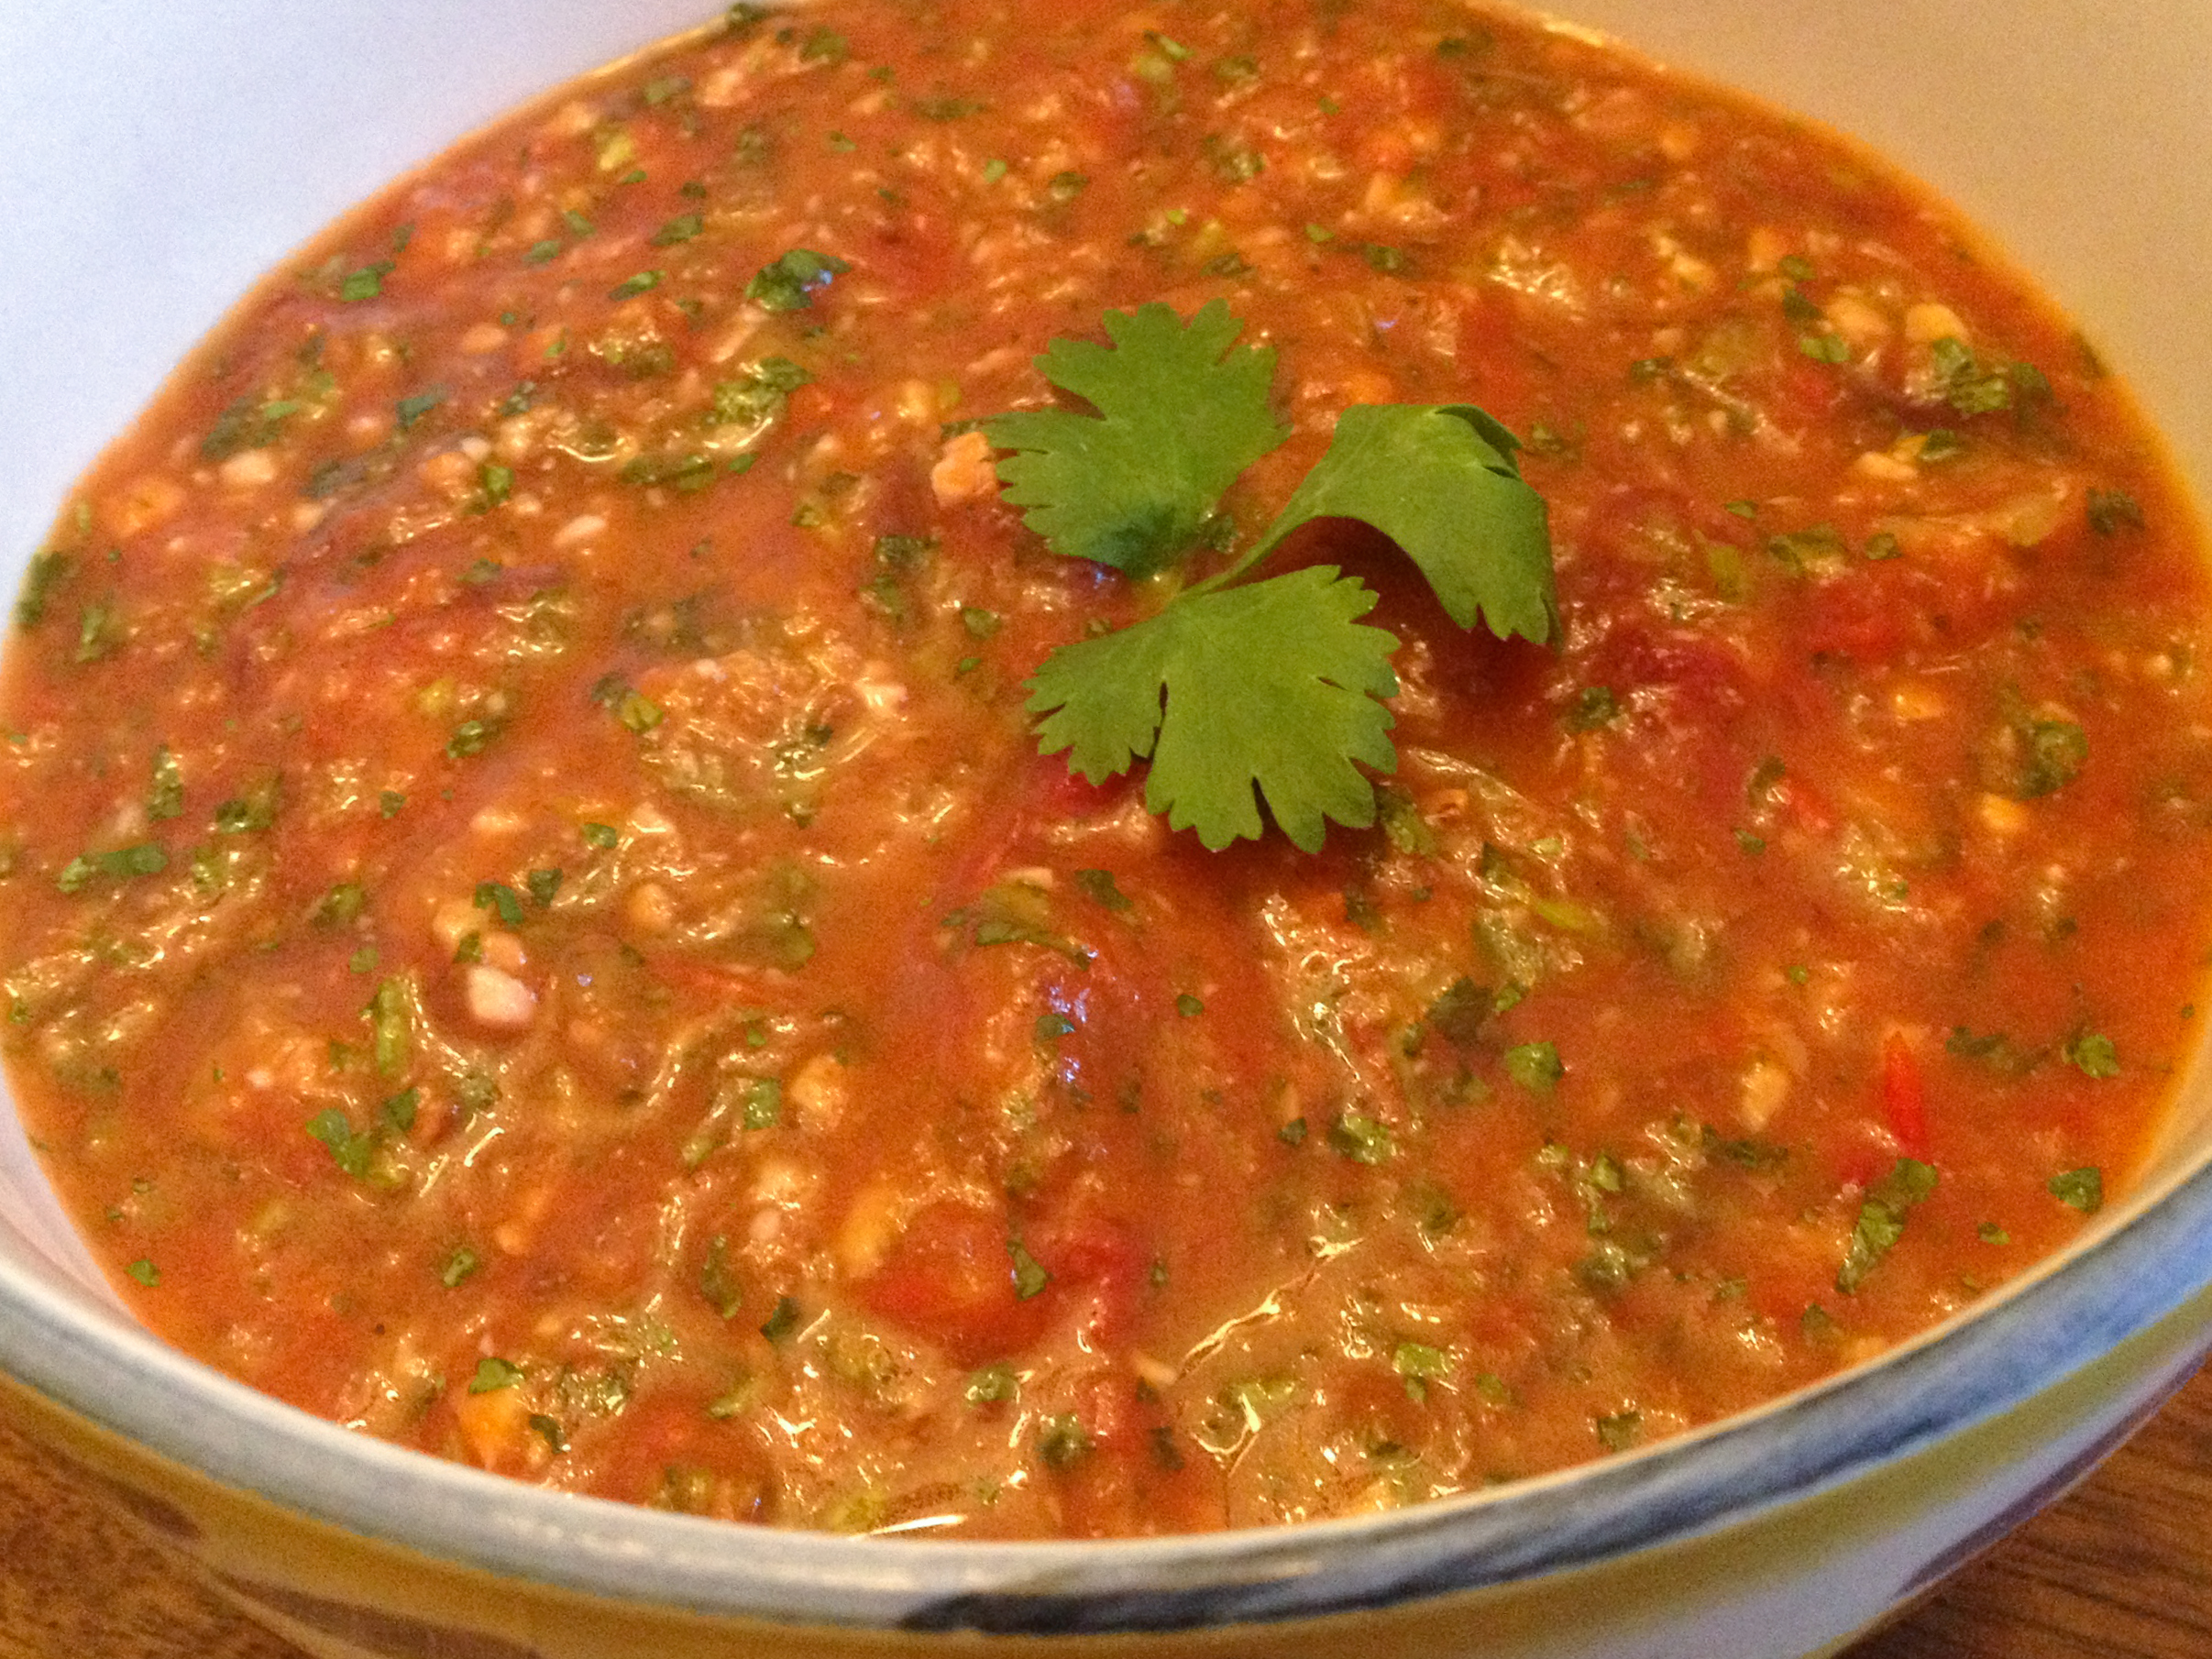
Roasted Chipotle Salsa


Roasted Chipotle Salsa
I planted my garden a little late this year, so my tomatoes are just getting ripe now.  My husband loves tomatoes in any form, in any dish.  As for me, the ONE food I don’t like is plain raw tomatoes.  I keep them off my sandwiches and salads.  Every other preparation is fine with me – ketchup, tomato sauce, anything with cooked tomatoes – and especially salsa!  And while I like raw tomato salsas a lot, I like this Roasted Chipotle Salsa even better!
Chiptole peppers in adobo sauce are easy to find – just check your local grocery store in the “ethnic” aisle with all the other Mexican food.  They’re cheap, and they are nearly pickled in the adobo sauce, so once you open the little can, you can keep the rest of the peppers and sauce in a small container in your fridge for months.  (A little Ball jar, or leftover jelly jar, is perfect for this.)  Then, if you find you love the smoky, mild heat of chipotles, use some of the others in your jar to make this dinner salad.  If you can’t find fresh cilantro at your store, you can leave it out, but it really adds a burst of freshness to this spicy sauce!
This recipe made a little more than a cup for me.  That said, my husband and I ate it all in one night!  It was “taco” night at our house, but we were using lettuce leaves instead of taco shells.  Ground beef with onions, avocado slices, and this salsa – delish!
Roasted Chipotle Salsa
Ingredients:
  • 3 regular-sized ripe tomatoes (around 1/2 pound, or a little more)
  • 1/2 onion
  • 3 cloves garlic
  • 2 teaspoons olive oil
  • salt
  • 1 chipotle pepper in adobo sauce (or more if you like it spicy!)
  • 1/2 teaspoon ground cumin
  • small handful cilantro, about half a cup
  • 1/2 lime or lemon
Directions:
  1. Preheat oven to Broil.  Line a baking sheet with aluminum foil.  Slice the tomatoes in half, removing any core or stem you don’t like.  Slice the onion into rounds.  Peel and smash the garlic cloves.  Lay these out on the baking sheet and drizzle lightly with olive oil.  Season with salt.
  2. Broil the vegetables until they start turning brown and are very juicy – about 8-10 minutes, depending on your oven.  Remove from the oven.  Pour the vegetables and any juices into a food processor.  Add in the cumin, chipotle pepper, cilantro, and hit start.  Process for a few seconds, then squeeze in the lime juice.  Process again – leave it chunky!  Taste for seasoning – maybe more salt or lime?  Process again until you reach your desired consistency.  I like mine to still have some texture and not be a puree.  Refrigerate until ready to use.  Tortilla chips, burritos, enchiladas – even over scrambled eggs – this stuff is yummy!

Monday, August 12, 2013

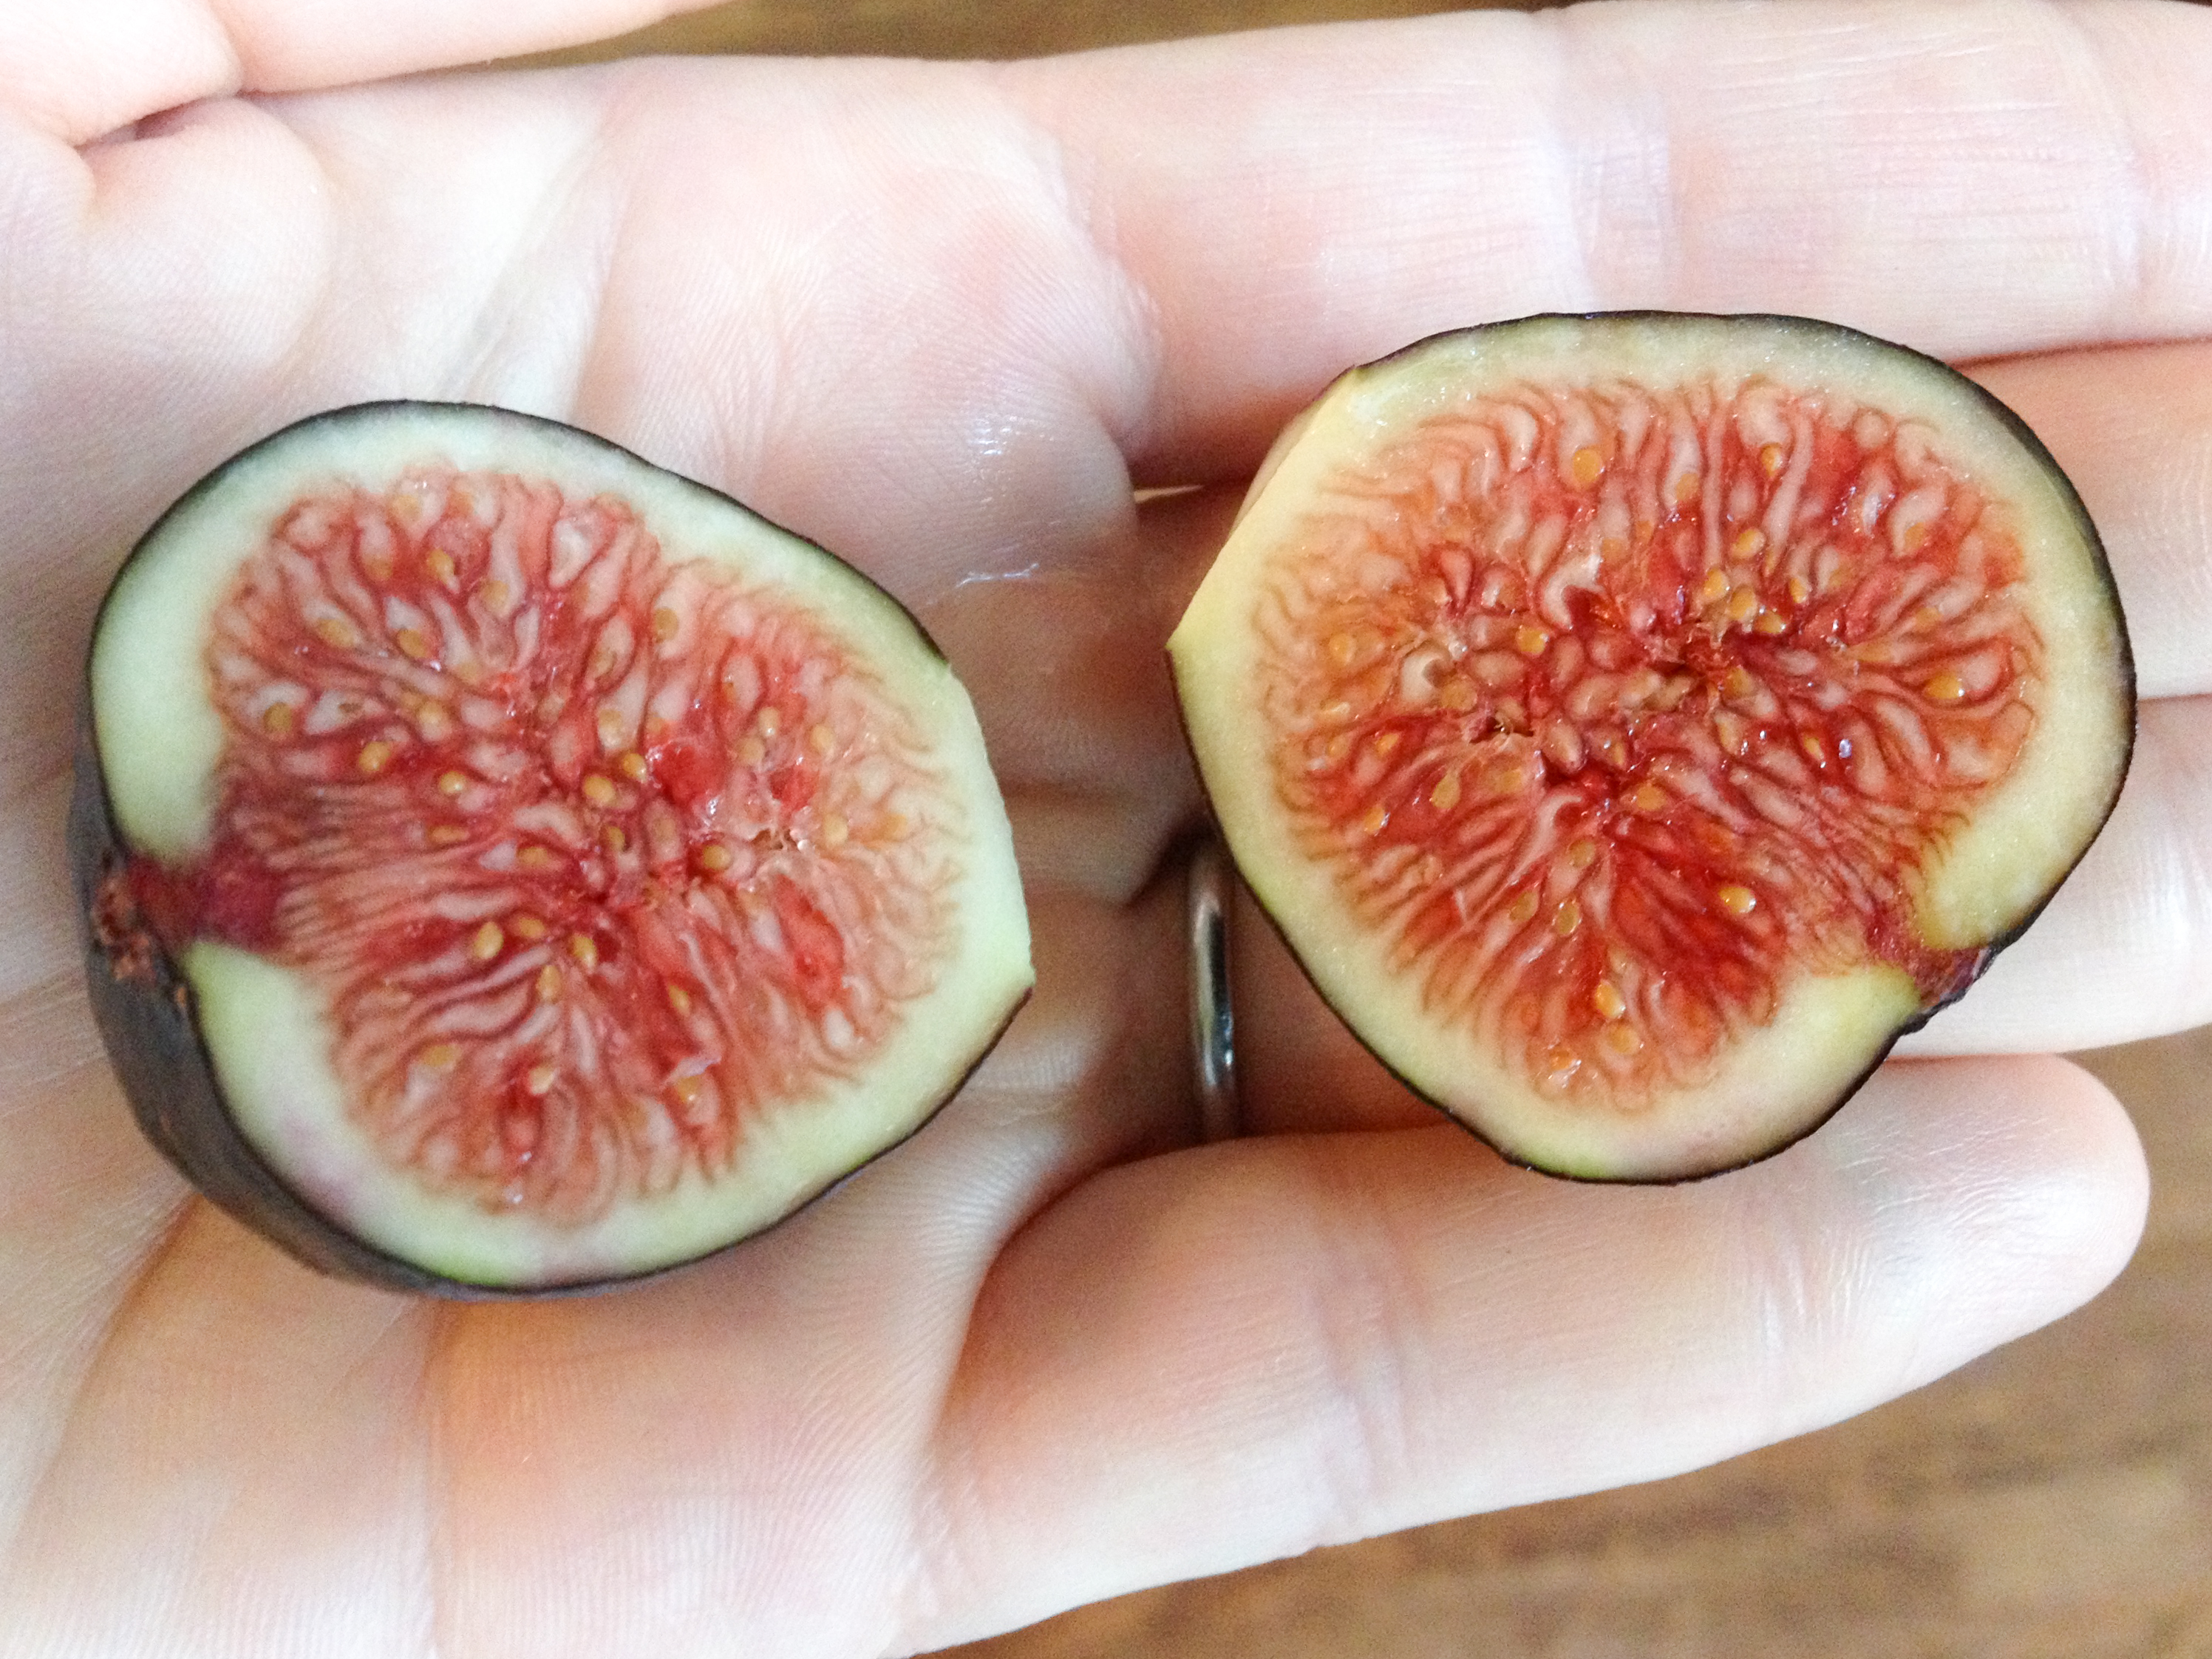
Bacon-Wrapped Figs


Fresh Figs
Ah summer!  You bring us such a variety of delectable little fruits and veggies, some that are only in season and available for a few weeks!  Figs are one of those little gifts from God.  I saw them at my farmer’s market two weeks ago, and Sunday I bought a basket.  Tender little nuggets of sweet pink flesh, hidden under an unassuming brown skin, figs are a sweet treat!  If you’ve only ever had them in Fig Newton form, try this recipe for Bacon-Wrapped Figs!
Simple ingredients, simple preparation – so easy!  Look for figs that are a little soft, but not squishy.  These little bites are sweet and salty and kind of rich, so you don’t need to eat a dozen to feel satisfied.  Try them with a green salad for a light lunch, or with some sparkling wine as an appetizer.

Bite-sized bacon goodness!

Bacon-Wrapped Figs

Ingredients:
  • 6 ripe figs
  • 6 slices bacon
  • 6 teaspoons cream cheese
  • fresh-ground black pepper
  • optional: honey
Directions:
  1. Preheat oven to 400*F.  Line a baking sheet with aluminum foil.  
  2. Rinse off figs and pat dry.  With a knife, trim off the little stem nub at the top and slice in half lengthwise, so you have 12 halves.  Cut the bacon in half so you have 12 short pieces.
  3. To assemble:  Place half a teaspoon of cream cheese on top of each fig half.  Season with a grind or two of black pepper.  If you want them sweeter, add a drop of honey on top of the cream cheese.  I didn’t use honey and mine were delicious, but it’s up to you how sweet you want them.  Wrap each cream cheese-topped fig in bacon.  I wrapped them so the open end is underneath the fig, but some had the open end on top and it didn’t unravel.  You could use toothpicks if you are worried they won’t stay wrapped in the oven, but mine were fine without.  Lay the bacon-fig bundles on the baking sheet.
  4. Bake for 20 minutes.  Turn off the oven and let them figs rest for 5 more minutes in the oven.  Take them out and serve hot.  Watch your fingers!

Saturday, July 27, 2013

Tropical Granita


In my last post on the joys of Homemade Coconut Milk, we’ll look at the most traditional use of coconut:  Dessert!  Coconut milk can be used in savory or sweet dishes, but I think most people like to find coconut mingling with chocolate or fruit.  Here’s a recipe that will satisfy your sweet tooth in a healthy way – Tropical Granita!
For some reason, my girls won’t try new fruits readily, but if I put them in a smoothie or in this granita, they love it!  A granita, if you don’t know, is like a cross between a sorbet and shaved ice.  It’s icy, flaky, and refreshing!  You can use any fresh, juicy fruit you want here – mangoes, peaches, any berries – but be sure you add at least one banana.  The bananas create a thicker texture and enough sweetness that you don’t need to add any sugar!  You could use frozen fruit too – pineapple and raspberries would be lovely!  I used nectarines, bananas, and strawberries.
As with all homemade recipes, there are pros and cons.  The pro, of course, is there are no sweeteners, preservatives, artificial color, etc.  The con is that since there are no stabilizers and gums, this granita is a little more difficult to scoop than commercial ice cream.  I take it out of the freezer about half an hour before we eat it, so it can soften up a little.  It’s a great motivator – I tell my daughter I’m taking dessert out of the freezer, so if she wants to eat some, she better start eating that broccoli on her plate!
Tropical Sorbet
Ingredients:
  • 1 cup dessicated coconut and 1 1/2 cups water (or one can coconut milk)
  • 3 nectarines or peaches
  • 1 ripe banana
  • 1 cup strawberries
  • optional toppings:  whipped cream, shredded coconut, strawberry jam
Directions:
  1. In a blender, blend the coconut and water.  Strain through a colander and cheese cloth.  Return coconut milk to the blender.  (If using canned coconut milk, just pour it in the blender!)
  2. Boil a pot of water.  Score an X on the bottom of each peach or nectarine.  Drop each nectarine into the water and let it boil for 30 seconds.  Remove the nectarines to an ice bath.  When cool, peel off the skin.  Cut the flesh from the pits and add to the blender.
  3. Add the banana to the blender and blend for 30 seconds.  Remove stems from strawberries and cut in half.  Add to blender and pulse a few times – I like to see chunks of berries!
  4. Pour into a large, shallow container and cover with plastic wrap.  Freeze until firm, at least 6 hours.  To serve, let thaw for about half an hour, and then scrape up with a spoon or fork.  Mound in a dish and serve with whipped cream, more diced berries or coconut flakes, or a dollop of strawberry jam!
These make great popsicles too!

Monday, July 22, 2013

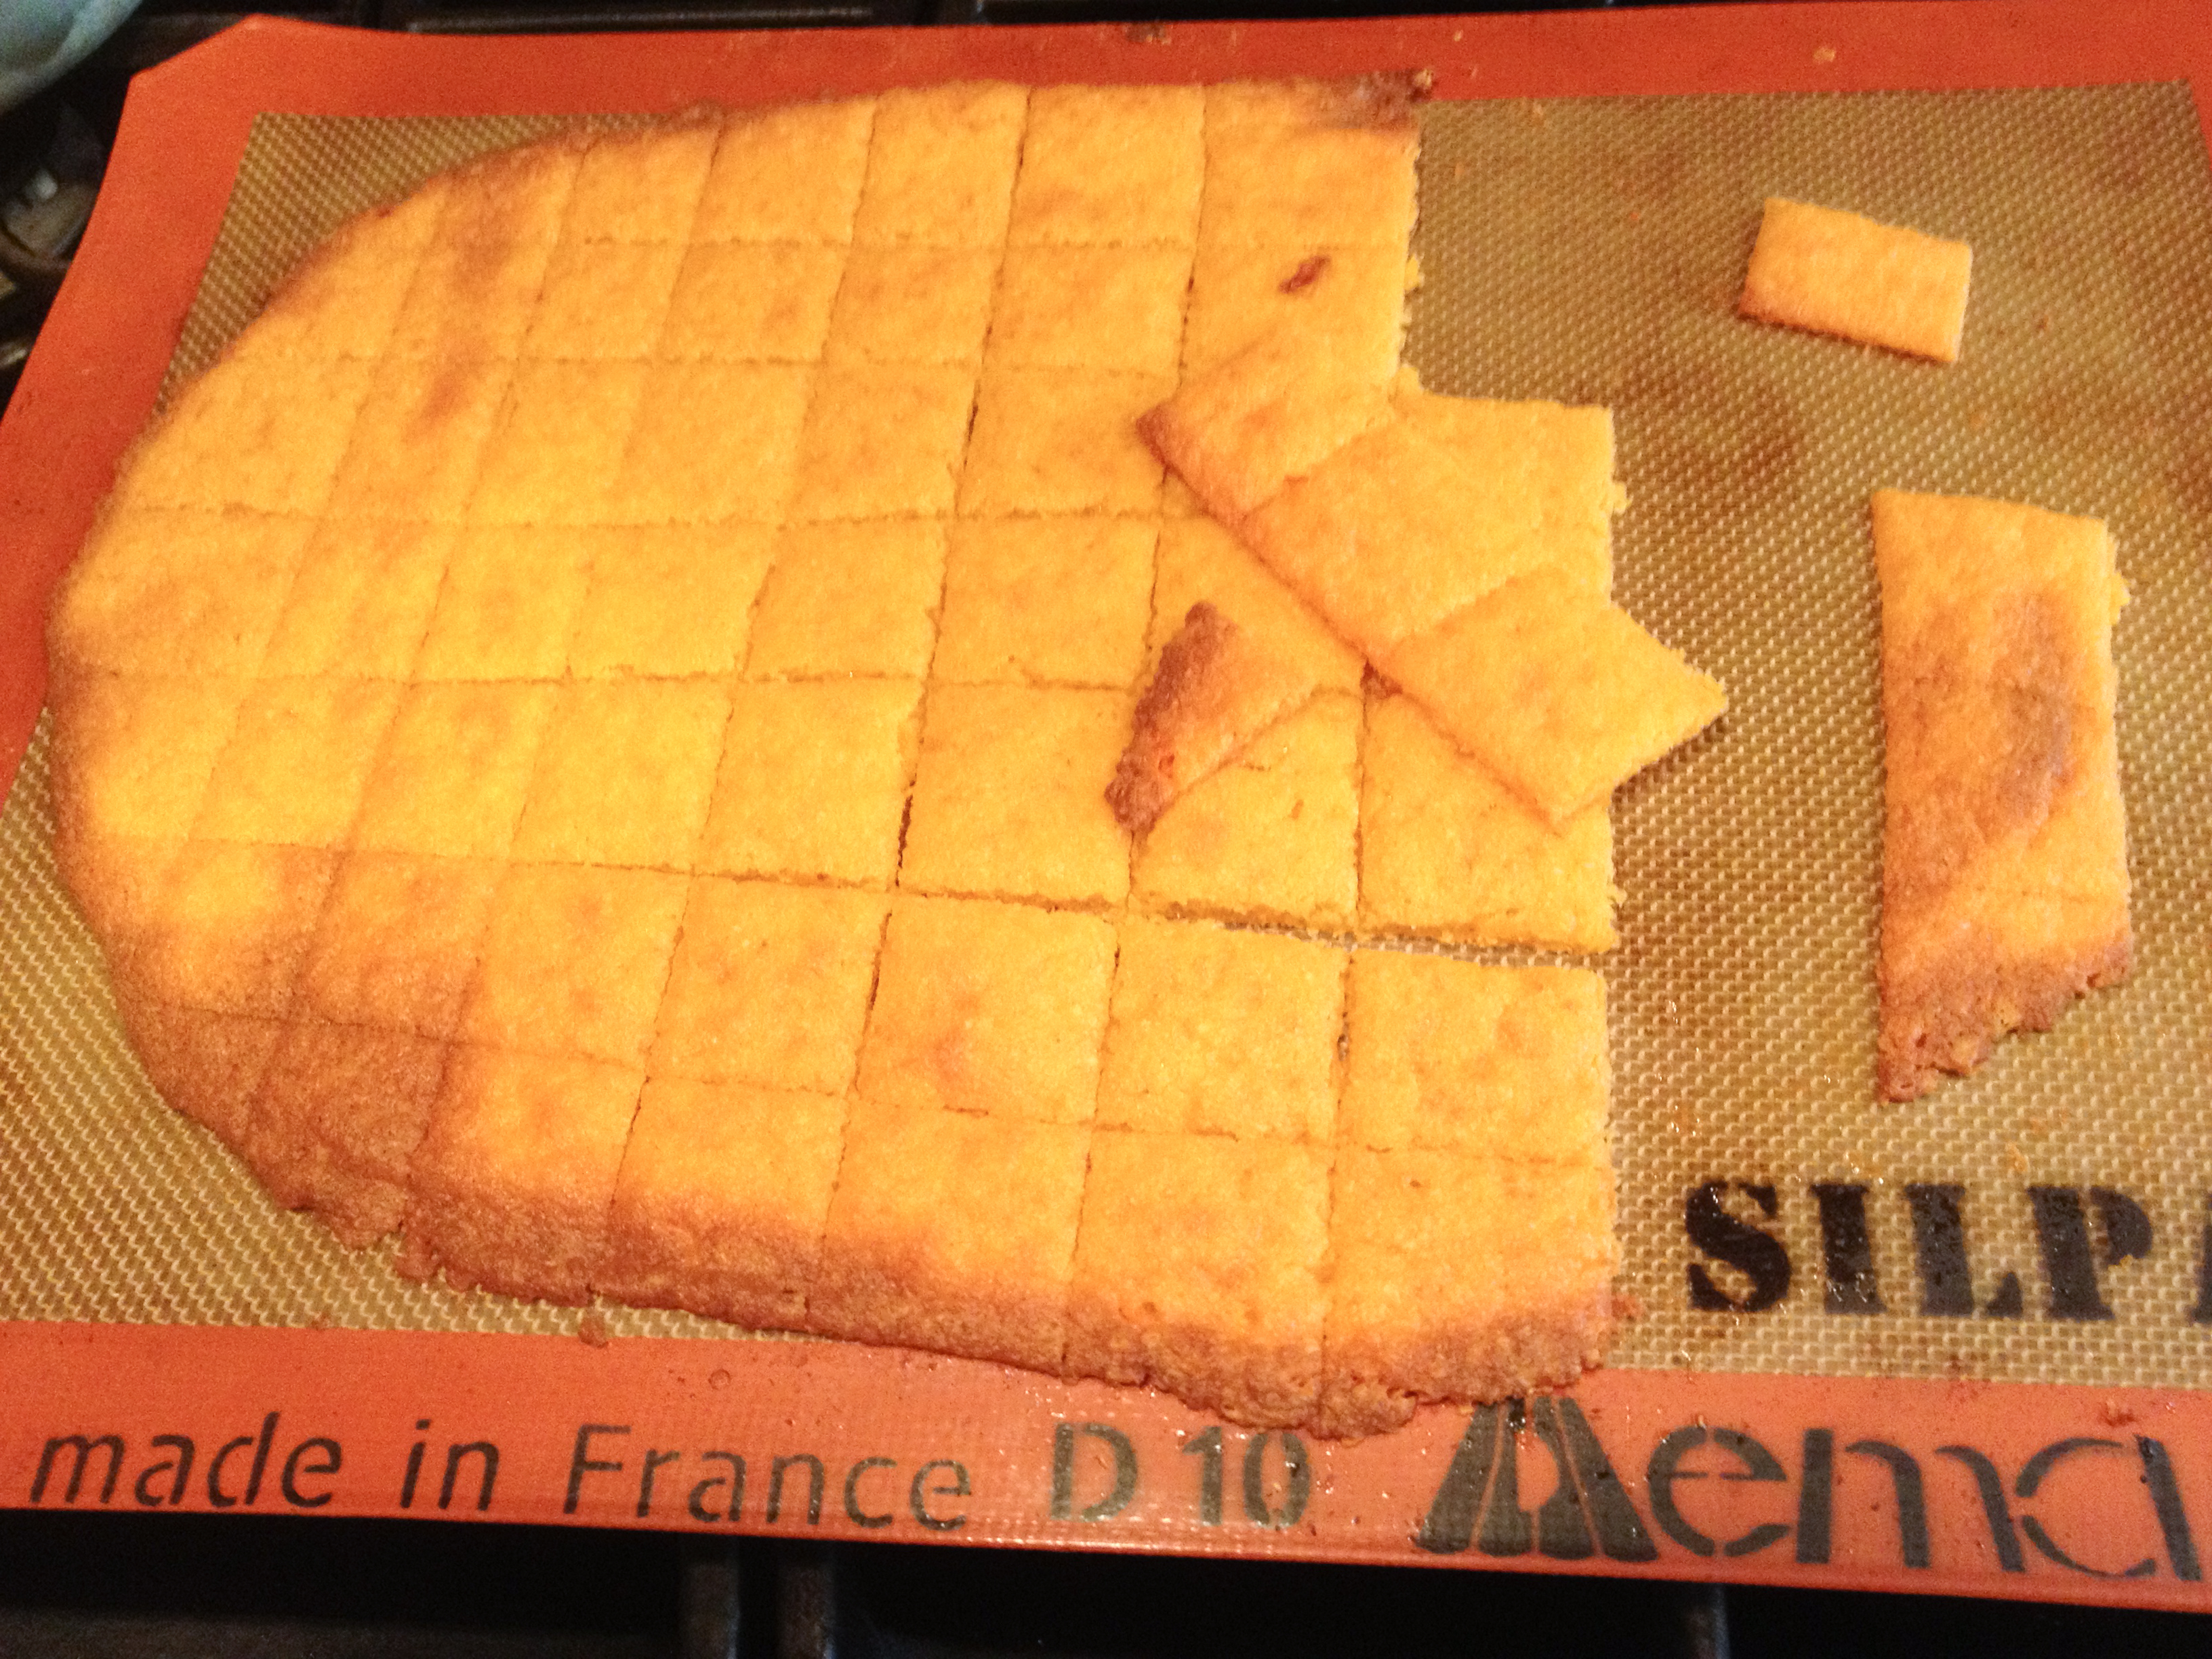
Homemade Cheezits, from Homemade Coconut Flour


Homemade Cheezits

So, you fell in love with coconut milk too, right?  It’s your end-all, be-all, new favorite thing? That’s okay if it’s not.  But if you have made it, or plan to, you will be left with a cheesecloth-wrapped ball of pulp.  Now, someone who didn’t know better might just chuck that in the trash.  But not us!  We are going to use the pulp to make Homemade Coconut Flour and, with that flour, we’re going to make Homemade Cheezits!
First, the tools you will need:  You’ll need a baking sheet, parchment paper, and a food processor or blender.  If you have a Silpat silicone baking liner, now is the time to use it.  And you’re in luck:  the ingredients are already in your house, right now!  Once you make (or purchase) coconut flour, you can whip these crackers up in minutes.  The good news is that they have no preservatives, artificial colors or flavors, or any unpronounceable chemicals – hooray!  They come out of the oven the perfect blend of crispy and  chewy, ready for snacking.  The bad news is, because they lack any of that lab-created stuff, they don’t stay crispy.  But that is easily remedied by a quick pass through a toaster oven.  Just a few minutes is enough to make these crackers crunchy again.
Ready to make some homemade, preservative-free snacks your family will love?  Let’s go!
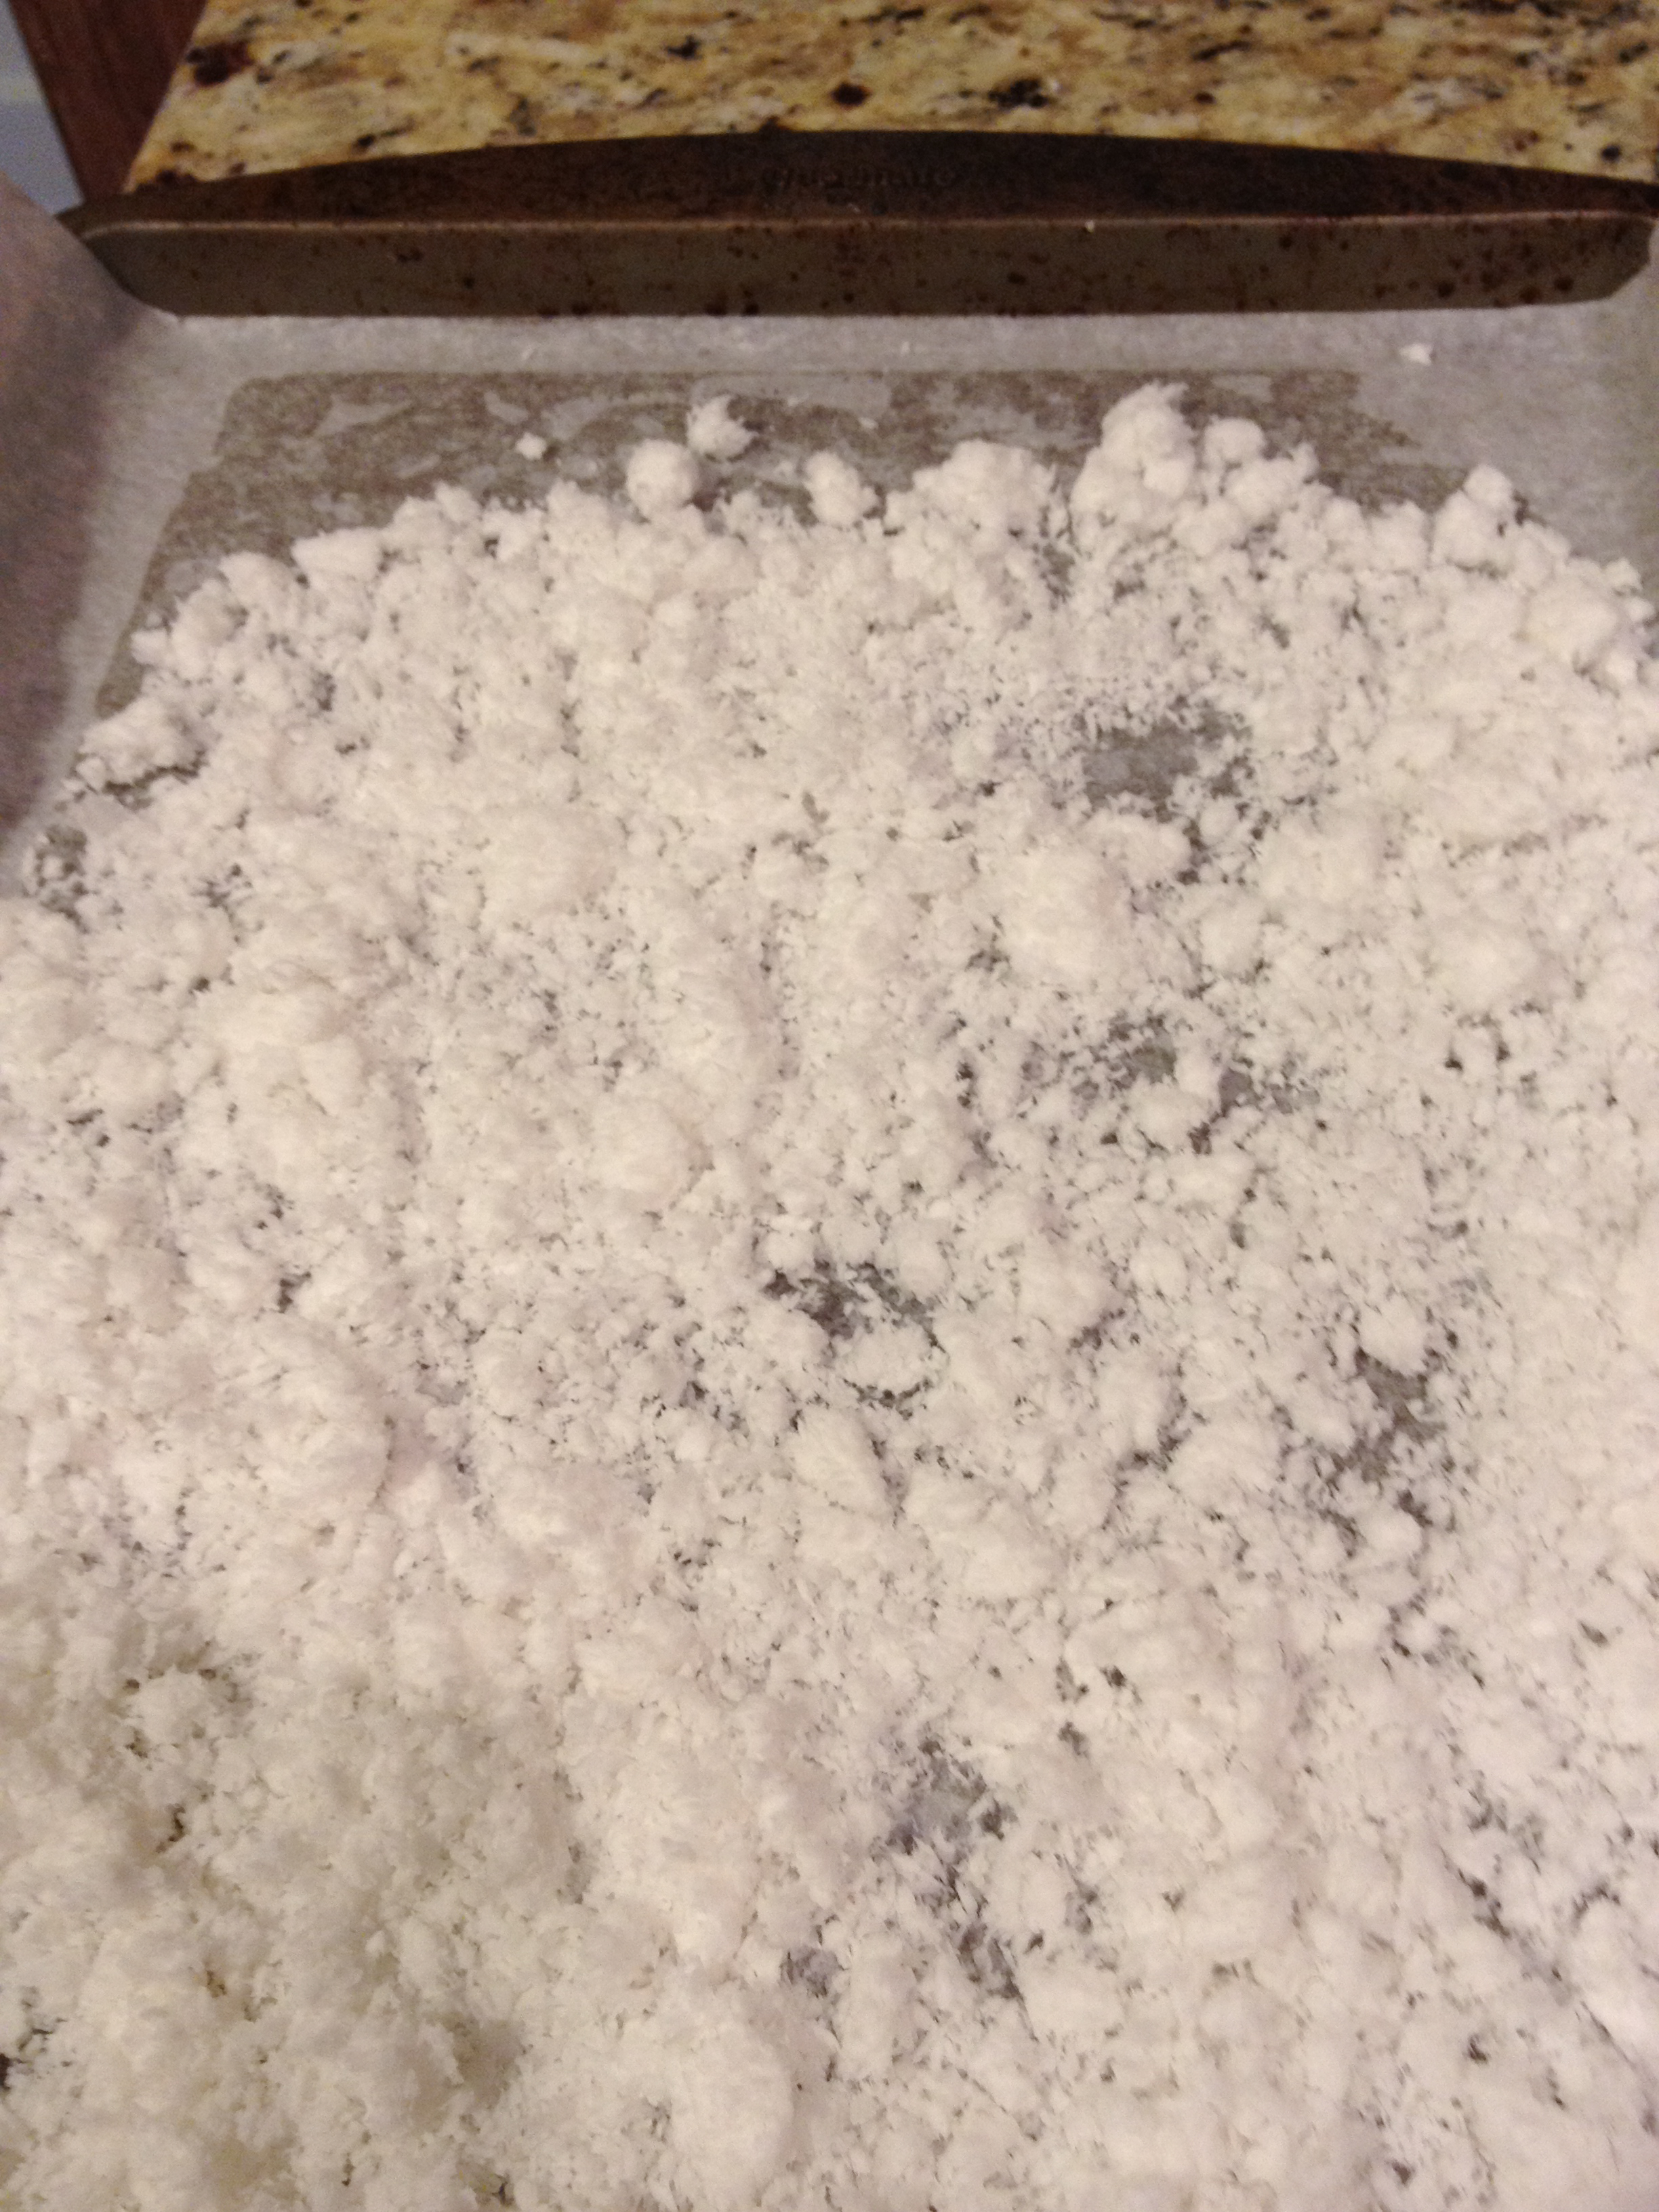
Homemade Coconut Flour
Ingredients:
  • Pulp from 2 batches of coconut milk
Directions:
  1. Preheat oven to 250 F.  Cover a large baking sheet with parchment paper or a Silpat mat.  Spread out the coconut pulp, breaking up any lumps.  Toast the pulp until completely dry and powdery.  You really need to make sure all the moisture is removed.  This can take anywhere from one to two hours.  Stir occasionally to make sure the lumps are broken up and there are no hot-spots, and don’t let it burn!
  2. When the pulp is very dry, let it cool in the oven for another hour or so.  Transfer to a blender or food processor and blend for 5 minutes.  Depending on how powerful your blender is, you can get it pretty fine.  My food processor did a decent job, but the flour was not silky fine in texture.  That’s okay!  Get it as powdery in texture as your tools allow.

Homemade Coconut Flour

Homemade Cheezits
Ingredients:
  • 1/2 cup coconut flour
  • 1 egg
  • 2 tablespoons butter, softened
  • pinch salt
  • 1 1/2 cups shredded cheese (I used cheddar)
Directions:
  1. Preheat the oven to 400F.  In a food processor, blend all the ingredients together.  You will end up with a moist ball of dough.
  2. Line a baking sheet with parchment paper or Silpat liner.  Plop the ball of dough down on the liner, and cover with a piece of parchment paper.  Roll out the dough very thinly, to about 1/8″ thickness.  Try to make it even thickness all the way across – you can see my edges were a little thinner, and they got crispier than in the middle.  That’s fine, but you don’t want a huge variation in thickness.  Remove top sheet of parchment paper and bake for 8-10 minutes until starting to color.
  3. Remove from oven and score with a sharp knife.  You don’t need to go all the way through, because you don’t want to cut your liner or parchment paper.  Bake again for another 8-10 minutes until golden brown and starting to get crispy at the edges.
  4. When it’s cool enough to touch, cut all the way through the crackers, or just use your hands to break them at the perforations.  When cool, store crackers in sealed container.  To crisp, put them on a baking sheet in the toaster oven or regular oven for five minutes.
I think next time I make these, I’ll add a little paprika or garlic powder.  New flavor combinations are exciting!  So - what store-bought snacks do you like to make at home?


Friday, July 5, 2013

Homemade Coconut Milk, and Coconut Chia Pudding


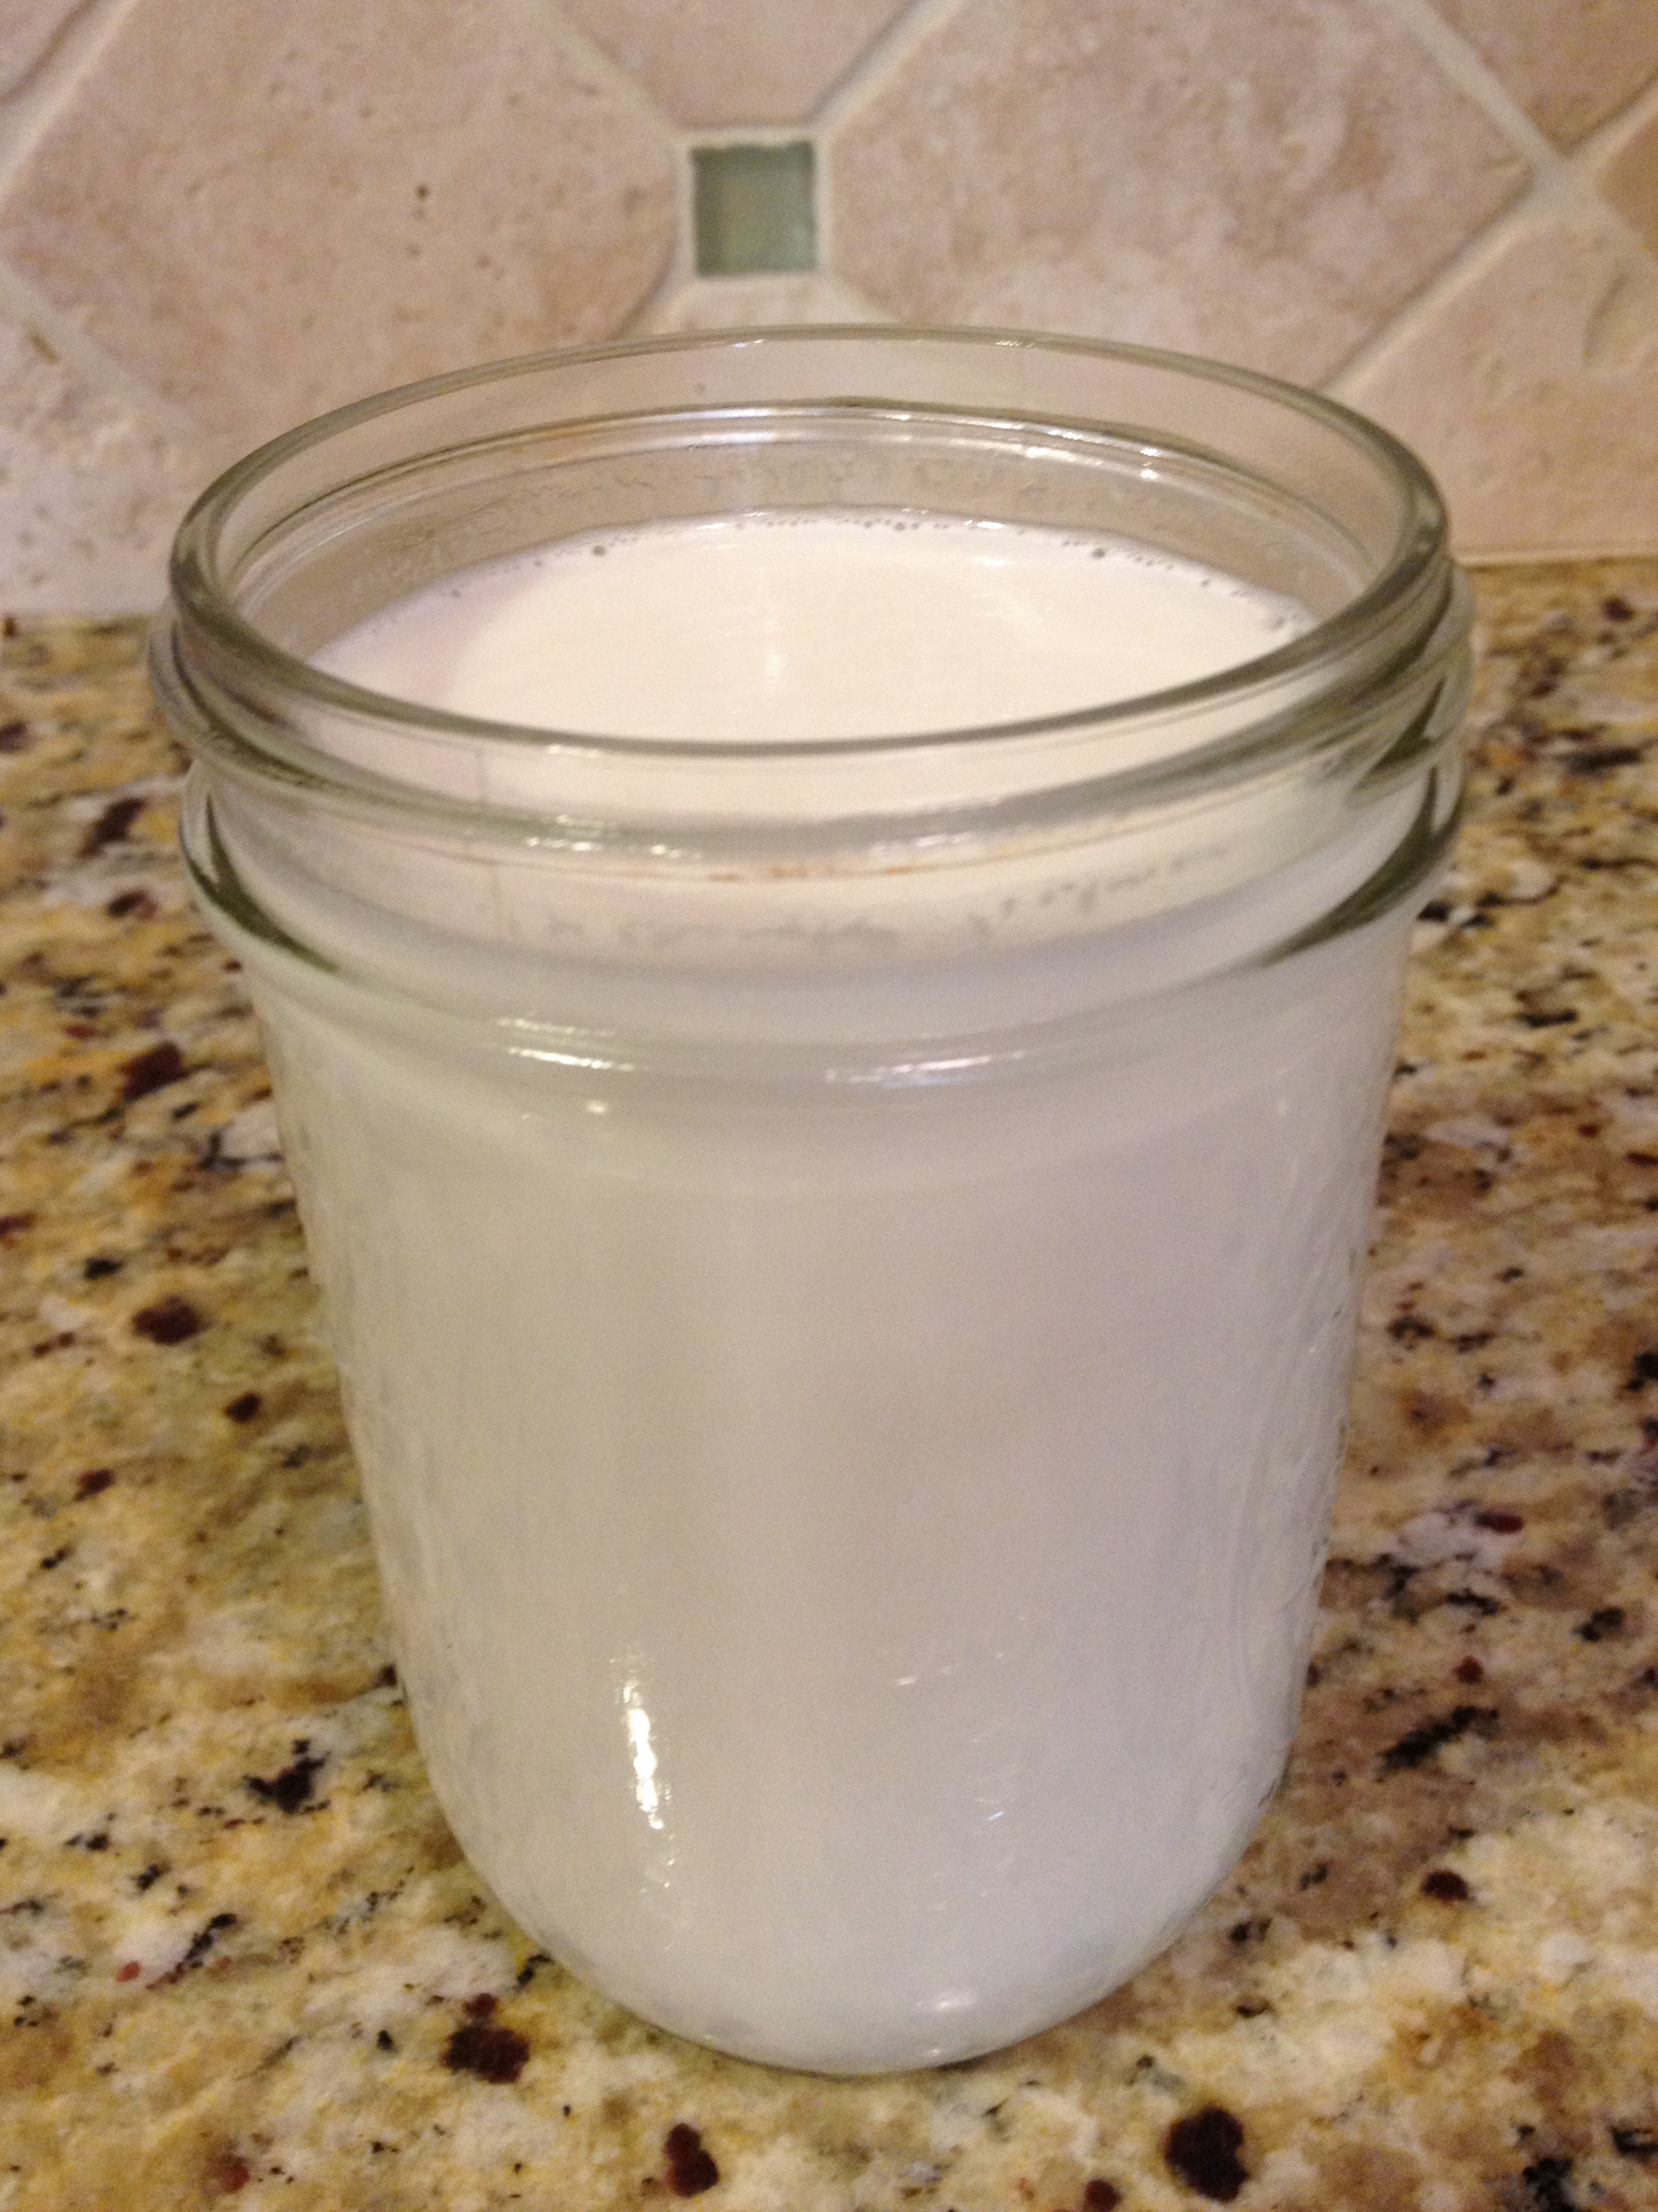
Coconut Milk Jar
I am not afraid of a little hard work.  To avoid preservatives, artificial colors or flavors, or other unnecessary weirdness in my food, I will attempt any hair-brained, hippy-dippy, do-it-yourself recipe.  Some work out, others are failures (or what I like to call "learning experiences") - and thankfully, making your own coconut milk is the former.  Easy peasy!
Coconut milk is a key ingredient in many Indian, Thai, and other Southeast Asian recipes.  It’s also a great staple to have on hand if you are lactose intolerant, or if you are allergic to soy or almond milk.  And while you can find it in a can in many supermarkets, it is quite easy to make at home!  All you need is dried or desiccated coconut flakes, a blender, a colander, and cheesecloth.  Now, this is not the coconut you make into a pie – that stuff is full of sugar and preservatives!  Make sure it is unsweetened, dried coconut.  You can use fresh coconut too, if you can find one. (I can get them at my local Thai market, but you may not have one of those nearby.)  The coconut milk is good for about a week in your refrigerator.  I keep mine in a Ball jar with a lid, but I can’t make it last more than 3 days – it’s that delicious!
What you do with it is up to you.  Pour it over your cereal (or Christi’s Granola), use it in coffee in place of creamer, or make this delicious Coconut Chia Pudding.  Chia seeds can be found online at Amazon, at nearly all health food stores or Whole Foods, and at Trader Joe’s.   Chia seeds are teeny, tiny, little health bombs!  Full of Omega-3 fatty acids, protein, and other necessary things, chia seeds can add crunch to homemade crackers, or top sweet potatoes and salads.  Even better, when mixed with liquid, they create a gel, and make a delicious “pudding” that feels decadent, but is actually quite healthy.  Think tapioca or rice pudding, without all the diet-busting starch!
Coconut Chia Pudding

Next week I’ll have more recipes that use coconut milk, but for now, here are the basics.  Check it out!
Homemade Coconut Milk
Ingredients:
  • 1 cup shredded, dried coconut
  • 1 1/2 cups boiling water
Directions:
  1. Boil water.  (I know, but it has to be said.)  In the pitcher of a blender or a large food processor (I use a food processor and it works fine), pour in one cup of coconut flakes.  Measure out 1 1/2 cups of boiling water and pour over the coconut.  Let sit for about 20 minutes.  Then blend for 2 or 3 minutes if you have a really strong blender, or about 4 minutes in a food processor.  You want to see a foamy slurry.
  2. Line a sieve or colander with a large piece of cheesecloth, folded over on itself.  Place the colander over a large bowl.  Pour the coconut mixture into the cheesecloth and squeeze, squeeze, SQUEEZE!!!  Pour the coconut milk into a jar with a lid and keep refrigerated.
  3. Don’t throw away the coconut pulp!  This can be mixed into smoothies, or spread out on a baking sheet lined with parchment paper and baked at 200*F for about 1 to 2 hours.  When it is completely dry, grind again in the food processor … and you just made coconut flour!  And now for the other recipe…
Coconut Chia Pudding
Ingredients:
  • 1 cup coconut milk
  • 1/4 cup chia seeds
  • 1/2 teaspoon honey (optional, depending on how ripe and sweet your fruit is)
  • 1 cup chopped fruit – I like strawberries, blueberries, or peaches, but find what you like best
Directions:
  1. In a Tupperware container with a lid, pour in one cup of coconut milk and 1/4 cup chia seeds.  Put the lid on and shake to combine.  Put in the refrigerator.  Shake again in one hour.  
  2. The chia pudding should be ready in about 3 hours.  When ready, it should be very thick, like tapioca pudding.  To serve, divide chia pudding between two bowls, drizzle with a tiny bit of honey if desired, and stir in the chopped fruit.  This makes a great dessert, or a nice, light breakfast.

Friday, March 22, 2013

Baba Ghanouj (Eggplant Dip)


So ... the Paleo Challenge starts tomorrow.  D-Day for being photographed in my bikini and then performing a serious, muscle-shaking, face-reddening workout.  But I think I'm getting my Paleo diet dialed in and I will just have to be strong and face this challenge.  I doubt I'll get much sleep tonight, due to nerves, but I will carry on just the same.  Wish me luck!

It is a small comfort knowing I have some good snack options at the ready.  One is this recipe for baba ghanouj.  You've probably had it alongside hummus and pita at Middle Eastern restaurants.  It's surprisingly easy to make at home.  If you are grilling, I highly recommend you roast the eggplants on the grill - this will add another layer of smoky depth.  But I made mine in the oven and it is certainly snack-worthy!  And since, like the Paleo hummus, it's made entirely of healthy olive oil, sesame seed paste, and vegetables, you can nibble without fear of wrecking your weight loss efforts!  Ready?  Find it at GCH, and let me know what you think!

Crackers, pita, and pretzels are all very tasty dippers ... but not Paleo.

Wednesday, March 20, 2013

Paleo Hummus (Plus an Admission, a Competition, and a Challenge)


Anyone who has known me for a long time knows certain things about me:  a)  Public embarrassment is to be avoided like the plague.  I will do nearly anything to spare my ego in front of strangers or people I'm not totally comfortable around.  b)  Hand-in-hand with fearing public shame, I steer clear of competition.  I hate to lose, and I would rather not play most games or sports so I don't have to feel the agony of defeat.  Do I need some therapy?  Perhaps!  But these are personality traits I've always had and I don't see them going away any time soon.

So it is with much trepidation that I even make this announcement -- I have entered a Paleo Challenge through my gym!  The Paleo lifestyle can best be described as eating as our caveman ancestors did, focusing on vegetables, meat, fruits, and nuts, and eliminating dairy, sugar, grains, and legumes.  For thirty days, I am going to be eating a strict Paleo diet, eschewing alcohol and the above verboten food  groups, and exercising like a crazy person.  There are, I am estimating, another 50 people in the competition, so I will be going up against a lot of people of unknown stamina, diet preferences, and cooking skill.  The challenge starts Saturday, with a visit to the dunk tank (to measure my body fat percentage) -- and a photo of me in my bathing suit.  (Insert screams of horror here!)  Then I complete a specific workout (to be determined) for time.  In a month, everyone comes back and repeats the process to see who has lost the most body fat, the most inches from their waist or thighs or whatever problem areas exist, and who has improved the most in their performance of that same workout.  We are also to keep a food log, so points will be docked for cheating on the diet.

I'm terrified of people seeing me in my bathing suit.  This is Hollywood, after all, and although I'm not obese, I do have some jiggles and bulges, and I'm creeping up on 40.  I'm terrified of performing the workout, period, because they're really hard, and I JUST joined the gym last week.  And of course, I'm terrified of losing, of putting myself out there and being found wanting, or a target for ridicule.  But I figure, since I'm new to the gym, perhaps my performance will ramp up quicker than others who are already used to the workouts.  And I have been cooking Paleo meals for a while, thanks to my husband's adoption of the diet a few years ago.

All of this is to say:  for the next month, you'll be getting Paleo recipes from me.  You are welcome to join me at home in the Paleo challenge!  Just weigh yourself at the beginning and again at the end of 30 days.  Who knows, you may drop a few pounds, find a new food you like, or decide you are ready to kick the soda habit once and for all!

Okay, on with the recipes.  This one is for Paleo hummus.  Since beans are off-limits, this one uses cauliflower.  This makes a great appetizer with veggie sticks as dippers, and is really satisfying when you want something snacky.  Curious?  Check it out!

Paleo Hummus

Ingredients:

  • 1 large head of cauliflower
  • 5 tablespoons olive oil, divided
  • 1 teaspoon cumin seeds (or ground cumin)
  • salt and pepper
  • 1/4 cup tahini
  • 2 cloves garlic
  • 1 lemon
  • stuff to dip with - I like carrots, but celery, peppers, or even pork rinds are Paleo!
Directions:
  1. Heat oven to 500*F.  Cut cauliflower into bite-sized chunks.  In a large bowl, mix the cauliflower with 3 tablespoons olive oil, the cumin, salt, and pepper.  Line a baking sheet with foil and spread out the cauliflower.  Bake for 30 minutes, stirring every ten minutes so nothing burns.  Let cool for 30 minutes.
  2. Add cauliflower to the bowl of a food processor.  Add remaining 2 tablespoons of olive oil, tahini, garlic, and the juice of one lemon.  Blend and taste.  If it's too thick you can add a little water or some more oil.  Too thin?  Add more tahini.
  3. To serve, drizzle with oil and sprinkle with paprika, if desired.  Go nuts on this stuff - it's good for you!

Tuesday, February 5, 2013

Spicy Sweet Potato Fries with Chipotle Sauce


I don't really care about football, but I do like the Super Bowl (tm) (please don't sue me, NFL!)  We usually invite friends or family over to the house, just a few people, and enjoy snacks and beer.  My favorite thing to eat during the game is Ruffles potato chips and sour cream and onion dip - you know, the kind that is comprised of a tub of sour cream and a packet of French Onion soup?  LOVE!  I only make it once a year, and it's my special, no-carbs-barred day with salty treats.  Only this year, I abstained.  It was hard, seeing all those shiny, brightly-colored bags in the store, but I made a commitment to treat my body better and lose weight, so I took a stand and passed.

Instead, I made these sweet potato fries.  They were incredibly tasty and easy to make, so I had to share the recipe.  The basic recipe, of course, is just sweet potatoes, oil, and salt.  And feel free to make them like that, they are wonderful!  But I found a jar of garam masala, a relative of curry powder, at my local Target last week, and I thought the two tastes would go well together.  I was right!  Garam masala ingredients vary by neighborhood in India, so there's no one "authentic" composition.  This one has black pepper, cardamom, anise, and other spices.  If you were to add sugar, it would remind you of chai.  If you add it to a savory dish, it is a fragrant, warm spice mixture that hints at sweetness and heat - perfect for sweet potatoes!


Eat these as-is, or make the chipotle dipping sauce recipe below.  I think these would be great with just a bowl of plain yogurt to dip into, too.

Spicy Sweet Potato Fries

Ingredients:
  • 3 small sweet potatoes, peeled
  • 1 tablespoon olive oil
  • 1 tablespoon coconut oil (if you don't have it, use all olive oil)
  • 1 teaspoon garam masala (OR 1/2 teaspoon ground cumin and 1/2 teaspoon pumpkin pie spice or cinnamon)
  • 1/2 teaspoon salt
Directions:
  1. Preheat oven to 400F.  Peel the sweet potatoes and slice into wedges.  Mine were pretty thin - they will crisp up quicker if you cut them thinly lengthwise, and as evenly as possible.  
  2. In a large bowl, mix together all ingredients.  Pour onto a baking sheet lined with aluminum foil and bake.
  3. Flip sweet potatoes every ten minutes until they are crisp.  Mine were unevenly cut, so some were done after 30 minutes and the rest at 40 minutes.  When crisp, remove from pan to a cooling rack or a plate lined with paper towels.  Serve plain or with sauce of choice.
And if your sauce of choice is the Chipotle Sauce...

In a food processor, add 1/4 cup mayonnaise, 1 tablespoon plain yogurt or sour cream, one chipotle pepper in adobo sauce, 1/2 lemon (juiced), and 1/4 cup cilantro stems and leaves.  Blend, taste, add salt, maybe some more adobo sauce from the can, or a little orange juice or more lemon.  Oh, ground cumin would be nice in here too!  Or, if you are lucky and recently made my recipe for Fajitas Salad, skip all this and use the leftover dressing!