Showing posts with label Chocolate. Show all posts

Friday, March 6, 2015

Easy Chicken Mole

Easy Chicken Mole
The first time I had mole (say moe-lay) it was at a small but very well-regarded Mexican restaurant in Los Angeles, La Loteria.  I had heard of mole poblano before and decided to take a chance.  Que rico!  What a glorious taste!  It was rich, a tiny bit spicy, a little bitter, and a little fruity.  It was really a savory fiesta in my mouth.  However, when I went home with the intent to find out more about this magical dish and how to make it, all the recipes I saw were 40 ingredients long and took days to make.  No me gusta – I just didn’t have time to mess with that.  So after some more research, I came up with this recipe – my Easy Chicken Mole!
The two ingredients that most moles share to give them such depth of flavor are dried chiles and chocolate.  Really!  Buy the darkest chocolate you can find.  You can use baker’s unsweetened chocolate, but that will make it bitter, and you’ll probably want to bring it back around with some added honey or brown sugar.  I used bittersweet chocolate, 63% cacao.  I think it worked well, and next time I might even add a little more.
As far as the chiles go, it gets a little confusing.  Oftentimes a chile will have one name when it’s fresh and a different name when it’s dried (I guess kind of like grapes vs. raisins.)  To be honest, I think I bought ancho chiles, but I’m not sure – there were two kinds and neither were labeled!  You want chiles that are a very dark reddish-brown—like the color of dried blood—and about fist-sized.  I used two but I may use three or even four next time.  I removed the seeds, and that’s where the heat resides, so you only get the smoky, fruity flavor of the chiles and not the spiciness.
Try this recipe.  If you’ve never had mole, this is a great place to start.  If you are a mole aficionado, go ahead and tweak my recipe to get the taste you like.  Either way, I bet you’ll say, Que sabor!  (Or if you don’t habla espanol, ‘So tasty!’)
Easy Chicken Mole
Ingredients:
  • 2-4 dried chiles (use ancho, pasilla, or guajillo)
  • 2 onions, chopped
  • 4 tablespoons butter
  • 4 cloves garlic, minced
  • 1/4 cup sesame seeds (or use pepitas, peanuts, or almond butter)
  • 1/4 cup dark chocolate chips
  • 1/4 cup raisins
  • 1/2 teaspoon ground cinnamon
  • 1/2 teaspoon salt
  • 1/2 teaspoon dried oregano
  • 2 cups chicken stock
  • 1/2 cup brewed coffee
  • 2 slices bread
  • 2 pounds boneless, skinless chicken thighs (or use breasts, up to you!)
  • diced avocado, cilantro, sesame seeds to serve
  • rice or tortillas to serve, optional
Directions:
  1. Put the dried chiles in a bowl and cover with boiling water.  Put a plate over the bowl and let the chiles soak for about 15 minutes.  When they have softened, remove the stem and seeds and roughly chop.  Discard the stem, keep some seeds if you want some heat.
  2. While the chiles are soaking, cook the onion in the butter in a very large pot or Dutch oven.  Stir to make sure they don’t burn.
  3. Add the chopped chiles, minced garlic, and sesame seeds.  Stir and cook for 3 minutes.
  4. Add the chocolate, raisins, cinnamon, salt, and oregano.  Stir to combine and cook for another 2 minutes.
  5. Add the chicken stock and coffee.  Crumble in the bread.  Cover the pot with a lid and simmer for 10 minutes.
  6. CAREFULLY transfer sauce to a blender and blend until pretty smooth.  You could use an immersion blender, too.
  7. Return the sauce to the pot and add the chicken thighs.  Tuck them into the sauce and stir.  Make sure the chicken is covered in sauce, then cover with the lid.  Let simmer for about 25 minutes.
  8. The chicken is done when you can shred it with forks.  To serve, ladle the chicken and lots of mole into a bowl.  Garnish with lots of avocado, cilantro and sesame seeds.  You can also eat this in tortillas – just serve with less sauce if you are making tacos.  You can also serve it over rice to soak up the sauce.

Friday, August 15, 2014

Fruity Energy Bars


I’ve got a lot of hoops to jump through when it comes to making snacks for my girls.  I try to eat Paleo myself, and while I do serve my girls grains and legumes, I am always searching for recipes that rely on Paleo ingredients first.  Next, my older daughter is allergic to peanuts and tree nuts.  That eliminates a giant swath of choices in the Paleo category, which excludes grains in favor of nuts.  So for baking, that leaves me either coconut products (which we love and use often), or seeds, like pepitas or sunflower seeds.  I found a recipe that sounded good, reconfigured it for our needs, and now I proudly present:  Fruity Energy Bars!
In the grocery store, you’ll find half an aisle dedicated to energy and granola bars.  I love them and I love that, for the most part, they’re healthy and nutritious.  They are, however, kind of pricy – sometimes two or three dollars a bar!  And it seems like the ones with the fewer ingredients are even more expensive!  (I’m looking at you, Larabar!)  Now, these Fruity Energy Bars couldn’t be quicker – just three minutes in the food processor, and about half an hour to chill and firm up.  I think you could easily exchange the dried cranberries for another dried fruit – apples, apricots, raisins, prunes, or cherries would all work.  If you want to use nuts instead of sunflower seeds, try almonds or walnuts.  They do warm up very quickly and get soft, so keep them in the fridge until ready to eat.  Ready?  Get energized!

Fruity Energy Bars

Ingredients:
  • 1 cup pitted dates
  • 1 cup dried cranberries
  • 1 cup sunflower seeds (I used roasted and salted)
  • 1/4 cup unsweetened flaked coconut
  • 1/4 cup chocolate chips
Directions:
  1. Pour all the ingredients into the bowl of  your food processor.  Pulse to blend, then mix for about 3 minutes.  You can blend it all the way together and it will form a ball, but I took mine out before that so I could still have a little texture to the bars – kind of like the consistency of sticky sand.
  2. Line an 8×8 pan with plastic wrap, or grease with a little coconut oil.  Press the mixture into the pan and press down with the back of a big spoon.  Refrigerate for at least half an hour.  Cut into 1″x4″ bars.  Get energized and go be productive!

Saturday, February 15, 2014

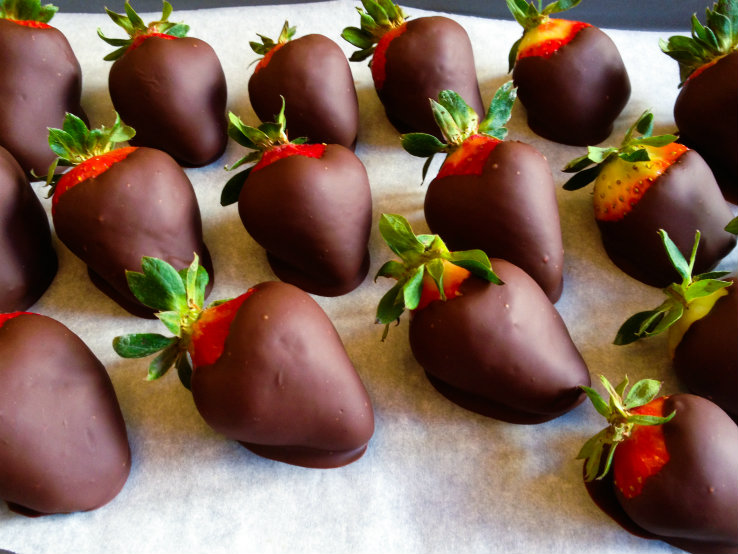
Chocolate-Covered Strawberries


Chocolate-Covered Strawberries Resize
Nothing says Valentine’s Day like Chocolate-Covered Strawberries!  Surprise your sweetie – or sweeties, because my kids went cuckoo for these!  If you can get your hands on some nice strawberries (and I know it’s still very much winter in some places, but go with me on this), you can make these for dessert and watch their eyes light up!
My trick here is to use a teaspoon of coconut oil in the chocolate.  It keeps the chocolate from becoming brittle and adds the lightest hint of tropical flavor.  Instead of shattering when you bite into it, this chocolate holds tight to the strawberry so you can eat every last bite.  No worries if you don’t have coconut oil.  You can go without and just use the chocolate, but you will definitely want to make sure your berries are blemish-free and thoroughly dried.
Ready to make your loved ones’ hearts go pitter-pat?  Bring out these healthy and gorgeous treats tonight!
Chocolate-Covered Strawberries
Ingredients:
  • 18 strawberries
  • 1 cup semisweet chocolate chips
  • 1 teaspoon coconut oil
Directions:
  1. Wash the strawberries and dry very carefully.  Pull up the stem leaves so they point up; otherwise you’ll get them covered in chocolate!  Make sure you don’t have any open, weepy spots on the berries, or the chocolate won’t stick.
  2. In a small but deep bowl, microwave the chocolate chips and coconut oil for 30 seconds at a time, and stir after each 30 seconds.  It took three 30-second bursts to get everything melted and smooth.
  3. Line a baking sheet or tray with parchment paper.  Holding onto the stem of the berry, dip in chocolate and place on the parchment paper.  When all berries are dipped, place the tray in the fridge (or freezer if you are short on time!)  Serve cold.
I had a little leftover chocolate in my bowl.  I dipped cashews and banana pieces in there to get every last drop.  My 2 year-old’s chocolate mustache was a sight to behold!

Saturday, December 21, 2013

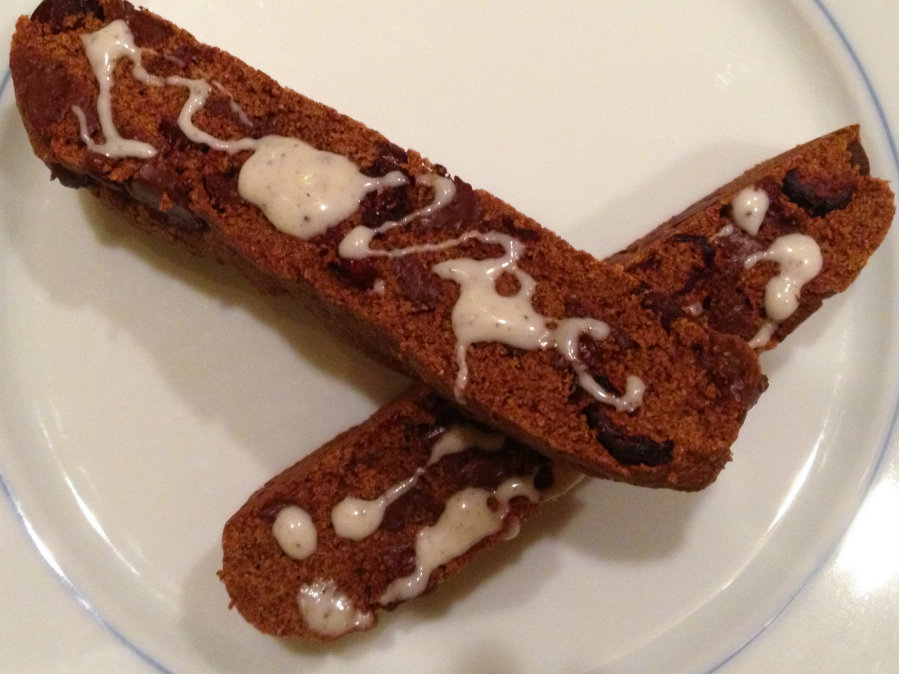
Chocolate Cranberry Quinoa Biscotti


If you’ve ever paid $2 for a biscotti at your local coffee shop and thought, “It can’t be that hard to make these,” you are right!  This recipe for Chocolate Cranberry Quinoa Biscotti takes a few extra steps, but if you are looking for a gluten-free, nut-free treat for your afternoon coffee break, read on!
I was looking for nut-free biscotti recipes online, and I found one using quinoa flour, which I’d never heard of or used.  Time to experiment!  It turns out that quinoa flour is incredibly easy to make, and exceeds wheat flour in fiber, protein, and nutrients.  If you don’t want to make your own at home, I understand – you can find it in health food stores and online, and Bob’s Red Mill makes it (I really like and trust their products.)  I used red quinoa, so the biscotti has a darker color, but feel free to use the regular white kind.  To make quinoa flour at home, pour one cup of quinoa on a baking sheet and bake for 12-15 minutes at 300*F.   When cool, grind in a spice grinder, grain mill, or superpowerful blender.  I have a hand-crank grain mill that made short work of the job!  One cup of dry quinoa will yield one and a quarter to one and a third cups of flour.  If you don’t want to go through the trouble, you can use regular or whole wheat flour instead.
Everything else in this recipe is pretty customizable.  Don’t like chocolate chips?  Leave them out or use white chocolate or even butterscotch chips.  Add in any kind of nut, like almonds, pecans or pistachios.  Replace the dried cranberries with cherries, apricots, or just lemon zest.  Drizzle with white or dark chocolate.  These make great gifts, too, because they are pretty hearty and don’t get stale too quickly.  After rigorous and exhaustive testing, I can report that these stand up well to dunking in coffee.  The things I do for you people! 
If you have a friend who loves coffee, give these as a gift (and keep a few for yourself!)

CCQ Biscotti Close up Resize
Chocolate Cranberry Quinoa Biscotti
Ingredients:
  • 1+ 1/3 cups quinoa flour (you can use whole wheat flour instead)
  • 2 tablespoons coconut flour
  • 1 teaspoon baking powder
  • 1/4 teaspoon salt
  • 2 eggs
  • 1/4 cup melted coconut oil (or use butter)
  • 2 teaspoons vanilla extract
  • 3/4 cup coconut sugar (or use brown sugar)
  • 3/4 cup dried cranberries (or cherries or diced apricots)
  • 3/4 cup chocolate chips
  • White chocolate for drizzling (Confession:  I was out of white chocolate, but I found a cookies and cream white chocolate bar that fit the bill.)
Directions:
  1. Preheat oven to 300*F.  Line a baking sheet with parchment paper.
  2. Combine quinoa flour, coconut flour, baking powder, and salt in a bowl.
  3. In a large bowl, combine the eggs, coconut oil, vanilla, and coconut sugar together.  Mix well, then stir in chocolate chips and cranberries.  Stir in the flour mixture a little at a time until thoroughly combined.
  4. Turn the dough out onto the parchment, and using damp hands, mold into a log that measures about 4 or 5 inches wide, one inch high, and about 15 inches long.  Bake until firm, about 25 minutes.
  5. Remove pan from oven, then pick up the parchment with the biscotti log on it, and let it cool on a rack.  You want this cooled to room temperature, so it won’t crumble too much.  With a serrated knife, slice the log into 1/2 inch biscotti.
  6. Place the biscotti back on the baking sheet and bake for about 15 minutes until dry and crunchy.  Let cool completely, then drizzle with white chocolate.  Store in an airtight container to keep them crisp.

Tuesday, March 5, 2013

Wellseley Fudge Cake with Cream Cheese Buttercream (Solar System Cake)

Solar System Cake!

Every year I try to make my older daughter's birthday cake better than the year before.  I knew that wouldn't be too hard this year, since I was not impressed with the princess castle cake I made last year.  I didn't have a good design plan, and was left winging it when guests arrived.  This year, I knew I wanted to celebrate and encourage my daughter's love of the Solar System, and I wanted her cake to be awesome, since she's turned five, and might actually remember this stuff!

I searched around Pinterest for ideas, and found some good ones, but I still decided to design my own instead of copy someone else's.  When dealing with the planets, it seemed people either made cake pop versions of the planets, or suggested them as mounds of raised frosting on the surface of the cake.  I've never made cake pops, and didn't want to start now - too much pressure! - and besides, I wanted the planets to be different sizes.  So I went to Michael's and found the non-edible version in Styrofoam balls, and had them orbit on lollipop sticks.  This made it easier all around, as I didn't have to worry about dyeing frosting, and just used my kids' tempera paint.  I did go dramatic with the cake frosting color, with violet gel coloring.  I think navy or black would look sharp too, or you could make it really easy on yourself and make a dark chocolate frosting!  I used white chocolate chips for stars, but you can pipe those if you are so inclined.

Jupiter, Mars and Earth

As for the cake, I found a wonderful recipe using Baker's Unsweetened Chocolate.  You know, those big blocks of either bittersweet or unsweetened chocolate in the baking aisle?  Fantastic!  The secret to this cake's rich and incredibly moist texture is using a stand mixer.  I whipped the heck out of this batter, and it was amazing.  I really doubt you'd be able to get the same results with a whisk or fork, so if you don't have a stand mixer, maybe an electric hand mixer would do the trick.

The cream cheese buttercream is my own recipe.  It's simple and holds up well in the fridge and on the counter. It's firm enough to frost with and pipe, but not so stiff you'll drag the crumbs off your cake.  It took the dye really well too.

If you need to celebrate a birthday for your favorite future space explorer, try this one.  It's beautiful inside and out!

White Chocolate Chip stars between the layers too!


Wellseley Fudge Cake with Cream Cheese Buttercream
(Recipe Courtesy Baker's Chocolate)

Ingredients:

  • 4 squares Baker's Unsweetened Chocolate
  • 1 3/4 cups sugar, divided
  • 1/2 cup water (I used cold coffee instead - you should too!)
  • 1 2/3 cups flour
  • 1 teaspoon baking soda
  • 1/4 teaspoon salt
  • 1/2 cup butter, softened
  • 3 eggs
  • 3/4 cup milk
  • 1 teaspoon vanilla
Directions:
  1. Preheat oven to 350*F.  Grease and flour two 9-inch round pans.  (You can use cocoa instead of flour if you have it!)
  2. In a medium bowl, microwave 1/2 cup sugar, coffee (or water) and Baker's Chocolate for 30-second intervals, stirring between each interval, until melted.  (Mine took 2 minutes.)  Set aside and let cool.
  3. In a small bowl, mix flour, baking soda, and salt.  
  4. In the bowl of your stand mixer, cream together remaining sugar and the softened butter until light and fluffy.  Add the eggs, one at a time, mixing well with each addition.  Then alternate adding milk and flour mixture, beating well with each addition.  Finally, beat in the chocolate mixture.  Divide evenly between the two prepared pans.
  5. Bake for 35 minutes, or until a toothpick comes out clean.  Let cool for ten minutes in the pans, then remove cakes from the pans and let cool on a wire rack.  Frost when totally cool.
She loved it!  Blowing out the candles

Cream Cheese Buttercream Frosting

Ingredients:
  • 4 ounces cream cheese
  • 1 stick butter, slightly softened
  • 1 box confectioner's sugar (one pound)
  • 1 teaspoon vanilla
  • 1/4 cup whole milk or whipping cream
Directions:
  1. In a large bowl using an electric hand mixer, or a stand mixer, beat together the cream cheese and butter.  Gradually mix in the powdered sugar, and add the vanilla.  Add in the milk or cream a tablespoon at a time until you achieve your desired consistency (you may not need to add it all.)  Mix in any coloring.  This recipe makes enough to frost a sheet cake, or to fill and frost a 2-layer round cake.