Showing posts with label Italian. Show all posts

Tuesday, January 31, 2017

Sausage & Mushroom Stuffed Shells with Pumpkin Sage Béchamel


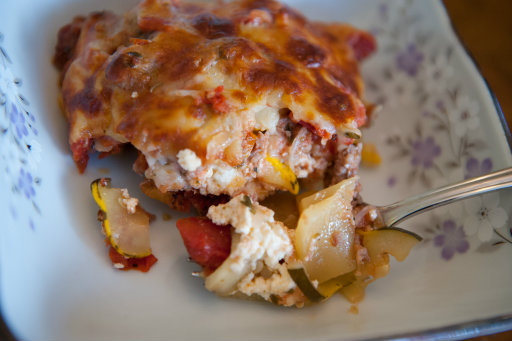
Whoo, that’s a long title!  And I’ll be honest – this does take a bit of time to prepare.  But if you have an extra hour on a Sunday night and want to make a delicious dinner with generous portions that you can eat the whole week through and not stop loving – try these Sausage and Mushroom Stuffed Shells with Pumpkin Sage Béchamel.
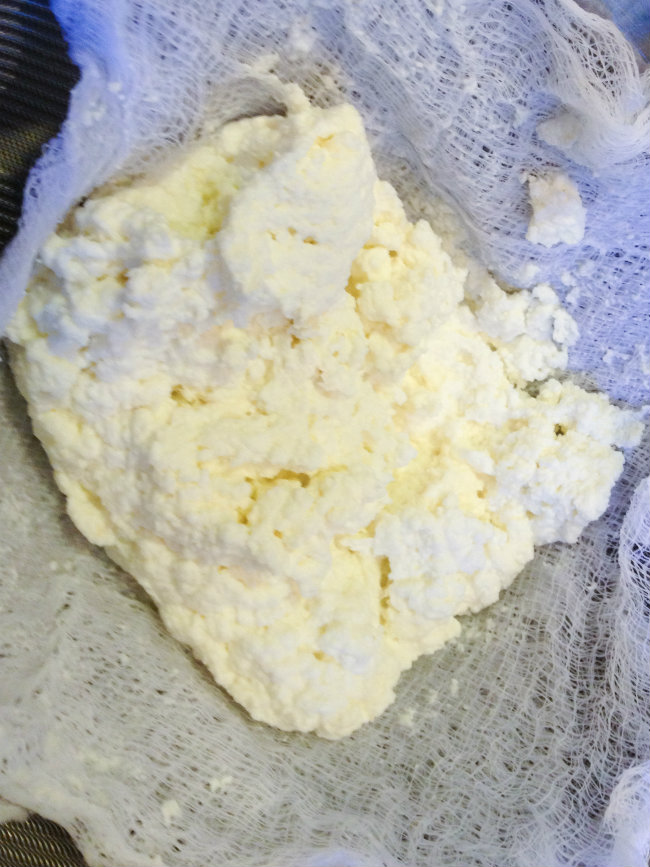
I was going to post my take on this recipe, since I made a few changes for my family, but I didn’t take careful note of my measurements. Food blogger fail!  So I’m just giving you the recipe I found at A Beautiful Bite.  I do want to note that I switched out cottage cheese for ricotta in this recipe, and it worked great.  Just buzz it in the food processor for a few seconds and it’s indistinguishable from the pricier ricotta.  Also, I ran out of sage and I had to garnish with parsley.  In any case, this recipe was a big hit, and it reheats well, so we’ll be seeing this again in our house.
 Sausage and Mushroom Stuffed Shells with Pumpkin Sage Béchamel
(Recipe Courtesy of A Beautiful Bite)
Ingredients:
  • 1 pound pasta shells, cooked al dente
  • 32-ounce ricotta cheese (or use cottage cheese)
  • 2/3 cup Parmesan cheese, grated
  • 1 egg
  • 1 teaspoon salt
  • ground pepper to taste
  • 1 pound Italian sausage (I used sage breakfast sausage)
  • 2 large yellow onion, diced
  • 2 cloves garlic, minced
  • 2 cups fresh mushrooms, sliced
  • 4 fresh sage leaves, thinly sliced
  • 3 tablespoons butter
  • 2 tablespoons flour
  • 3 cups milk
  • 1 cup pumpkin puree
  • 1 cup Greek yogurt
  • 1/2 cup Parmesan cheese, grated
  • 1/3 cup ricotta cheese
  • 6 fresh sage leaves, thinly sliced
  • 1 1/2 teaspoon salt
  • pepper to taste
  • 1/2 cup Parmesan cheese, grated for topping (I skipped this)
Directions:
  1. In a large mixing bowl, combine ricotta cheese, Parmesan, egg, salt and pepper.  Set aside.
  2. Cook shells according to directions on box.  Drain and let cool.
  3. While shells are cooking, brown sausage in a large skillet.  Remove from skillet and place meat on a paper towel to drain.  Reserve 1 tablespoon of the fat to cook the onions in.
  4. Cook onions in fat over medium heat until translucent.  Add garlic and cook for just a minute.  Add mushrooms and sage and cook for another four to five minutes.  Remove from heat and add cooked sausage.   Allow to cool for several minutes.
  5. Stuff shells with ricotta mixture, then top with sausage mixture.  Place shells in a 9×13 baking dish.  Set aside while you prepare béchamel sauce.
  6. In a large heavy pot, melt butter over medium heat.  Add flour and cook, stirring, for several minutes.  Add milk, pumpkin, yogurt, Parmesan, and ricotta.  Cook for a few minutes to thicken.  Add sage, salt and pepper.
  7. Pour béchamel over shells.  Top with extra grated Parmesan.  Bake at 350*F for forty minutes.

Friday, March 14, 2014

Italian Tuna Wraps


I love it when a plan comes together!  I was hungry at lunchtime yesterday, so I opened my pantry.  I stared at the shelf for a good minute…eyes glazing over.  ”There’s got to be something here, some combination of flavors that will fill and delight me” I thought.  And bingo!  Inspiration struck and I made these Italian Tuna Wraps.
Okay, this is pretty much just tuna salad in a lettuce wrap.  But the addition of white beans makes it filling, contributes a creamy texture, and ups the fiber.  A handful of chopped parsley adds freshness.  This recipe serves two for lunch.  Or just do what I did, and put it in the fridge for tomorrow’s lunch.  It will still taste great the next day!
Italian Tuna Wraps
Ingredients:
  • 1 can of tuna
  • 1 can of white beans
  • juice of 2 lemons
  • 1 tablespoon olive oil
  • salt and pepper
  • pinch of garlic powder
  • 1/4 cup roughly chopped parsley
  • Boston lettuce leaves (or other lettuce leaves of choice) for wrapping
Directions:
  1. Drain the can of tuna and put it in a large bowl.  Drain the beans, rinse them in a strainer and then add them to the tuna.
  2. Toss the tuna mixture with the lemon juice and olive oil.  Season with salt, pepper, and garlic powder; toss again.  Add parsley and toss.
  3. To serve, wash and shake dry the lettuce leaves, and place a large spoonful of tuna in the lettuce.  Wrap and eat.  Couldn’t be easier!

Saturday, September 7, 2013

Zucchini Lasagna


Zucchini Lasagna Resize
This recipe came about, as many do, in my house:  I start with an ingredient and brainstorm what in the world I’m going to do with it.  I had a bag of summer squash from the farmer’s market – it was so inexpensive, I couldn’t pass it up.  But aside from making zucchini bread, I couldn’t think of how to use it.  That was when I stumbled upon a recipe for Homemade Ricotta, and it came to me:  Zucchini Lasagna!
The zucchini stands in for traditional noodles in this recipe, so if you are following a low-carb diet, or if you are avoiding gluten, you’re in luck!  If you are making ricotta, drain and squeeze it to keep any extra liquid out of the casserole.  Nobody likes a soggy lasagna!  Feel free to saute and add other veggies or herbs to the lasagna, too – baby spinach, bell peppers, black olives, or fresh basil would all be lovely!
This is a small casserole, so we ate it with a big salad for dinner.  You can easily double or quadruple this recipe to serve more people.  Hope you like it!
Zucchini Lasagna
Ingredients:
  • 1 or 2 zucchinis or other summer squash, about 3/4 pound
  • cooking spray
  • 1/2 pound sausage
  • 1/2 small onion
  • 1 clove garlic
  • 1 can diced tomatoes, drained (I used fire-roasted canned tomatoes)
  • 1/2 teaspoon Italian herbs, or oregano
  • salt and pepper
  • 1 cup Homemade Ricotta, or store-bought
  • 1 cup shredded mozzarella cheese
Directions:
  1. Preheat oven to 400*F.  Line a baking sheet with aluminum foil and spray lightly with cooking spray.  Chop the zucchini into thin coins – about 1/8″-thick.  Lay out on the baking sheet and bake for about 8 minutes.  They don’t need to be cooked through at all – you just want to dry them out a little bit.  Remember, no one likes a soggy lasagna!
  2. While the zucchini is drying out, dice the onion, and mince the clove of garlic.  In a large pan, brown the sausage with the onion and garlic.  Drain any fat that accumulates.  Add in the drained tomatoes, oregano, and salt and pepper, and heat through.
  3. In a casserole dish, spray a little cooking spray so nothing sticks.  Layer half the zucchini slices to cover the bottom of the casserole dish.  Spread half the ricotta over the zucchini, then spread half the sausage mixture over the ricotta.  Repeat with the rest of the zucchini, then ricotta, then sausage.  Cover with the shredded mozzarella.
  4. Cover with a lid or aluminum foil, and bake for 20 minutes.  Remove lid and bake for another ten minutes, until the cheese is golden and melty.

Friday, August 23, 2013

Homemade Ricotta


Homemade Ricotta Resized
When I was in high school, 25 years ago, I thought the funniest movies in the world were Monty Python movies.  Yes, I was one of those nerds who could rattle off quotes from all the movies (in the intervening years, my skills have gotten rusty, but I still have a few).  One of my favorite scenes in the movie “The Life of Brian” was when a group of people are listening to the Sermon on the Mount.  Unfortunately, they are way, way at the back of the crowd and can’t hear well. When Jesus says, “Blessed are the peacemakers,” the crowd in back misinterpret it as “Blessed are the cheese makers.”  So when I came across this recipe for Homemade Ricotta, I immediately started giggling.  I want to be a blessed cheese maker, and you can be too!
You already have the ingredients you need.  Use whole milk, or else the ricotta won’t set up.  One lemon, a little salt, and a tablespoon of white vinegar – what could be easier?  You’ll also need a thermometer.  I have a candy thermometer that clips to the side of the pan, but you could use a meat thermometer, or one of those fancy infrared ones too!  The only equipment you might need to buy is cheesecloth.  I found it at my regular grocery store, and have used it before in making Homemade Coconut Milk.
Ricotta is one of those amazing ingredients that can be used in either sweet or savory recipes.  In the following two weeks, I’ll have recipes that use fresh ricotta in a zucchini “lasagna” (with no noodles!), and in a dessert with fresh summer fruit.  Until then, you can serve fresh ricotta as an appetizer, spread on thin slices of bread, with either cracked pepper and minced herbs, or with a light drizzle of honey and crushed walnuts.  Ready?  Let’s make some cheese!
Homemade Ricotta  
(Makes one cup of ricotta)
Ingredients:
  • 4 cups whole milk
  • 1/2 teaspoon salt
  • 1 tablespoon lemon juice
  • 1 tablespoon white vinegar (you may need more, but I didn’t)
Directions:
  1. In a pot, heat milk and salt over medium-high heat.  Stir occasionally to make sure it’s not burning on the bottom.
  2. Prepare your utensils:  Line a mesh sieve with a double-layer of cheesecloth.  If you want to save the whey, place the sieve over a large bowl.  (I saved my whey – next week I’ll show you how I used it.)
  3. When the temperature of the milk reaches 185*F, turn off the heat and pour in the lemon juice and vinegar.  Stir gently.  You just made what Little Bo Peep was eating – curds and whey!  Let it sit for about ten minutes, and stir again.  If you see any milk in your pot that hasn’t curdled, you can add another teaspoon of vinegar, stir, and let sit another ten minutes.  Mine didn’t need any extra and separated easily.
  4. Pour the curds and whey into the cheesecloth-lined sieve.  The whey, the yellowish liquid, will end up in the bowl.  Let cool and refrigerate for later use.  Let the cheese curds, aka your lovely homemade ricotta, drain in the cheesecloth.  If you want it soft and moist, let it drain for about ten minutes.  This is good for spreading on bread, or in dessert applications.  I let mine drain for much longer – about half an hour – because I was baking it in a “lasagna” and didn’t want extra water in the casserole.
  5. This keeps for about 5 days, refrigerated.  I challenge you to make it last more than a few hours!

Saturday, June 8, 2013

Sweet Potato Pizzas


Everyone has their weaknesses, their diet-busters, their evil temptresses.  One of mine, as you may have guessed, is popcorn.  Unfortunately, since I am striving to lead a Paleo lifestyle, popcorn is a no-go.  (Still searching for a good nut-free Paleo cracker recipe.  If you find one, please pass it on!)  The big temptation for my husband is pizza.  He is a pizza fanatic.  So when he pointed this recipe out to me online, he asked me to make it for him, hoping to scratch the pizza itch in a healthier way.

To be honest, I thought it sounded gross.  The ingredients didn't sound like they'd combine into something I wanted to eat.  Thankfully, I was a good wife and made him what he wanted.  I tried a bite ... and LOVED it!  So happy I trusted him!  These Sweet Potato Pizzas are not the same as a crispy-crusted calorie bomb from your favorite pie shop, but they are a tasty dish nonetheless.  And if you are craving pizza but don't want the gluten-and-grain crust, here is a good place to go to feed your need.  Find my recipe at GCH.

Saturday, February 23, 2013

Spaghetti Carbonara


I love poached eggs.  They are nature's Sauce Bombs!  So I decided to see if I could replace the whipped egg sauce of Spaghetti Carbonara with a more-cooked, healthier helping of poached eggs.  Did I succeed?  In a word, YES!  Check out the recipe I posted at GCH:  Spaghetti Carbonara.