Tuesday, January 29, 2013

Sesame Kale Salad


If you follow me on Facebook, you know by now that I am in love with kale.  I talk about it all the time! I finally got up the nerve to try raw kale again (after my first experience with raw kale salad, which was, shall we say, uninspiring).  And boy am I glad I did!  I bought a package of pre-washed kale with shredded red cabbage and carrots, and made the simple vinaigrette recipe listed on the back.  Fantastic!  But I love to tinker, and I made what I think is a perfect intro to raw kale salad for those who've never had it.

If you can find it, pre-washed and prepared, packaged kale is a great way to go.  Trader Joe's always has it, as does Whole Foods, and probably other health food grocery stores.  If not, buy one large bunch of kale, or two if they are small.  To prepare it, fold each leaf in half and tear the leaf off the tough stem.  (You can eat the stems, but they are very fibrous and will give your jaw a workout!)  Wash well, once or twice, especially if it's curly kale - dirty kale is yucky!  You can use a veggie peeler on the carrots to get thin slivers and a knife to chop the cabbage finely, or just use a food processor, if you have one.  You don't want to shred them like in coleslaw, though - this is a chewy, satisfying salad.


The secret to the dressing is tahini.  Tahini is a paste made of sesame seeds, and is key in making your own hummus.  It's a nice thing to have around, and keeps in the fridge for a long time.  Otherwise, you probably have everything else you need.  Ready for raw kale salad?  This recipe will make you a believer!

Sesame Kale Salad

Ingredients:

  • 1 bag prepared kale, or 2 small bunches kale, washed and torn into small pieces
  • 2 large carrots, or ten baby carrots, peeled and shredded or sliced very thinly
  • 1/2 small head red cabbage, sliced very thinly
  • 1/4 cup sesame seeds
  • 1 heaping tablespoon tahini
  • 1 tablespoon rice vinegar
  • 1 teaspoon lemon juice
  • salt and pepper
  • 1/2 teaspoon sugar, honey, or other sweetener
  • 2 tablespoons sesame oil
  • 2 tablespoons olive oil
Directions:
  1. In a very large bowl, or preferably a very very large Tupperware container with a lid, mix together the kale, carrots, cabbage and sesame seeds.
  2. In a small Tupperware container with a lid, mix together the remaining ingredients.  Shake it up!  Then pour over the salad.  If you are using a container with a lid, shake to combine.  Really move it around!  If you don't have a lid, toss well for a few minutes, or use your hands to massage the dressing into the kale.  The dressing will help soften up the kale.  Let the salad sit at room temperature or in the fridge for half an hour before serving.
This salad is so sturdy, it's good the next day - even TWO days later!  Try putting a dressed lettuce salad in the fridge and eating it a day later.  You won't like it.  This one is better the next day because the dressing penetrates the veggies and makes them chewy and delicious.

Also, try adding in some raisins or a chopped apple.  My husband likes chopped green onion mixed in too.

Tuesday, January 22, 2013

Egg and Olive Salad, and Mayonnaise From-Scratch


This was my favorite lunch when I was a kid: an egg and olive salad sandwich on wheat bread, maybe with a leaf or two of lettuce, and some fruit.  So when my friends and I gathered for an impromptu second-baby shower for a friend, I offered to bring tea sandwiches.  Cucumber, of course, and a chicken salad with chutney, and these egg and olive salad sandwiches.  None of my friends had had this combination before and were surprised that I hadn't invented it.  I don't know if it's an East Coast thing and my California-born friends had never come across it before, but I realized that I have to share this tasty secret!

 This recipe is pretty bare bones, and that's how I like it.  Like any other salad, people like to add different things; please feel free to doctor this as you see fit.   If you are watching your carbs or are cutting out refined and processed foods, skip the bread and serve on lettuce leaves - either in little bundles in butter lettuce leaves, or down the middle of a romaine leaf.


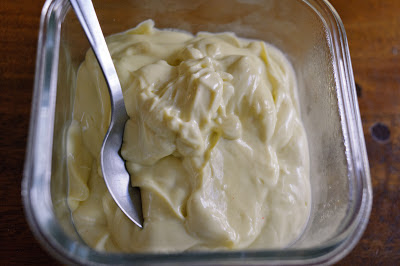
Also included is my recipe for homemade mayonnaise.  You certainly don't have to take this extra step for egg and olive salad (or tuna salad or potato salad or whatever) - but it's tasty and fresh, so why not? This recipe is a great starting place for aioli or creamy salad dressings.  And of course, as with any from-scratch recipe, you know what's in it, so you can avoid allergens, preservatives, stabilizers, et cetera.  If you have a blender, why not give it a try?  (Insert obligatory warning about raw eggs and people who are pregnant or have a compromised immune system.  But you already knew this, right?)

Egg and Olive Salad

Ingredients:

  • 4 hard-boiled eggs
  • 1/4 cup green olives (preferably with pimentos)
  • 2 tablespoons mayonnaise
  • 1 teaspoon yellow mustard
  • salt and pepper (optional)
Directions:
  1. In a mixing bowl, use two knives to roughly chop the eggs.  Don't mash it, but don't leave the chunks of egg too big.  Mix in the mayo and mustard.  Check for consistency - you may want a little more mayo, it's up to you.
  2. Chop the olives and mix into the egg salad.  Taste - you'll probably want to add some pepper, but  it might already be salty enough from the olives.  Serve on bread or lettuce leaves.


Homemade Mayonnaise

Ingredients:
  • 1 egg (as fresh as possible - splurge for farmer's market eggs if you can)
  • 1/2 teaspoon Dijon mustard, or dry mustard powder
  • 1/4 teaspoon salt
  • 1 tablespoon apple cider vinegar or lemon juice
  • 1 cup very light olive oil, or half olive oil and half grape seed oil
Directions:
  1. In a blender, combine egg, mustard, salt and vinegar.  Blend until light yellow and frothy.
  2. Take off the little cap in the top of the blender lid, and through the whole, with the blender running, add a drop of oil at a time.  Seriously, it's going to seem like it this is going to take forever, but if you add too much at one time, the mayonnaise will "break" and won't get creamy; it'll get clumpy and gross.  So go SLOOOW.  After a minute of adding a few drops at a time, you can add the rest in a very very thin stream, stopping every few seconds.  Soon you'll have smooth, thick mayo, ready for whatever you have planned for it.  
This keeps in the fridge for about a week.  I like using it to make Curried Chicken Salad!


Friday, January 18, 2013

Greek Salad


I don't know about you, but I made a New Year's resolution to eat better, and so far, I'm doing a pretty good job of keeping it.  (I'm patting myself on the back right now!)  A big part of that is to eat more veggies and less refined carbohydrates.  This Greek Salad recipe is a wonderful place to start if your resolution is the same as mine.  Lots of fresh vegetables, different textures, and a light, bright vinaigrette keeps things interesting.  Want to give it a try?  I'm blogging today at Girlfriends Coffee Hour.  Follow me there for the recipe!

Wednesday, January 9, 2013

Fish Tacos


Fish tacos are a little bite of Southern California, via Baja, Mexico.  You can't have a few of these yummy tacos and a beer and NOT imagine you are near the Pacific Ocean.  If you don't live here, and don't have a Wahoo's or Green Burrito close by, you can make these at home, in a jiffy.  The key ingredient?  The lowly fish stick.  These are muy sabroso (very tasty!) and super easy.  Check out my recipe at GCH: What's on Your Plate!

Thursday, December 20, 2012

Pork Katsu


From Japanese bento boxes to Hawaiian plate lunches, pork katsu is a crispy and delicious dish.  The ingredients list is short, the preparation is easy, and it's a real people-pleaser!  Check out my post at Girlfriends Coffee Hour this week for the recipe.  Arigato, Aloha, let's eat!

Thursday, December 6, 2012

Spinach Banchan and Cucumber Salad Banchan -- Korean Basics


Last week I posted my recipe for Dubu Buchim at GCH.  Then I had requests:  "Can we have some recipes for things to eat with it?"  Of course!  Banchans for everyone!

This week's post at GCH is for two of my favorite banchans:  spinach banchan, and a cucumber salad.  The spinach banchan is a recipe you'll want to learn and memorize, since it is a component in many other Korean recipes, like Japchae, Kimbap, and Bibimbap.  The cucumber banchan is spicy-sweet and very refreshing when paired with hot rice and kimchee.  Ready for the link?  Here it is!  Girlfriend's Coffee Hour:  What's on Your Plate?  -- Korean Banchans!


Tuesday, December 4, 2012

Pumpkin Tart with Anise Seed Crust


Thanksgiving did not turn out the way I had planned this year.  Thanksgiving day, we got together with my husband's family, and had a lovely time.  It was a large gathering so we did it potluck; I made mashed potatoes, sweet potatoes with marshmallows, and cornbread stuffing.  We had Thanksgiving with my side of the family scheduled for Sunday afternoon.  I was planning on making two desserts - my Dad requested apple and pumpkin pies.  Then I realized:  I only have one pie plate!  That's okay, I thought, I have a tart tin - I can make an apple pie and a pumpkin tart!  I searched the web, found a fantastic-sounding recipe for a pumpkin tart with an anise seed crust, and got to it.  I roasted my pumpkin in the oven, mixed and refrigerated the dough for the crust, and then ...

Disaster struck.  I got the stomach flu.  My husband was a saint and took the kids to my Dad's house while I stayed home in bed.  I completely missed out on Thanksgiving with my family.  Ugh.

When I recovered a few days later, I realized two things:  I still had the ingredients to make the tart, and unless I wanted to freeze them and make it later, I should do it now; and I was really craving pumpkin pie, since I missed it with my family.  (I had a little nibble of the pie at my in-laws' Thanksgiving, but it was pumpkin mousse cheesecake from Coco's.  Tasty, but too little, and not traditional enough.)  So I made the tart, one week after Thanksgiving - and it was worth the wait!

The anise seeds in the crust may not seem like a huge diversion from a regular pumpkin tart, but just that one extra ingredient had a huge impact!  The crust was like an Italian cookie - it made me want to call my friend Mr. Daddario and have him break out the pizelle iron!  The pumpkin filling is simple and creamy, and with the addition of whipped cream (or Cool Whip, if that's how you roll), you have a perfect, off-beat holiday dessert!
Thanks to Jean for the idea of little crust decorations!


Pumpkin Tart with Anise Seed Crust
(Recipe adapted from Gourmet)

Ingredients:
For the crust:

  • 1 1/3 cups flour
  • 2 tablespoons sugar
  • 1/4 teaspoon salt
  • 1 tablespoon anise seeds
  • 1 stick cold butter, cut into 1/2-inch cubes
  • 1 large egg yolk
  • 1 1/2 to 2 tablespoons ice water
For the pumpkin filling:
  • 1 1/2 cups pumpkin (either canned or fresh roasted)
  • 3/4 cup sugar
  • 2 teaspoons pumpkin pie spice
  • 1/4 teaspoon salt
  • 3 large eggs, beaten
  • 1 1/3 cups heavy cream
Directions:
  1. Make the crust:  In the bowl of a food processor, blend together the flour, sugar, salt, and anise seeds.  Add in the butter cubes and pulse until coarse crumbs form.  Mix together the egg yolk and 1 1/2 teaspoons ice water and pulse until dough forms.  Squeeze together a small handful of dough - if it doesn't stick together, add in the last 1/2 teaspoon water.
  2. Turn the dough out onto a piece of plastic wrap.  Gather into a disc and refrigerate for an hour.  (You can do this a day ahead of time and refrigerate the dough overnight.)
  3.  Roll out the dough to about 1/4-inch and press into tart tin (or you could just use a pie plate, I'm sure it'd work fine.)  If you have any left over scraps of dough, don't throw them away!  I cut out little stars with a cookie cutter and baked them separately on a cookie sheet.  They looked super cute on top of the tart, and are tasty too!
  4. Prick crust with a fork and refrigerate for 30 minutes.  Preheat oven to 375 degrees.  Line the crust with foil and fill with dried beans or pie weights and bake for 15 minutes.  Then remove foil and beans and bake for another 15 minutes until golden brown.  Remove from the oven but leave the oven turned on.
  5. In a large bowl, whisk together all the pumpkin filling ingredients, in order.  Pour filling into crust and bake until puffy and almost set, about 45 minutes.  (If you have too much filling, pour it into ramekins or a casserole dish and bake.  Voila, pumpkin pudding!)  Remove from oven and chill at least 2 hours.  Serve with whipped cream and cute crust stars!